Lawn
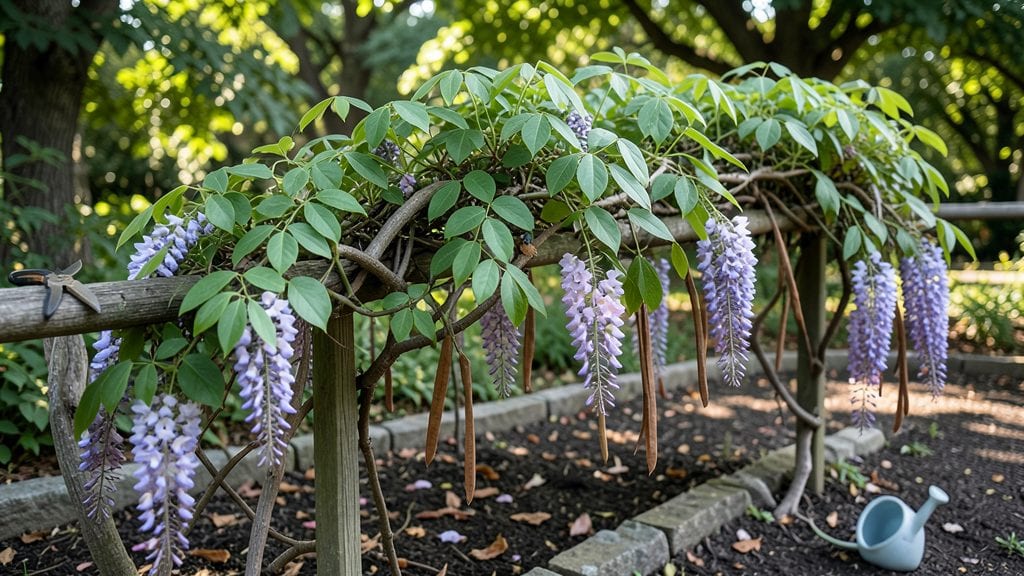
Harvesting vine seed pods at the right moment transforms your garden into a living privacy screen. I’ve turned my backyard into a lush, green curtain using nothing but seeds collected from dried pods—no expensive fencing or plastic screens required.
The key is timing: wait until the pods turn brown and papery, then collect them before they split open and scatter seeds everywhere. Morning glories, wisteria, and passionflowers are my top picks for fast-growing, dramatic results.
Once you’ve gathered your pods, drying them properly is the secret to high germination rates. Spread them in a single layer on a mesh screen or paper towel in a warm, dry spot for about two weeks.
This mimics nature’s way of breaking down tough seed coats, making them ready to sprout when you’re ready. You’ll need just a few supplies—a pair of scissors, a small container, and some potting mix—and you’re set for a foolproof start.
Even if you’ve never grown vines before, these seeds are forgiving and eager to take root.
Planting your seeds in well-draining soil and keeping them consistently moist will give you strong, healthy vines by spring. Within months, you’ll watch them climb trellises or fences, creating a thriving green barrier that outshines anything you can buy.
The best part? Many of these vines return year after year, saving you the hassle of replanting. Whether you’re dealing with nosy neighbors or just want to add beauty to your space, this method delivers neighbor-jealousy levels of greenery.
For those in cooler climates, opt for hardy perennials like clematis or hops, while warmer zones can experiment with tropical vines like bougainvillea. Just remember: patience is key—some vines take a season or two to fully mature, but the wait is worth it.
Once established, they’ll reward you with years of effortless privacy and stunning blooms. Let’s get those pods dried and growing!
📚 In This Guide
- What you need
- Instructions
- Tips and common mistakes
- Wrapping up and next steps
What you need
- ● Fresh vine seed pods: Harvest from mature, healthy vines (e.g., wisteria, grape, or morning glory). Aim for 10–20 pods per plant for a balanced screen.
- ● Pruning shears or sharp scissors: Sterilized to prevent disease spread (1 pair).
- ● Brown paper bags or breathable mesh sacks: 5–10 bags (10–12" wide) for collecting pods without crushing them.
- ● Newspaper or cardboard: To line drying surfaces and protect workspaces.
- ● Drying racks or mesh screens: 2–3 racks (e.g., wooden lattice or wire grids) with 1–2" spacing for airflow.
- ○ Fan or dehumidifier (optional but recommended): To speed up drying in humid climates.
- ● Rubber gloves: 1 pair to protect hands from sap and thorns.
- ● Labeling tags & marker: To track pod types and harvest dates.
- ● Desiccant packets: Place near drying pods to absorb moisture faster.
- ● Sunlight calculator: Track UV exposure (aim for 4–6 hours/day for even drying).
- ● Storage jars or airtight containers: For long-term seed preservation (e.g., quart-sized mason jars).
- ● Camera or sketchbook: Document your vine’s growth stages for future reference!
Instructions for harvesting and drying vine seed pods
Here's how to collect and preserve vine seed pods for reliable, seasonal privacy screens.
Identify and Harvest Mature Seed Pods
Wait until the pods turn a deep brown or tan color and begin to split open slightly—this signals full maturity. I like to harvest on a dry morning when dew has evaporated, as moisture can encourage mold during drying. Use clean, sharp pruning shears to snip the pods directly from the vine, leaving about a 1-inch stem attached. This helps them dry more evenly.
Collect pods in a paper bag rather than plastic to allow airflow. If you're working with a large vine, harvest in sections to avoid overloading the bag. Discard any pods that appear shriveled, moldy, or damaged by pests—these won’t produce viable seeds. A good batch should yield pods that rattle slightly when shaken, indicating seeds inside.
Prepare the Drying Environment
Choose a warm, dry location with good airflow—like a well-ventilated garage or a shaded porch. Avoid direct sunlight, which can cause pods to overheat and crack prematurely. I spread a clean sheet of newspaper or a drying rack on a table to catch any loose seeds or debris. The goal is to maintain a steady temperature between 65-75°F and relative humidity below 50%.
If your space is too humid, place a small fan nearby to circulate air gently. Avoid using heat sources like space heaters, as uneven drying can ruin the pods. You’ll know the environment is right when the pods feel slightly crisp to the touch after a few hours.
Dry the Seed Pods Evenly
Arrange the pods in a single layer on the drying surface, spacing them about 1 inch apart to ensure air circulates around each one. Stir or flip them every 24 hours to prevent mold or uneven drying. Over the next 7-10 days, the pods should darken further and become brittle to the touch. If they start to crack open on their own, they’re ready for storage.
Check daily for signs of moisture—condensation on the pods or a musty smell means the drying area needs better airflow. If you notice any pods developing mold, isolate them immediately and discard them to prevent spoilage of the entire batch. Properly dried pods will feel light and hollow when shaken.
Store Seed Pods for Planting
Once fully dried, place the pods in a paper envelope or breathable fabric bag—plastic traps moisture and can cause mold. Label the bag with the vine type and harvest date. Store in a cool, dark place like a pantry or seed drawer. Viable pods can remain dormant for up to 2 years if kept dry and cool.
Before planting, test a few pods by nicking them with a knife—if they release seeds easily, they’re ready. If they’re still too hard, let them sit in a warm, dry spot for another week. Plant directly in the soil in early spring, pressing them lightly into the top inch of moistened earth. Water gently to settle the soil around them.
Tips & tricks for perfect vine seed pod harvesting and drying
Here's how to ensure your vine seed pods stay viable and ready for planting year after year.
Harvesting Timing: The key to successful harvesting is patience—wait until pods turn deep brown or tan and show slight splitting. I've learned the hard way that harvesting too early means immature seeds that won't germinate properly. A good test is to gently shake a pod over paper; if seeds rattle inside, they're ready. Harvest on dry mornings only, as morning dew can introduce moisture that encourages mold during drying.
Drying Environment: Maintaining the 65-75°F temperature range is crucial for even drying. I've found that a well-ventilated garage with a small fan works perfectly. If your space feels too humid, place a bowl of silica gel packets nearby to absorb excess moisture. The pods should feel slightly crisp after just a few hours in these conditions, which tells me the environment is right. Never use direct sunlight or heat sources—they can cause pods to overheat and crack prematurely.
Daily Maintenance: The 24-hour stirring schedule is non-negotiable for preventing mold and ensuring even drying. I set a reminder on my phone to check the pods daily and flip them over. This simple step has saved me from losing entire batches to uneven drying. Look for condensation on the pods or musty smells as early warning signs that your drying area needs better airflow. Properly dried pods will feel light and hollow when shaken.
Storage Solutions: Paper envelopes or breathable fabric bags are essential for long-term storage. I've had terrible luck with plastic bags—they trap moisture and cause mold within weeks. Label each bag with the vine type and harvest date to keep track of your collection. Store in a cool, dark pantry where temperatures stay consistent. This method has kept my pods viable for up to two years, ready for spring planting whenever I need them.
Pro Tips for Vine Seed Pods
- Here's how to ensure your vine seed pods stay viable and ready for planting year after year.
- Harvesting Timing: The key to successful harvesting is patience—wait until pods turn deep brown or tan and show slight splitting.
- Drying Environment: Maintaining the 65-75°F temperature range is crucial for even drying.
Frequently asked questions
Got questions about vine seed pods? You’re not alone! Here are some common concerns—plus quick, practical answers to help you navigate harvesting, drying, and using them for your privacy screens.
When is the best time to harvest vine seed pods?
The ideal time is late fall to early winter, once the pods turn brown and dry but before they split open on their own. This ensures maximum seed viability. Avoid harvesting after a frost, as cold weather can reduce germination rates.
How long does it take to dry vine seed pods indoors?
Spread pods in a single layer on a mesh screen or paper towels in a warm, dry, and well-ventilated area (like a garage or basement). With consistent airflow, they’ll dry in 7–14 days. Check periodically—pods are ready when they rattle when shaken and open easily with gentle pressure.
Can I use vine seed pods from any vine, or do I need a specific type?
Not all vine seed pods are created equal! For privacy screens, focus on fast-growing native vines like Bignonia (e.g., crossvine) or Wisteria. Avoid toxic varieties (e.g., Nerium oleander)—always confirm the vine type before harvesting. Local nurseries or extension offices can help with ID.
What’s the best way to store dried vine seed pods for next year?
Keep pods in a cool, dark, and dry place (like a sealed glass jar or airtight container) with a silica gel packet to absorb moisture. Label them with the harvest date—viability drops after 1–2 years. Avoid plastic bags, as condensation can cause mold.
My pods are moldy or smelly—what went wrong?
Mold or odors usually mean excess moisture or poor airflow. If this happens, discard the affected pods immediately. To prevent it: never dry pods in humidity (like a damp basement) or stack them too tightly. For stubborn cases, try a food dehydrator on low heat (95°F) for 4–6 hours to kill mold spores.
Pro Tip:
For faster drying, place a small fan near your pods to circulate air—just avoid direct heat, which can crack the pods. And if you’re short on time, a seed drying oven (set to 85°F) can cut drying time to 2–3 days!
Wrapping up and next steps
Vine seed pods offer a natural, low-maintenance way to create lush, year-round privacy screens—without the hassle of fences or expensive landscaping! 🌿 By mastering the harvesting and drying process, you’ll unlock a sustainable solution that thrives with minimal effort.
Whether you’re a gardening novice or a seasoned green thumb, these tips ensure your vine pods grow into a thriving, eco-friendly barrier.
Ready to transform your outdoor space? Start small—plant a few pods this season, monitor their growth, and expand as you gain confidence. Soon, you’ll enjoy the beauty (and privacy!) of a flourishing vine garden that’s uniquely yours. Happy planting! 🌱