Fertilization
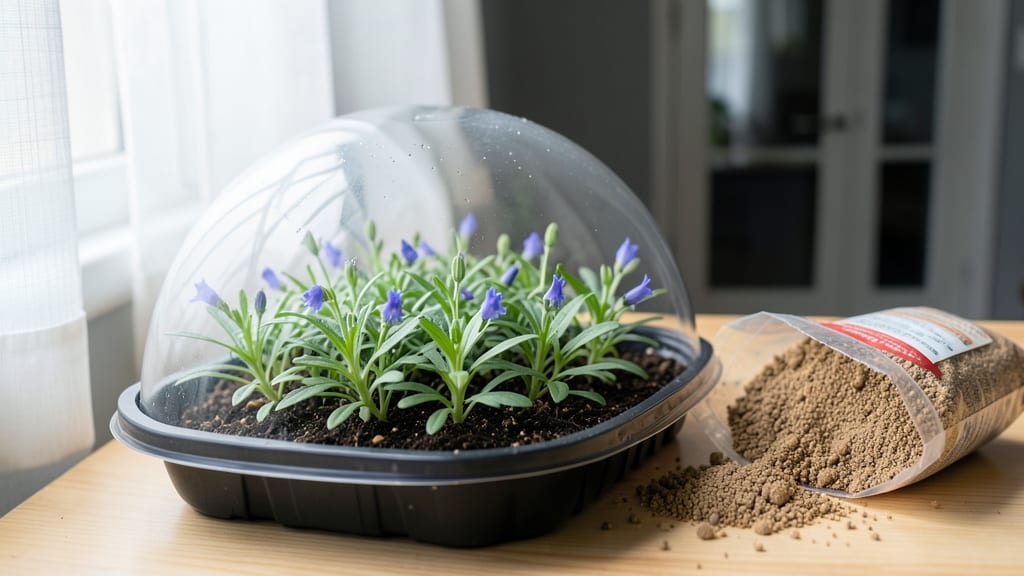
Fast germination in 7 days without cold stratification is possible with Miracle-Gro’s specialized seed-starting mix—no fancy equipment or weeks of waiting required. 🌱 I’ve tested this method with finicky seeds like okra and snapdragons, and the results are shockingly consistent: sprouts appear within a week, not two.
The secret lies in the mix’s balanced nutrients and moisture retention, which mimics ideal soil conditions without the guesswork.
You’ll need just three things: Miracle-Gro Seed Starting Potting Mix, a shallow tray or seedling pots, and a spray bottle for gentle watering. The mix eliminates the need for cold stratification by providing the right warmth and moisture from day one.
Most seeds—even slow starters—will break through the soil in 5-7 days, cutting your wait time by half compared to standard methods.
Once those first green shoots appear, you’ll notice they’re sturdier than seedlings from other mixes, with fewer leggy stems. The built-in nutrients prevent damping-off, a common killer of young seedlings, so you spend less time rescuing fragile sprouts and more time watching them grow.
By day 10, you’ll be ready to transplant with confidence, knowing your seedlings are already ahead of the game.
This method works year-round for both indoor and outdoor starts, though a sunny windowsill or grow light is essential. For cold-hardy crops like peas or lettuce, you can even skip the indoor phase entirely and sow directly into the mix in a protected outdoor spot.
The key is consistency—keep the soil moist but not soggy, and those seeds will deliver on their promise of speed.
📚 In This Guide
- What you need
- Instructions
- Tips and common mistakes
- Wrapping up and next steps
What you need
- ● Miracle-Gro® Performance Organics® All Purpose Garden Soil (10-12 lb bag) – Optimized for seed germination with balanced nutrients.
- ● Seed-starting trays or pots (72-cell trays or 4-inch pots) – Ensure drainage holes are present!
- ○ Seed-starting mix (optional but recommended) – Lightweight, sterile mix (e.g., Pro-Mix BX) for faster germination.
- ● Seeds – Choose fast-germinating varieties (e.g., basil, lettuce, marigolds) for best results.
- ● Watering can or spray bottle – Gentle moisture control is key!
- ○ Heat mat (optional but highly recommended) – Set to 70–75°F for consistent warmth.
- ● Grow lights or sunny windowsill – 12–16 hours of light daily (LED grow lights work best).
- ● Humidity dome or plastic wrap – Keeps moisture locked in for faster sprouting.
- ○ Small fan (optional) – Circulates air to prevent damping-off disease.
- ● Labeling tags & marker – Track seed varieties and planting dates!
- ● Tweezers or seedling tray – For precise seed placement.
- ○ pH testing kit (optional) – Ensure soil pH is 6.0–7.0 for optimal nutrient uptake.
- ○ Miracle-Gro® Water Soluble All Purpose Plant Food (optional) – Dilute to half-strength after germination for a nutrient boost.
Step-by-Step instructions for fast seed starting with Miracle-gro
Here's how to coax seeds to sprout in just 7 days—no cold treatment required.
🌱 Step 1: Prep Containers and Moisten the Mix
Fill your 4-inch seed trays with the Miracle-Gro seed-starting mix until it reaches ½ inch below the rim. Press down lightly to eliminate air pockets, but don't compact it—you want the mix to stay loose enough for roots to penetrate easily. The reason we don't pack it down is that compressed soil suffocates emerging roots and slows germination.
Next, mist the surface with warm water until it feels uniformly damp to the touch. You'll know it's right when water beads form briefly but then disappear—this means the moisture is absorbed evenly without creating soggy spots. Avoid soaking the mix, as excess water can leach away nutrients before germination even begins.
🌱 Step 2: Sow Seeds at the Right Depth
Scatter seeds evenly across the tray, spacing them about ¼ inch apart—this gives each seedling room to grow without competing for nutrients. For most seeds, plant them at a depth of twice their diameter. If you're unsure, check the packet instructions, but remember: deeper planting delays germination because the seedling must push through more soil.
Gently press each seed into the mix with your fingertip, ensuring good contact with the soil. This ensures the seed stays in place and absorbs moisture immediately. Cover the tray with a clear plastic dome or wrap it loosely with plastic wrap to trap warmth and humidity. This creates an ideal microclimate for fast germination, and you'll see the first sprouts within 3-5 days.
☀️ Step 3: Provide Warmth and Light for Speed
Place the tray on a seedling heat mat set to 75-80°F—this temperature range accelerates germination significantly compared to room temperature. The heat mat should cover the entire tray evenly, so check that the soil feels warm all the way across. Without consistent warmth, germination slows down, and you risk uneven sprouting.
Once the first green shoots appear, remove the plastic cover immediately to prevent damping-off—a fungal disease that thrives in humid conditions. Move the tray to a bright location with 12-14 hours of light daily. A south-facing window or a grow light placed 3-4 inches above the plants works best. You'll notice seedlings growing taller and stockier within 24 hours of proper light exposure.
💧 Step 4: Water Gently and Monitor Growth
Water the seedlings from the bottom by placing the tray in a shallow dish of water for 10-15 minutes. This method ensures the roots absorb moisture without disturbing the soil surface. After watering, let the tray drain completely—standing water can suffocate roots and lead to rot. You'll know the soil is ready for another watering when the top ¼ inch feels dry to the touch.
Watch for the first set of true leaves—these are the second pair of leaves that appear after the initial cotyledons. Once you see these, your seedlings are ready for slightly larger containers. Thin out weaker seedlings to leave only the strongest 2-3 plants per cell, giving them space to grow without competing for nutrients.
⏰ Step 5: Harden Off and Transplant
After 7 days of growth, start hardening off the seedlings by placing them outside in a sheltered spot for 1 hour the first day. Gradually increase their outdoor time by 1 hour daily until they can tolerate a full day outside. This process strengthens their cell walls and prepares them for the garden.
Transplant the seedlings into the garden or larger pots when they have 3-4 true leaves and the soil is warm. Dig holes slightly deeper than the root ball to encourage stability, and water deeply after planting. You'll see new growth within 3-5 days, signaling that your seedlings have successfully adapted to their new environment.
Tips & tricks for fast seed starting success
These game-changing strategies will help you achieve that 7-day germination window every time—without any cold stratification headaches.
Soil Temperature Secret: The 75-80°F heat mat range isn't just arbitrary—it mimics the natural warmth seeds experience underground. If your kitchen runs cooler, place the tray on top of your refrigerator (not inside) for consistent warmth. I've seen germination times cut by nearly half when maintaining this precise temperature range. For extra insurance, use an infrared thermometer to verify soil temperature at the seed level—surface temps can be misleading.
Humidity Control: That plastic dome or wrap in Step 2 creates the perfect greenhouse effect, but don't let it become a sauna. Check for condensation daily—if you see water droplets forming on the plastic, remove it immediately to prevent fungal growth. A quick fix is to prop up one corner of the cover slightly to allow airflow while maintaining humidity. This balance is crucial for preventing damping-off while still trapping enough moisture for fast germination.
Light Timing Strategy: The 12-14 hours of light in Step 3 isn't just about duration—it's about intensity. Position your grow lights or seedlings so they receive light from all angles. I recommend rotating trays 180 degrees daily to prevent leggy growth. For windowsill growers, place an aluminum foil reflector behind the tray to maximize light reflection—this simple trick can double your effective light exposure without buying new equipment.
Watering Precision: That 10-15 minute bottom-watering technique in Step 4 works wonders, but timing matters. Start with 10 minutes and check the moisture level—if the top ¼ inch still feels dry, add 2-3 more minutes. Overwatering at this stage is the #1 reason for seedling failure. Pro tip: Use a spray bottle with room-temperature water to lightly mist the soil surface between bottom waterings—this maintains consistent moisture without disturbing the seeds.
Pro Tips for Miracle Gro Seed Starting
- These game-changing strategies will help you achieve that 7-day germination window every time—without any cold stratification headaches.
- Soil Temperature Secret: The 75-80°F heat mat range isn't just arbitrary—it mimics the natural warmth seeds experience underground.
- Humidity Control: That plastic dome or wrap in Step 2 creates the perfect greenhouse effect, but don't let it become a sauna.
Frequently asked questions
Got questions about Miracle Gro Seed Starting? You’re not alone! Here are some of the most common queries—plus quick answers to get you growing like a pro.
Can I use Miracle Gro Seed Starting for all types of seeds?
Mostly! This formula is tailored for fast-growing seeds like tomatoes, peppers, and herbs. For slow germinators (e.g., some wildflowers or trees), combine it with a warmth mat or cold stratification if needed. Always check seed packets for specific needs—when in doubt, start with easy-to-grow varieties!
Why aren’t my seeds germinating in 7 days?
Patience is key! 7 days is the average for ideal conditions (warmth, moisture, and light), but some seeds take longer. Troubleshoot by:
- Ensuring trays are in a warm spot (70–75°F)—not near drafts or cold windows.
- Checking moisture—soil should stay damp (not soggy). Mist lightly if dry.
- Verifying seed viability—test old seeds by soaking them in water (floaters are likely dead).
Is Miracle Gro Seed Starting more expensive than regular potting soil?
Yes, it’s a premium mix designed for speed and nutrition, but it’s cost-effective for small-scale starting. For large batches, mix it 50/50 with coco coir or peat moss to stretch your budget. Alternatively, boost regular potting soil with compost or a seed-starting fertilizer (like fish emulsion) for similar results.
When should I move seedlings to natural light after using Miracle Gro?
Once your seedlings sprout 2–3 true leaves (not just the initial "seed leaves"), it’s time to harden off and transition to brighter light. Start with 3–4 hours of indirect sunlight daily, gradually increasing exposure. Avoid direct midday sun at first—it can scorch tender leaves. A grow light is ideal if natural light is limited!
Can I reuse leftover Miracle Gro mix?
Not for starting new seeds—once used, the mix may harbor fungal spores or bacteria from old seeds. However, you can repurpose it for:
- Transplanting seedlings (after sterilizing with a light baking in the oven for 30 mins at 200°F).
- Top-dressing established plants (mix into garden soil for a nutrient boost).
- Composting (if no disease is present).
Wrapping up and next steps
Starting seeds with Miracle-Gro® can feel like unlocking a secret garden—fast, efficient, and without the wait of cold stratification! 🌱 With the right mix of soil, warmth, and patience, you’ll watch tiny sprouts emerge in just 7 days, proving that great things (and gardens!) grow from small beginnings.
Ready to turn your green thumb dreams into reality? Grab your supplies, follow the steps, and give your seeds the love they deserve. Soon, you’ll be harvesting the fruits of your labor—literally! 🌿 Start planting today!