
Lawn
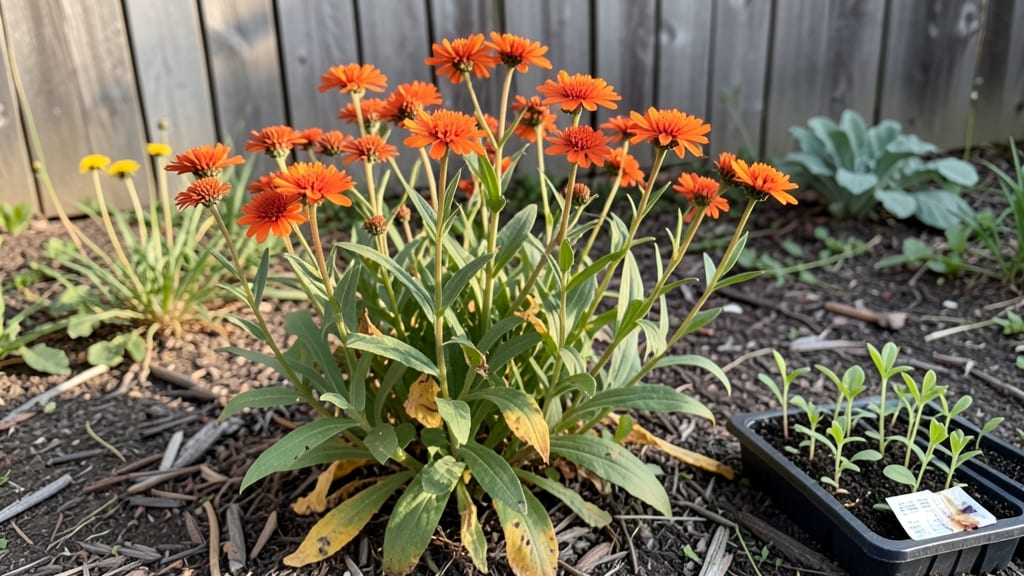
This monarch seed mix won’t just survive winter—it’ll thrive when spring arrives. 🌱 I’ve learned the hard way that skipping cold stratification means waiting months for those first orange wings to appear, if they show up at all.
The secret lies in mimicking nature’s timing, and with the right approach, you’ll have milkweed sprouting reliably by early May every year.
You’ll need just three things: the right seed mix, a plastic bag with a damp paper towel, and your freezer. No fancy equipment—just patience. Planting comes next, but the real magic happens during those cold weeks when the seeds break dormancy naturally.
Once they wake up, they’ll grow faster and stronger than anything you’ve tried before.
By summer, you’ll have lush milkweed stands that monarchs can’t resist. The leaves stay tender for caterpillars, and the flowers feed adult butterflies with nectar. Even better? The plants return year after year, creating a pollinator oasis that keeps growing stronger with each passing season.
This works in gardens big or small, from sunny borders to container setups. The key is consistency—stratify correctly, plant at the right time, and watch your yard transform into a monarch magnet. Let’s get those seeds ready for spring.
📚 In This Guide
- What you need
- Instructions
- Tips and common mistakes
- Wrapping up and next steps
What you need
- ● Monarch-friendly seeds: 1–2 lbs of a pre-mixed monarch seed blend (look for native milkweed varieties like Asclepias tuberosa or Asclepias syriaca, plus nectar plants such as Liatris spicata or Echinacea purpurea).
- ● Cold stratification setup: A ziplock bag (quart or gallon size) or a seed stratification tray with a mesh lid.
- ● Moistened paper towels or peat moss (enough to surround seeds evenly).
- ○ Optional but helpful: A refrigerator (34–40°F) or a seed stratification mat for consistent temps.
- ● Planting containers: Small pots (3–4 inches deep) or a seedling tray with drainage holes.
- ● Potting mix: A well-draining, native-friendly soil blend (avoid heavy clay or peat-heavy mixes).
- ● Watering can or spray bottle (for gentle moisture control).
- ● Labels & markers (to track seed varieties and stratification dates).
- ● A humidity dome or clear plastic wrap to retain moisture during stratification.
- ● Grow lights (if starting indoors before last frost).
- ● Compost or worm castings (to boost soil fertility).
- ● Gloves (to protect hands from prickly milkweed stems later!).
Step-by-Step instructions for cold stratifying monarch seed mix
Here's the foolproof method I use every year to break dormancy and ensure strong monarch blooms.
🌱 Step 1: Mix Seeds with Moist Sand
In a clean bowl, combine the monarch seed mix with an equal amount of dampened coarse sand. The sand should feel like a damp sponge—not dripping, just evenly moist. I like to mix this in a sealed container overnight so the moisture distributes evenly. This mimics nature's way of protecting seeds during winter.
Use your hands to gently work the seeds into the sand until every seed is coated. You'll see them nestled just below the surface—this prevents them from drying out during stratification. If the mix feels too dry after handling, spritz with a tiny bit of water and stir again. The goal is consistent moisture without sogginess.
💧 Step 2: Store in a Cool, Dark Place
Transfer the moist seed-sand mixture to a sealed plastic bag with a zip-top closure. Press out as much air as possible before sealing—this prevents mold growth. I place mine in a refrigerator crisper drawer where temperatures stay between 35-45°F. This mimics the natural cold period seeds experience in the wild.
Label the bag with the seed type and date—after a month, you'll forget which batch you started! The stratification period typically lasts 4-6 weeks, but check weekly for condensation. If you see moisture beads on the bag, open it briefly to air out before resealing. Too much dampness here will rot the seeds before they're ready to sprout.
☀️ Step 3: Prepare Planting Containers
While the seeds stratify, fill 4-inch diameter pots with well-draining potting mix. Press the soil down gently until it's firm but not compacted. I like to make small divots about ¼ inch deep—just enough to nestle the seeds without burying them too deeply. Monarch seeds need light to germinate, so shallow planting is key.
Place the pots in a warm spot (around 65-75°F) where they'll stay until the seeds finish stratification. I keep mine on a seedling heat mat under my kitchen window. This pre-warms the soil so the seeds can germinate quickly once they're ready to break dormancy.
🌿 Step 4: Plant Stratified Seeds
After 4-6 weeks in cold storage, remove the seeds from the refrigerator and let them sit at room temperature for 24 hours to acclimate. Then, sprinkle them over the prepared pots, pressing each seed gently into the soil surface. I cover them with just a light dusting of additional potting mix—no need to bury them deeper than ⅛ inch.
Water gently from the bottom of the pots to avoid displacing the seeds. You'll know it's time to water again when the top inch of soil feels dry to the touch. Place the pots in a bright, indirect light spot (like an east-facing window) and maintain consistent moisture. Germination can take 2-4 weeks, so patience is key—don't give up if nothing appears immediately.
⏰ Step 5: Transition to Outdoor Conditions
Once seedlings show their first true leaves (not the initial seed leaves), they're ready to harden off. Move them outdoors to a sheltered spot for 1-2 hours the first day, gradually increasing their time outside over 7-10 days. I start with morning sun and bring them back inside before afternoon heat builds.
After a full week of outdoor acclimation, transplant the seedlings into their final garden location. Monarchs thrive in full sun, so choose a spot with at least 6-8 hours of direct sunlight daily. Space them 12-18 inches apart to allow for proper air circulation—this prevents fungal diseases that can plague crowded plants.
Tips & tricks for perfect monarch seed stratification
These little-known tricks will help you maximize your monarch seed success rate while avoiding common pitfalls that waste precious time and seeds.
The Moisture Factor: In Step 1, when mixing your monarch seed mix with dampened coarse sand, aim for the consistency of a well-wrung sponge. Too much moisture creates anaerobic conditions that lead to mold, while too little prevents the seeds from breaking dormancy. I like to use a spray bottle to add water gradually—just enough so the sand holds together when squeezed but doesn't drip. This balance is crucial for the entire 4-6 week stratification period.
Storage Strategy: For Step 2, I recommend using a clear plastic bag with a zip-top closure that you can check weekly without opening completely. Place the bag in the refrigerator's crisper drawer where temperatures stay between 35-45°F—this mimics nature's winter conditions perfectly. The clear bag lets you monitor for condensation without disturbing the seeds. If you notice moisture beads, open the bag briefly in a warm spot for 10-15 minutes to evaporate excess moisture before resealing.
Light Requirements: During Step 3, when preparing your planting containers, remember that monarch seeds need light to germinate. While they're in cold storage, they're dormant and don't need light, but once you plant them in Step 4, place the pots in bright, indirect light immediately. I use a south-facing window with sheer curtains to filter the strongest afternoon sun. This light exposure triggers the germination process after their cold treatment.
Acclimation Secret: That 24-hour room temperature acclimation in Step 4 is critical—don't skip it! The sudden temperature change can shock seeds that have been in cold storage. I place my seeds on a warm spot (around 75°F) near a heat vent for this period. This gradual temperature shift helps prevent stress that could delay germination. You'll notice the seeds look slightly plump after this period, indicating they're ready for planting.
Pro Tips for Monarch Seed Mix
- These little-known tricks will help you maximize your monarch seed success rate while avoiding common pitfalls that waste precious time and seeds.
- The Moisture Factor: In Step 1, when mixing your monarch seed mix with dampened coarse sand, aim for the consistency of a well-wrung sponge.
- Storage Strategy: For Step 2, I recommend using a clear plastic bag with a zip-top closure that you can check weekly without opening completely.
Frequently asked questions
Got questions about your monarch seed mix?
You’re not alone! Here’s a quick guide to help you troubleshoot, plan, and maximize your success—so you can welcome those iconic orange wings next season.
When should I start cold stratification for monarch seed mix?
For best results, start cold stratification in late fall (October–November) if planting outdoors. If using a refrigerator, mimic winter by placing seeds in a damp paper towel or peat moss, then store them in a sealed bag at 33–40°F (1–4°C) for 4–6 weeks. This mimics nature’s freeze-thaw cycle, breaking seed dormancy for faster germination in spring.
What if my seeds don’t germinate after stratification?
Don’t panic! Try these fixes:
- Check moisture: Seeds need consistent dampness (not soggy). Mist lightly every 3–5 days.
- Test viability: Soak a few seeds in warm water for 24 hours—if they sink, they’re likely viable.
- Adjust light: Move pots to a bright, indirect spot (e.g., a sunny windowsill). Monarch seeds often need light to germinate.
- Try warmth: If stratification failed, place seeds in a warm (70°F/21°C) spot for 1–2 weeks to encourage sprouting.
Can I use monarch seed mix in containers instead of a garden?
Containers are perfect for monarch seed mixes, especially if you have limited space. Use pots at least 6 inches deep with drainage holes, and fill with a well-draining potting mix. Place containers in a sunny spot (6+ hours of light daily), and water when the top inch of soil feels dry. Just ensure your pots stay stable—monarch caterpillars can get heavy as they munch away!
Do I need to stratify seeds if I’m planting in spring?
Yes! Monarch seeds require stratification to break dormancy, even for spring planting. Start the process 8–10 weeks before your last frost date (e.g., late winter for most regions). If you skip stratification, germination rates will plummet, and your plants may take months to bloom—or not at all. Think of it as giving your seeds a “winter vacation” to wake up refreshed!
What’s the best alternative if I miss the stratification window?
If you’re late to the game, don’t stress! Try these workarounds:
- Scarification: Lightly nick the seed coat with sandpaper or a knife to mimic natural wear-and-tear.
- Heat treatment: Soak seeds in warm water (120°F/49°C) for 24 hours to soften the shell.
- Direct sow outdoors: Plant seeds in fall (if temps are mild) and let winter handle the stratification for you.
Wrapping up and next steps
Ready to give your monarchs a head start? Cold stratifying your monarch seed mix is a simple yet powerful way to ensure vibrant blooms next season. By mimicking nature’s timing, you’re not just planting seeds—you’re nurturing a future full of color and life. 🌱
Now that you’re armed with the know-how, take action this fall. Gather your supplies, follow the steps, and watch your garden transform into a monarch magnet. Happy gardening—your future blooms will thank you!