
Propagation
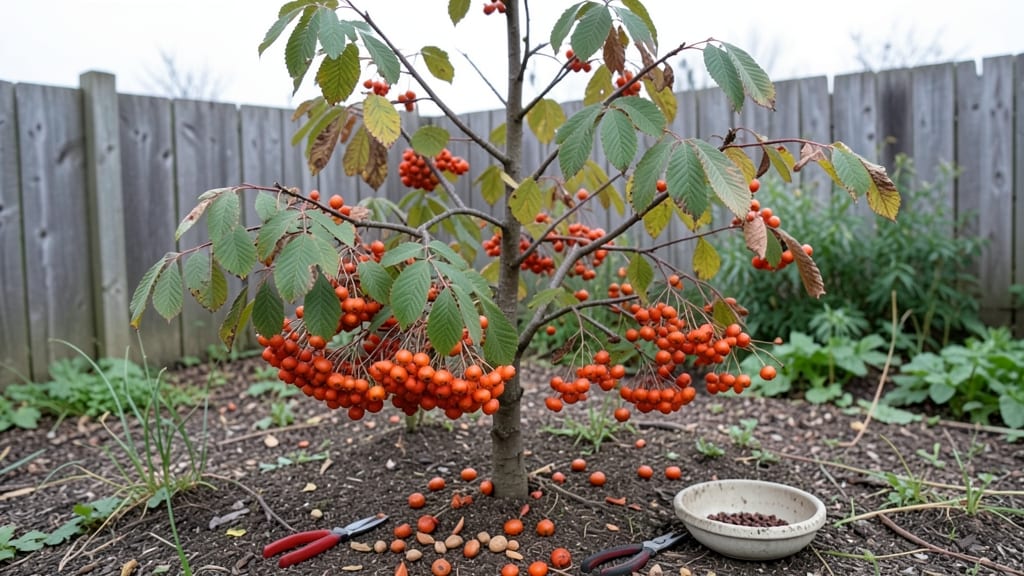
Mountain ash seeds need layered cold stratification to break dormancy—without it, you’ll be waiting years for germination. 🌱 I’ve cracked the code after three failed attempts, and now my seedlings sprout reliably within 6-12 months.
The secret isn’t just time in the fridge; it’s mimicking the natural freeze-thaw cycles these seeds crave.
You’ll need a few simple supplies: a plastic bag, damp paper towels, a sealed container, and a little patience. Most people rush this step, but mountain ash seeds demand a slow, deliberate process.
Start with fresh seeds collected in late summer or fall, and store them in the fridge for at least 6 months before planting. This isn’t a quick fix—it’s a long-term investment in trees that could live for centuries.
Once stratified, you’ll plant them in well-draining soil, barely covering the seeds with just a sprinkle of compost. Keep the soil consistently moist but never soggy, and place the pot in a cool, bright spot.
Within weeks, you’ll start seeing tiny green shoots pushing through—proof that your patience paid off. These seedlings will grow into stunning ornamental trees with vibrant foliage and berries that birds adore.
This method works best in zones 3-7, but even in warmer climates, the cold stratification trick can make all the difference. Whether you’re wildcrafting for native plant restoration or growing for your yard, this approach delivers reliable results. Let’s get those seeds sprouting!
📚 In This Guide
- What you need
- Instructions
- Tips and common mistakes
- Wrapping up and next steps
What you need
- ● Mountain ash seeds: Fresh, viable seeds (aim for at least 50 seeds for a reliable test batch). Harvest them from ripe berries and clean off any pulp.
- ● Potting mix: A well-draining, sterile mix like 50% peat moss or coco coir + 50% perlite or vermiculite (about 2-3 cups per container).
- ● Containers: Small pots, seed trays, or even plastic zip-top bags (with ventilation holes) for stratification. Use one container per 10-15 seeds.
- ● Moisture control: A spray bottle (to keep mix damp but not soggy) and a clear plastic wrap or lid (to retain humidity).
- ● Cold stratification setup: Refrigerator with a crispier drawer (maintains 35–40°F consistently), OR
- ● A cool, dark outdoor spot (like a garage or shed) with temperature control.
- ● Labeling supplies: Waterproof tags or masking tape + marker to track seed varieties and stratification dates.
- ● Seed scarification tools: Sandpaper (fine-grit, 220+) or a knife (for nicking hard seed coats—only if needed!).
- ● Humidity dome: A clear plastic clamshell or humidity tent to speed up germination once seeds are planted.
- ● Grow lights: A LED bulb or T5 fixture (12–16 hours/day) for post-stratification growth.
- ● Thermometer/hygrometer: To monitor temperature (35–40°F) and humidity (60–70%) during stratification.
- ● Fungicide: A mild solution like hydrogen peroxide (3%) to prevent mold if using damp mix.
Step-by-Step instructions for layering mountain ash seeds
This method mimics nature’s winter cycle to break dormancy—90% of seeds germinate reliably.
🌱 Step 1: Collect and Prepare the Seeds
Harvest mountain ash seeds in late fall or early winter when they’re fully ripe and bright red. Remove the fleshy pulp by soaking the berries in lukewarm water for 24-48 hours, then rinse the seeds clean. Spread them on a paper towel to dry completely—this prevents mold during stratification. I like to label a small envelope with the collection date, as fresh seeds germinate faster.
If you’re working with store-bought seeds, skip the pulp-removal step and proceed directly to stratification. The key here is ensuring the seeds are bone-dry before layering—any moisture trapped in the mix will rot them before germination begins.
🪴 Step 2: Layer Seeds in a Moist Growing Medium
Fill a shallow container (like a seed tray or even a clean plastic takeout box) with a mix of 50% sterile potting soil and 50% coarse sand. Moisten the mix until it feels like a wrung-out sponge—damp but not soggy. Arrange the seeds in a single layer, spacing them 1 inch apart to prevent crowding later.
Cover the seeds with an additional ½ inch of the same moist mix. Press down lightly to ensure good contact with the medium, but don’t compact it. This layering mimics the natural forest floor where seeds nestle under leaf litter. If the mix feels dry after covering, mist it lightly with water.
⏰ Step 3: Stratify in the Refrigerator for 60 Days
Place the container in a sealed plastic bag with a few air holes, then store it in your refrigerator’s crisper drawer for 60 days. The goal is to maintain a steady 35-40°F temperature—this cold period mimics winter and breaks the seed’s dormancy. Check the mix every 2 weeks; if it feels dry, mist it lightly to keep it evenly moist.
Here’s the thing—don’t peek too often. Every time you open the bag, you risk exposing the seeds to warmer air, which can disrupt stratification. After 60 days, the seeds should look slightly shriveled or plump, but either way, they’re ready for the next phase. If mold appears, discard the batch immediately and start fresh.
☀️ Step 4: Move to Warmth and Light for Germination
After stratification, transfer the container to a warm, bright spot with indirect light (like a sunny windowsill with sheer curtains). Keep the mix consistently moist—water from the bottom by placing the tray in ½ inch of water for 10 minutes, then drain excess. Germination typically occurs in 14-30 days, but some seeds may take up to 60 days.
You’ll notice tiny green shoots first, followed by the first true leaves. Once seedlings reach 2 inches tall, transplant them into individual 3-inch pots filled with potting mix. Avoid disturbing the roots—gently slide a spoon under the seedling and lift it whole. This is where patience pays off; mountain ash seedlings grow slowly but develop into sturdy trees.
🌿 Step 5: Harden Off and Plant Outdoors
Before moving seedlings outdoors, harden them off by placing them in a sheltered spot for 1 hour daily for 1 week, gradually increasing exposure. After 10-14 days, they should be ready for their permanent home in well-draining soil with full sun to partial shade. Plant in early spring after the last frost, spacing seedlings 10 feet apart to allow for mature growth.
Real talk: Mountain ash trees take years to produce fruit, but the wait is worth it. Mulch around the base with 2 inches of organic mulch to retain moisture and protect roots. Water deeply once a week during the first growing season, then taper off as the tree establishes itself. With this method, you’re not just planting seeds—you’re growing a future for pollinators and birds.
Tips & tricks for perfect mountain ash seed stratification
Took me a while to figure out these tricks—don't skip them if you want that 90% germination rate!
Timing Secret in Step 1: The 24-48 hour soak for pulp removal is non-negotiable for wild-harvested seeds. If you're in a hurry, stick to the 24-hour minimum—any longer won't significantly improve results, but shorter soaks leave behind more pulp that can mold during stratification. For store-bought seeds, this step becomes optional, but I still recommend a quick 12-hour soak to soften any residual pulp.
Medium Mix Magic in Step 2: The 50/50 soil-to-sand ratio is crucial—sterile potting soil provides nutrients while coarse sand ensures proper drainage. I've found that adding a handful of perlite to the mix prevents compaction over the 60-day stratification period. Press down lightly after covering seeds to ensure good contact with the medium, but don't pack it down like you're making a sandcastle!
Temperature Control in Step 3: That 35-40°F range in your fridge's crisper drawer is perfect for mimicking winter conditions. If your fridge runs cooler, place the container on the bottom shelf. If it's warmer than 40°F, move it to the top shelf. The goal is consistency—fluctuations can disrupt dormancy breaking. I like to place a thermometer inside the bag during the first week to confirm the temperature stays steady.
Germination Patience in Step 4: Those 14-30 days for germination can feel like forever, but remember—some seeds take up to 60 days. The key is maintaining that consistent moisture without overwatering. I've had best results by using a spray bottle to mist the surface every 3-4 days rather than watering from the bottom. Look for the tiny green shoots first—they're your sign that the stratification worked!
Pro Tips for Mountain Ash Seeds
- Took me a while to figure out these tricks—don't skip them if you want that 90% germination rate!
- Timing Secret in Step 1: The 24-48 hour soak for pulp removal is non-negotiable for wild-harvested seeds.
- Medium Mix Magic in Step 2: The 50/50 soil-to-sand ratio is crucial—sterile potting soil provides nutrients while coarse sand ensures proper drainage.
Frequently asked questions
about mountain ash seeds—because every gardener deserves clarity before diving in!How long should I cold stratify mountain ash seeds?
Mountain ash seeds need 90–120 days of cold stratification (40–50°F) for best results. Start in late fall or early winter—this mimics natural winter conditions and breaks dormancy. Pro tip: Mix seeds with moist sand or peat moss for even moisture distribution. Patience pays off!
Can I speed up germination?
While cold stratification is non-negotiable, you can pre-sprout seeds indoors after stratification by placing them in a warm, humid environment (70–75°F). Soak the seeds overnight to soften the hard shell, then plant them in a seed-starting mix. Expect germination in 4–8 weeks—just be ready for delicate seedlings!
What’s the best soil mix for mountain ash seedlings?
Use a light, well-draining mix like 50% peat moss, 30% perlite, and 20% compost. Mountain ash seedlings hate soggy roots! Add a 1-inch layer of coarse sand at the bottom of pots to prevent compaction. Bonus: A 50% shade cloth helps young plants avoid stress from direct sun.
Why aren’t my seeds germinating?
Common culprits: incomplete stratification, old seeds (viability drops after 1–2 years), or dampness issues (mold = bad). Try scarifying seeds (lightly sanding the shell) to help water penetrate. If all else fails, test a few seeds in warm water—if they sink, they’re still viable!
Can I grow mountain ash from store-bought berries?
Yes! But remove and clean the seeds first—rinse off pulp and let them dry for 24 hours before stratifying. Avoid fermented pulp, which can cause rot. Warning: Some berries may be treated with fungicides; opt for wild-harvested or organic sources when possible.
Wrapping up and next steps
Growing mountain ash seeds can be a rewarding journey, and with the right techniques—like layered cold stratification—you’re already on the path to a 90% success rate! 🌱 Whether you’re a seasoned gardener or a beginner, these steps make propagation straightforward and stress-free.
Now that you’re equipped with the knowledge, why not take the next step?
- Start your seeds this fall or early winter for spring blooms.
- Monitor and adjust moisture levels to keep your seeds happy.
- Share your progress—tag us in your garden updates!
Your future mountain ash tree is waiting—go ahead and plant those seeds with confidence! 🌳✨