
Propagation
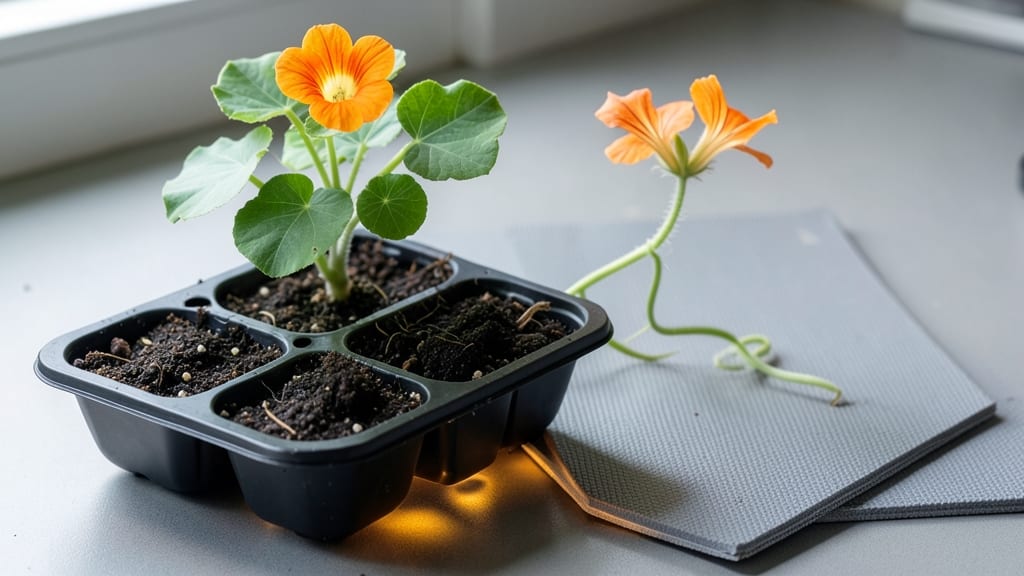
Starting nasturtium seeds with the cold-moist trick guarantees those first bright blooms in just 4-6 weeks—no more waiting months for stubborn sprouts. I learned this method after my first batch of seeds took three weeks to germinate, then flopped when transplanted.
The secret lies in mimicking nasturtiums' natural preference for cool, damp soil right from day one.
You'll need a shallow tray, dampened seed-starting mix, and a plastic bag to create that perfect moist environment. Plant seeds just ¼-inch deep—they need light to germinate, so don't bury them—and keep the soil consistently damp (not soggy) by misting daily.
A sunny windowsill or grow light keeps them happy until those first leaves appear.
Once seedlings have their second set of true leaves, they're ready to move outdoors after the last frost. The cold-moist trick eliminates the leggy, weak seedlings that often fail when transplanted.
You'll end up with sturdy, vibrant plants that bloom faster than store-bought transplants—and they're edible too, adding peppery zing to salads.
This method works equally well for indoor starts or direct sowing in cooler climates. The key is patience with the moisture and light balance—once you nail it, nasturtiums become the easiest annual to grow. Ready to try it?
📚 In This Guide
- What you need
- Instructions
- Tips and common mistakes
- Wrapping up and next steps
What you need
- ● Nasturtium seeds: Choose Tropaeolum majus (annual) or Tropaeolum nanum (dwarf). Buy fresh seeds (viability drops after 2–3 years). Quantity: 5–10 seeds per container (they germinate easily!)
- ● Seed-starting containers: Option 1: 4–6" deep trays with drainage holes (e.g., plastic or biodegradable pots).
- ● Option 2: Paper towels or damp coffee filters (for the cold-moist trick).
- ● Seed-starting mix: Lightweight, sterile potting soil (avoid garden soil—it’s too dense). Quantity: Enough to fill containers ½–¾ full.
- ● Water: Room-temperature, filtered water (chlorine-free). Tip: Use a spray bottle for gentle moisture!
- ● Plastic wrap or clear lid: To retain humidity (e.g., a ziplock bag with holes or a humidity dome).
- ● Fine-mist spray bottle (for even watering).
- ● Small hand trowel or chopsticks (to plant seeds shallowly, ~¼" deep).
- ● Grow lights or sunny windowsill: 6–8 hours of light daily (south-facing window or LED grow lights work best).
- ○ Heat mat (optional): Speeds up germination in cool climates (70–75°F ideal).
- ● Labels & markers: Track seed varieties (nasturtiums come in colors like orange, red, and yellow!).
- ● Temperature: Keep seeds at 60–75°F (15–24°C) for consistent germination.
- ● Humidity: High moisture levels (90%+) until sprouts appear (usually 7–14 days).
- ● Indoor setup: A warm, bright spot (e.g., kitchen windowsill or under grow lights).
Step-by-step instructions for starting nasturtium seeds with the cold-moist method
This trick ensures rapid germination and sturdy seedlings without the usual fuss.
Prepare Containers and Soil for Optimal Moisture Retention
Fill small seed-starting trays or individual pots with the sterile seed-starting mix, leaving about ½ inch of space below the rim. Nasturtiums thrive with excellent drainage, so avoid heavy garden soil. Press the mix lightly to create a firm, even surface—this prevents air pockets that can dry out seeds too quickly.
Moisten the mix thoroughly until it feels like a damp sponge, but not soggy. The cold-moist method relies on consistent moisture, so I recommend using a spray bottle to avoid displacing soil. Tap the tray gently to settle everything, then place it in a cool spot—50-55°F is ideal for the first 24 hours.
Sow Seeds Shallowly and Maintain Consistent Moisture
Scatter the nasturtium seeds directly on the soil surface—do not cover them. These seeds need light to germinate, so pressing them lightly into the mix is enough. I like to space them about ½ inch apart in rows, but since nasturtiums self-thin easily, a loose scattering works too.
Mist the seeds again with water until the surface glistens, then cover the tray with a clear plastic dome or wrap it loosely in plastic wrap. This traps moisture and keeps the environment humid, which is critical for the cold-moist method. Check daily to ensure no condensation drips onto the seeds—excess water can cause rot.
Stratify for Speed and Strength
Place the tray in the refrigerator for 7-10 days, checking every 3-4 days to confirm the soil remains moist. This cold stratification mimics winter conditions, breaking dormancy and encouraging faster, more vigorous germination. You’ll see tiny white roots emerge first—this is your cue that the process is working.
After 7 days, move the tray to a bright, indirect light spot (like a north-facing window) and remove the cover. Keep the soil consistently moist but not waterlogged. Within 3-5 days, you’ll notice the first true leaves unfurling—these are your first true growth signal that germination is complete.
Transition to Warmth and Sun for Rapid Growth
Once seedlings have 2-3 sets of leaves, gradually introduce them to full sun over 5-7 days to prevent shock. Nasturtiums love warmth, so aim for 60-70°F during the day. If growing indoors, supplement with a grow light kept 4-6 inches above the plants for 12-14 hours daily to prevent leggy growth.
Thin seedlings to 3-4 inches apart once they reach 1 inch tall, using scissors to snip weak stems at soil level. The remaining plants will fill out quickly, producing bright, edible blooms in as little as 6-8 weeks from sowing. Pinch back the tips of young plants to encourage bushier growth—this trick works wonders for compact, flower-heavy plants.
Harden Off and Transplant for Outdoor Success
Two weeks before your last frost date, begin hardening off seedlings by placing them outside in partial shade for 1-2 hours the first day. Increase exposure by 1 hour daily, moving them to direct sun by day 10. Nasturtiums are cold-hardy but prefer warmer soil, so wait until nighttime temperatures stay above 50°F before transplanting.
Plant seedlings 6-12 inches apart, depending on the variety, in well-draining soil. They thrive in full sun to partial shade and tolerate poor soil conditions, making them a low-maintenance addition to any garden. Water deeply after transplanting to settle the roots, and watch as they burst into color—fast, reliable blooms in just weeks.
Tips & tricks for perfect nasturtium seed starting with the cold-moist method
Mastering this technique means faster germination and stronger plants—here's what I've learned to ensure your nasturtiums thrive from the start.
The Moisture Factor: During the initial 24 hours at 50-55°F, maintain that "damp sponge" consistency in your sterile seed-starting mix. Too dry and seeds won't activate; too wet and you risk rot. I use a spray bottle to mist lightly every 6 hours, checking by pressing my finger into the soil—it should hold together but not leave moisture on my hand. This precise moisture balance is why the cold-moist method outperforms traditional sowing.
Stratification Insight: Those 7-10 days in the refrigerator aren't just about time—they're about breaking dormancy. I've found that checking every 3-4 days for moisture is critical because refrigerator humidity can drop unexpectedly. If the soil feels dry at the surface but moist below, just mist again. The moment you see those tiny white roots, you know the stratification is working perfectly.
Light Transition Strategy: When moving from refrigerator to bright indirect light after 7 days, don't rush the process. The 3-5 days for true leaves to unfurl is your window to observe—if leaves appear pale, you're not getting enough light. I position my trays on a north-facing windowsill where they receive gentle morning sun. This gradual light exposure prevents the leggy growth that plagues many seed-starting attempts.
Harden Off Like a Pro: The 1-2 hour incremental increases during hardening off create resilient plants. I start with just 1 hour on day one in partial shade, then add 30 minutes each subsequent day. By day 10 when they're in full sun, they've already adapted to temperature swings. This method ensures your nasturtiums will handle outdoor conditions without shock when transplanting.
Pro Tips for Nasturtium Seed Starting
- Mastering this technique means faster germination and stronger plants—here's what I've learned to ensure your nasturtiums thrive from the start.
- The Moisture Factor: During the initial 24 hours at 50-55°F, maintain that "damp sponge" consistency in your sterile seed-starting mix.
- Stratification Insight: Those 7-10 days in the refrigerator aren't just about time—they're about breaking dormancy.
Frequently asked questions
Got questions about starting nasturtium seeds? You’re not alone!
Here are answers to the most common concerns—from timing to troubleshooting—to help you grow lush, vibrant nasturtiums with ease.
When is the best time to start nasturtium seeds indoors?
Start nasturtium seeds 8–10 weeks before your last frost date for transplanting. They germinate quickly (5–10 days) in warm soil, so no need for early starts. For cooler climates, begin indoors in late winter, while warmer zones can direct-sow in early spring. Pro tip: Use the cold-moist trick to speed up germination if your space is chilly!
Why do my nasturtium seeds need a cold-moist trick?
The "cold-moist" method mimics winter conditions, breaking seed dormancy and ensuring faster, more reliable germination. Simply soak seeds in water for 24 hours, then place them in a sealed bag with damp paper towels in the fridge for 3–5 days. This trick works especially well for Tropaeolum majus varieties, which can be finicky. No fridge? A cool, dark basement works too!
Can I start nasturtium seeds without soil?
Nasturtiums thrive in soilless mixes like coconut coir or peat pellets, which reduce disease risk. For the cold-moist trick, place seeds on a damp paper towel or in a jar with water—just ensure they stay moist (not soggy) until sprouting. Once germinated, transplant into well-draining seedling trays with a light potting mix. Bonus: This method cuts down on transplant shock!
What if my nasturtium seedlings look leggy or weak?
Leggy seedlings usually mean too little light or overcrowding. Move trays to a sunny windowsill or under grow lights (12–14 hours/day) immediately. Thin seedlings to 1 inch apart to prevent competition. If stems are soft, reduce watering—nasturtiums hate soggy roots! Quick fix: Bury stems deeper when transplanting to encourage stronger growth.
Are nasturtiums edible? Can I save seeds from store-bought plants?
Yes! All parts of nasturtiums are edible—leaves taste peppery, flowers add color to salads, and seeds are spicy like mustard. However, save seeds only from open-pollinated varieties (like ‘Alaska’ or ‘Jewel Mix’). Store-bought hybrids may not produce true-to-type seeds. Fun fact: Nasturtiums repel pests like aphids, making them a dual-purpose powerhouse!
Wrapping up and next steps
Starting nasturtium seeds with the cold-moist trick is your ticket to vibrant, edible blooms without the fuss! 🌱 With minimal supplies and patience, you’ll unlock a bountiful harvest of flowers and leaves—perfect for gardens, salads, or pollinator-friendly spaces.
Whether you’re a seasoned gardener or a curious beginner, this method makes success deliciously achievable.
Ready to turn those tiny seeds into lush plants? Grab your supplies, follow the steps, and plant your first batch today! Your future nasturtiums (and hungry bees!) will thank you.