
Companion Plants
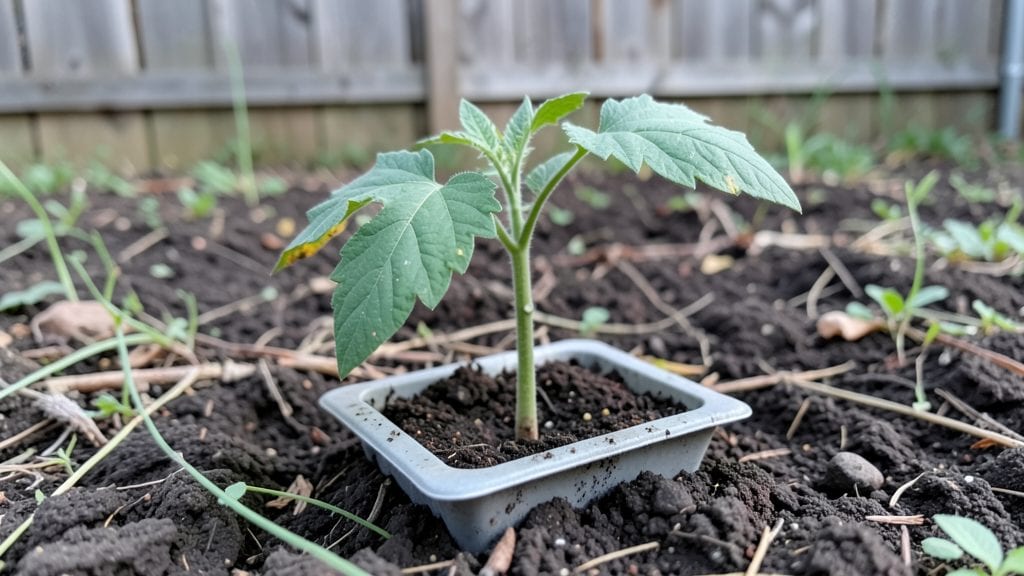
Turning seeds into plants is where every garden begins—and where most beginners hit their first snag. I’ve watched trays of seedlings fail before they even crack the soil, but the right approach makes it foolproof.
The secret isn’t luck; it’s matching each seed’s needs to light, warmth, and moisture like a puzzle.
Start with the basics: the right soil mix, containers with drainage, and seeds planted at the depth marked on their packets (or twice as wide as the seed itself). Most people overwater or bury seeds too deep, and that’s when mold or weak sprouts show up.
A spray bottle keeps moisture even without drowning roots, and a clear plastic dome or zip-top bag creates the humidity young plants crave.
Within days, you’ll see the first green hooks breaking through—those tiny leaves mean you’re on track. Thin seedlings to the strongest one per pot, and move them to brighter light as they grow.
The payoff? Stocky, vibrant plants ready to transplant, not leggy, stretched-out failures. This method works for tomatoes, marigolds, or basil—just adjust the timing and conditions.
Common mistakes like damping-off or slow germination have simple fixes: better airflow, warmer soil, or patience with stubborn seeds. By the time you’re pinching back those first true leaves, you’ll have a system that actually works. Here’s how to get it right the first time.
📚 In This Guide
- What you need
- Instructions
- Tips and common mistakes
- Wrapping up and next steps
What you need
- ● Seeds: Choose high-quality, fresh seeds (check the packet for germination rates—aim for 80%+). Start with 5–10 seeds per variety for testing.
- ● Growing Containers: Seed trays or pots (3–4 inches deep) with drainage holes—4–6 containers for a small batch.
- ○ Optional: Biodegradable peat pots (eliminates transplant shock!).
- ● Growing Medium: Seed-starting mix (lightweight, sterile, and free of garden soil)—1–2 bags (8–12 qt) depending on container size.
- ○ Optional: Perlite or vermiculite (10–20% mix) for aeration.
- ● Water: Room-temperature, dechlorinated water (let tap water sit out for 24 hours or use filtered water).
- ● Spray Bottle: 8–16 oz with a fine mist nozzle (for gentle watering).
- ● Plant Labels: Small tags or a permanent marker to label seeds by type/date.
- ○ Heat Mat (Optional): For seeds needing warmth (e.g., peppers, tomatoes)—70–80°F range.
- ● Grow Lights or Sunny Windowsill: 12–16 hours of light daily (LED grow lights are ideal for indoor setups).
- ● Humidity Dome or Plastic Wrap: Keeps moisture in during germination (remove once sprouts appear).
- ● Research your seeds’ germination requirements (light/dark, temperature, moisture).
- ● Sanitize tools/containers with a 10% bleach solution (1 part bleach to 9 parts water) to prevent mold.
- ● Dedicate a warm, bright space (60–75°F) for your seedlings.
Step-by-step guide to turning seeds into healthy plants
Here’s my foolproof method for coaxing seeds into vigorous plants—tested across dozens of varieties.
Prepare Your Growing Environment
Start by filling small containers with 2-3 inches of moistened seed-starting mix—never garden soil, which can harbor diseases. I like to use biodegradable pots because they eliminate transplant shock later. Press the mix down gently so it’s firm but not compacted. The goal is to create a fine, even surface where seeds can make contact without sinking too deep.
Place your containers in a warm spot—70-75°F is ideal for most seeds. A seedling heat mat works wonders if your home runs cooler, especially in spring or fall. Keep the mix damp but not soggy; you’ll know it’s right when a handful clumps together but doesn’t drip water. Cover the containers loosely with plastic wrap or a humidity dome to trap warmth and moisture.
Sow Seeds at the Right Depth and Spacing
Check your seed packet for depth guidelines, but a good rule is to plant seeds twice as deep as their diameter. For tiny seeds like lettuce, press them just below the surface. Larger seeds, like beans, can go ½ inch deep. I use a toothpick to make small holes—it’s precise and avoids crushing seeds.
Space seeds ¼ inch apart if you’re sowing multiple in one container. Crowding leads to weak, leggy seedlings that compete for light. After planting, mist the surface with water until the soil looks evenly moist. Label each container with the seed type and date—trust me, you’ll forget by week three!
Monitor Germination and Provide Light
Most seeds sprout within 5-14 days, depending on the variety. Keep the soil consistently moist—never let it dry out completely, but avoid soggy conditions, which rot seeds. Once you see the first green shoots, remove the plastic cover immediately to prevent fungal growth. This is the moment that matters: too much humidity now invites damping-off, a deadly mold.
Move your seedlings to a bright, indirect light source right away. A south-facing window works, but if your plants stretch toward the light (a sign of legginess), supplement with a grow light kept 2-3 inches above the seedlings. Rotate containers daily so they grow straight, not lopsided. You’ll notice strong seedlings have thick stems and dark green leaves—these are your winners.
Thin and Harden Off for Transplant Success
When seedlings have 2-3 true leaves (not just the initial cotyledons), thin them to one plant per container. Use scissors to snip weak stems at soil level—pulling risks disturbing roots. This might seem harsh, but it prevents overcrowding and ensures your strongest plants thrive. Water gently after thinning to settle the soil.
Two weeks before your last frost date, start hardening off your seedlings. Place them outside in a sheltered spot for 1-2 hours the first day, gradually increasing time over 7-10 days. Watch for wilting or yellowing leaves—this means they’re not ready yet. Once they tolerate full sun and wind without stress, they’re ready for the garden. Transplant on a cool, overcast day to reduce shock.
Tips & tricks for perfect seed germination
Transforming seeds into healthy plants takes more than just patience—it’s about creating the right conditions from the start. Here are my hard-won insights to give your seedlings the best possible beginning.
The Warmth Factor: Maintaining that 70-75°F range is crucial, but don't assume your home stays consistently warm. If your space tends to be cooler, especially in early spring or fall, invest in a seedling heat mat—it makes all the difference. I've seen seeds fail to germinate when left in a chilly corner, so always double-check your environment. For extra insurance, place containers on top of the fridge or near a sunny window during the day.
Seed-Specific Depth Strategy: While the twice-as-deep rule works for most seeds, some varieties like lettuce need special care. Tiny seeds like lettuce should barely be covered—just press them into the surface with your finger. For larger seeds, that ½-inch guideline holds true, but I've found using a toothpick to make precise holes prevents crushing delicate seeds. This attention to detail prevents uneven germination and gives every seed an equal chance to sprout.
Lighting Secrets: That 2-3 inch distance for grow lights might seem small, but it's perfect for preventing leggy seedlings. I've learned the hard way that moving lights too far away creates weak stems that can't support themselves. Rotate your containers daily—this might seem like overkill, but it ensures even growth toward the light source. You'll know you're doing it right when your seedlings develop thick stems and dark green leaves rather than stretching upward like spindly poles.
Harden Off Gradually: The 1-2 hour to 7-10 day progression might seem slow, but rushing this step leads to transplant shock. Start with just an hour on the first day, watching closely for any signs of stress. I've seen seedlings that looked perfect indoors wilt completely after just two hours outside. The key is gradual exposure—this toughens them up without overwhelming their systems. On those final days, if you notice wilting or yellowing, they're not quite ready yet.
Pro Tips for Seeds Into Plants
- Transforming seeds into healthy plants takes more than just patience—it’s about creating the right conditions from the start.
- The Warmth Factor: Maintaining that 70-75°F range is crucial, but don't assume your home stays consistently warm.
- Seed-Specific Depth Strategy: While the twice-as-deep rule works for most seeds, some varieties like lettuce need special care.
Frequently asked questions
Got questions about turning seeds into thriving plants? You’re not alone! Here are answers to the most common queries to help you grow with confidence.
How long does it take for seeds to sprout?
Sprouting time varies by plant—fast growers like radishes sprout in 3–7 days, while slower ones (e.g., tomatoes) take 7–21 days. Check the seed packet for specifics! Keep soil moist and warm (70–85°F) for best results.
What’s the best time to plant seeds?
Timing depends on your climate and plant type. For cool-season crops (e.g., lettuce), plant 4–6 weeks before the last frost. Warm-season plants (e.g., peppers) need soil at 60°F+—wait until after frost. Use a frost chart for guidance!
Why aren’t my seeds germinating?
Common culprits: too dry (keep soil damp, not soggy), too cold (use a heat mat if needed), or old seeds (test viability with a water float test). Also, some seeds need light to sprout—check the packet!
Can I grow plants from store-bought veggies/fruit?
Yes! Try avocados, potatoes, or green onions—they’re easy. For others (like tomatoes), save seeds by fermenting and drying them. Just know heirloom seeds work best for reliable results.
What’s the difference between direct sowing and starting indoors?
| Direct Sowing | Starting Indoors |
|---|---|
| Plant seeds outside in their final spot (e.g., beans, peas). | Grow seedlings inside first (e.g., tomatoes, peppers) for a head start. |
| Best for hardy, fast-growing plants. | Ideal for tender or slow-starting plants. |
Pro tip: Use seedling trays for indoor starts!
Wrapping up and next steps
Transforming seeds into thriving plants is a rewarding journey that connects you to nature—and you’ve got everything you need to succeed! 🌱 From choosing the right seeds to nurturing them with patience, every step brings you closer to a lush, green harvest.
Whether you’re a beginner or a seasoned gardener, the key is to start small, stay consistent, and celebrate the little victories along the way.
Ready to take the next step? Pick a seed packet, grab your supplies, and begin your germination adventure today! Your future garden is waiting—let’s grow something amazing together. 🌟