
Lawn
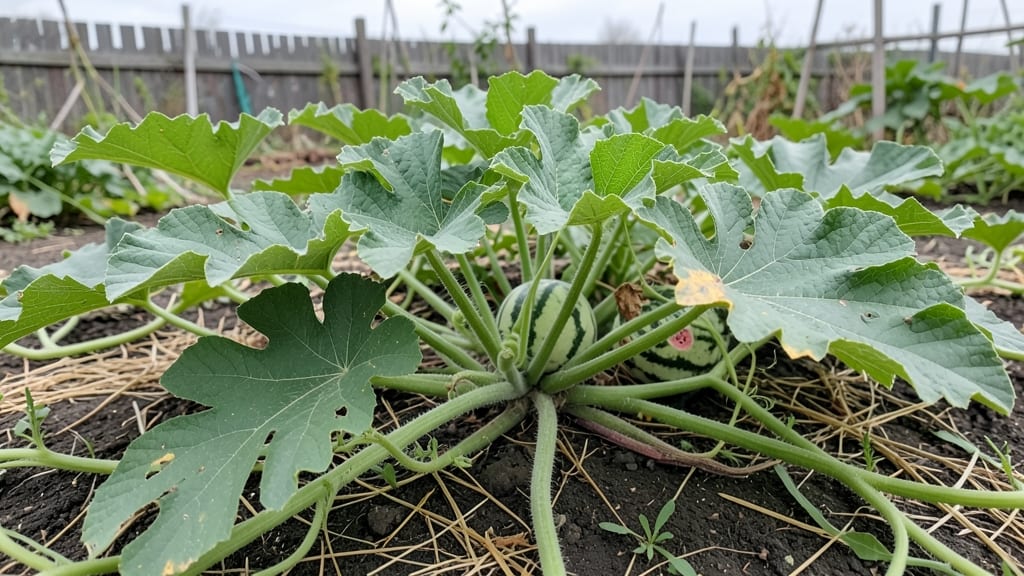
There’s nothing like sinking your teeth into a ripe no-seed watermelon—but mastering these sweet giants takes heat, space, and a little extra patience for the perfect harvest. 🌟 That first bite of seed-free perfection after just 3 months of care makes all the difference.
The secret starts with the right variety—look for triploid seedless types like 'Sugar Baby' or 'Crimson Sweet'—and a soil mix rich in compost. Plant in full sun after the last frost, giving vines plenty of room to sprawl (think 3 feet per plant).
Water deeply but keep it consistent—uneven moisture is the #1 enemy of sweetness.
By midsummer, you’ll be watching those striped fruits swell with sugar. The rind turns dull, the tendril near the stem dries up, and the melon thuds when tapped—all signs it’s ready. One slice is all it takes to know you’ve grown something truly special.
Works best in zones 4-10, but even cooler climates can pull it off with black plastic mulch. Here’s how to avoid the common pitfalls and get melons that’ll make your neighbors jealous.
📚 In This Guide
- What you need
- Instructions
- Tips and common mistakes
- Wrapping up and next steps
What you need
- ● No-seed watermelon seeds: Choose a seedless variety like Sugar Baby, Crimson Sweet, or Black Diamond (5–10 seeds per plant).
- ● Growing containers or garden bed: For containers: 5-gallon pots or larger (at least 2–3 plants per container).
- ● For ground planting: Full sun (6–8+ hours daily) and well-draining soil.
- ● Potting mix or garden soil: Rich, loamy soil with a pH of 6.0–6.8. Add compost for extra nutrients.
- ● Fertilizer: Balanced 10-10-10 or organic options like compost tea or worm castings.
- ● Watering can or hose with a gentle nozzle: Watermelons need consistent moisture (1–2 inches per week).
- ○ Mulch (optional but recommended): Straw or black plastic to retain moisture and suppress weeds.
- ○ Trellis or support (for vining varieties): Optional for compact varieties like Sugar Baby.
- ● Soil moisture meter: Ensures you’re watering just right—no soggy roots!
- ● Row covers or shade cloth: Protects young plants from pests or extreme heat.
- ● Plant markers: Label your seedlings to track varieties and harvest times.
- ● Organic pest control: Neem oil or insecticidal soap for aphids or cucumber beetles.
Step-by-step instructions for growing no-seed watermelons
Here’s how to grow seedless watermelons reliably—no fancy tricks, just proven techniques.
🌱 Step 1: Start Seeds Indoors 3-4 Weeks Before Last Frost
Fill 4-inch peat pots with the seed-starting mix and plant 2 seeds per pot at a depth of ½ inch. Watermelon seeds need warmth to germinate, so place pots on a seedling heat mat set to 80-85°F. Keep the mix moist but not soggy—water when the top ¼ inch feels dry.
Germination takes 5-7 days. Once sprouts appear, remove the weaker seedling, leaving only the strongest. Place pots under a grow light for 14-16 hours daily to prevent leggy growth. You’ll know they’re ready when first true leaves unfold—about 2-3 weeks after planting.
☀️ Step 2: Harden Off and Transplant After Frost
Two weeks before your last frost, move seedlings outside for 1-2 hours daily in a sheltered spot. Gradually increase time over 7-10 days until they can stay out all day. This toughens them up—skipping this step leads to shocked plants that wilt in the heat.
Transplant after soil warms to 70°F and all frost risk has passed. Bury seedlings deeply—up to the first true leaves—to encourage strong root growth. Space plants 3-4 feet apart in rows 5-6 feet apart. Watermelons need room to sprawl, so don’t crowd them.
💧 Step 3: Water Deeply and Fertilize for Sweet Fruit
Water deeply 1-2 times per week, soaking the soil 6-8 inches down. Shallow watering stresses plants and leads to bitter fruit. You’ll know moisture is right when the top 2 inches of soil feel dry—stick your finger in to check. Mulch with straw to retain moisture and keep roots cool.
When vines start running, begin fertilizing with balanced 10-10-10 every 2 weeks. Stop fertilizing 4 weeks before harvest—too much nitrogen makes fruit tough. Watch for yellowing leaves—this signals overwatering or nutrient burn, not drought.
✂️ Step 4: Prune and Support for Maximum Yield
Remove suckers (side shoots) growing from the main vine to direct energy into fruit production. Leave 1-2 main vines per plant—more than that weakens growth. Use cattle panels or trellises to train vines if space is tight, but let them sprawl for sweeter melons.
When small fruits form, place a board or sling under them to prevent rot from damp soil. Harvest when the underneath turns cream-colored and the stem separates easily with a slight twist. Ripe no-seed watermelons are heavy for their size—that’s your cue!
Tips & tricks for perfect no-seed watermelon growth
Growing seedless watermelons is all about patience and precision—here's how to avoid common pitfalls and maximize your harvest.
Heat Matters: Those 80-85°F heat mat temps are non-negotiable for germination. If your home stays cooler, consider using a heating pad or placing pots on top of your refrigerator (not inside). I've seen germination fail completely when temps dip below 75°F—don't skip this step! The 14-16 hours of grow light daily is equally critical. Without this light exposure, seedlings stretch toward any available light source, becoming leggy and weak.
Transplant Timing Secret: The 70°F soil temperature threshold is your green light for transplanting. Use an infrared thermometer to check—cooler soil shocks roots. I've made the mistake of transplanting too early when soil was only 65°F, and my seedlings took weeks to recover. Also, bury those seedlings deeply—up to the first true leaves—as this encourages stronger root systems that can support heavy fruit.
Watering Wisdom: That 6-8 inch deep watering isn't just about quantity—it's about consistency. I learned the hard way that shallow watering creates weak roots and bitter fruit. Use your finger to check moisture 2 inches down before watering again. And here's a pro tip: water in the morning so foliage has time to dry, preventing fungal issues that can rot your vines.
Pruning Strategy: When removing those suckers in Step 4, focus on keeping 1-2 main vines per plant. I've seen gardeners leave too many vines, which dilutes energy across too many fruits. For maximum yield, prioritize removing suckers that grow below the first 6 inches of the main vine—they're the most competitive for resources.
Pro Tips for No Seed Watermelon
- Growing seedless watermelons is all about patience and precision—here's how to avoid common pitfalls and maximize your harvest.
- Heat Matters: Those 80-85°F heat mat temps are non-negotiable for germination.
- Transplant Timing Secret: The 70°F soil temperature threshold is your green light for transplanting.
Frequently asked questions
Got questions about growing no-seed watermelons? You’re not alone! Here are answers to the most common queries—from curious beginners to seasoned gardeners looking to troubleshoot.
Can I grow no-seed watermelons from store-bought fruit?
Nope! Store-bought seedless watermelons are triploid (sterile), meaning they won’t produce viable seeds. To grow them, you’ll need to buy seed packets labeled as "seedless" (like 'Sugar Baby' or 'Crimson Sweet'), which are diploid hybrids. Save money by splitting a packet with a gardening buddy!
How long does it take for no-seed watermelons to ripen?
Patience pays off! From seed to harvest, expect 70–90 days in warm climates (Zones 9–11). In cooler zones (like 7–8), extend the season with row covers or start seeds indoors 2–3 weeks early. Check for ripeness by thumping the melon—a hollow sound means it’s ready!
Why aren’t my no-seed watermelons producing fruit?
Common culprits include:
- Poor pollination: Seedless varieties need help from bees or hand-pollination (use a paintbrush to transfer pollen from male to female flowers).
- Temperature stress: Watermelons thrive in 75–90°F soil. If nights dip below 55°F, growth stalls.
- Nutrient deficiency: Amend soil with compost and add potassium-rich fertilizer (like banana peels or wood ash) during flowering.
Are no-seed watermelons as sweet as seeded varieties?
Seedless watermelons are bred for sweetness and texture, often scoring higher on the brix scale (a measure of sugar content). Brands like 'Black Diamond' or 'Jubilee' are fan favorites. For extra sweetness, grow in full sun and water consistently—drought stress = bitter melons.
Can I grow no-seed watermelons in containers?
Yes, but choose compact varieties like 'Sugar Baby' or 'Tiny Tim' (vines stay under 3 feet). Use a 5-gallon container with drainage holes, fill with well-draining potting mix, and place in full sun. Containers dry out faster, so water daily and fertilize weekly with a balanced liquid feed.
How do I store no-seed watermelons after harvest?
Store whole melons in a cool (50–55°F), dry place for up to 2 weeks. Cut melons last 3–5 days in the fridge—wrap slices in plastic wrap to retain moisture. For long-term storage, freeze seedless watermelon flesh (great for smoothies!) or pickle rinds.
Wrapping up and next steps
Growing your own no-seed watermelon is a rewarding journey that blends patience, care, and a touch of gardening magic! 🌱 With the right variety, soil, and sunlight, you’ll soon enjoy sweet, seedless slices straight from your backyard—no store-bought shortcuts needed.
Whether you’re a seasoned gardener or a beginner, this guide proves that delicious success is just three months away.
Ready to take the next step? Start by planting your seeds this spring and keep an eye on those vines—your future watermelon feast is growing one day at a time! 🍉✨