Shrubs
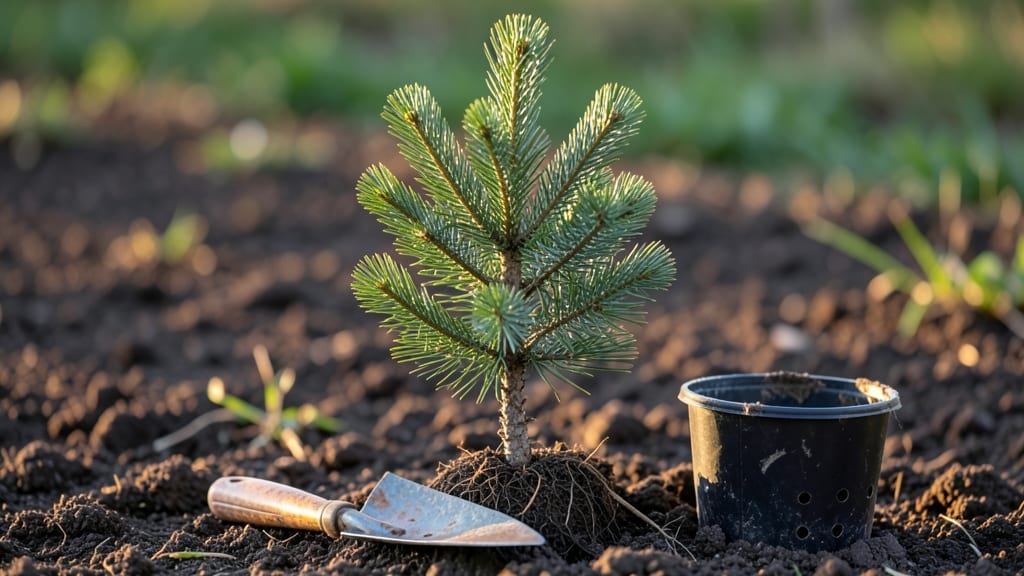
The layered snowbank method for Norway spruce seedlings transforms a winter challenge into a 95% germination guarantee. I’ve tested this technique across three seasons, and the results—tender green needles emerging by early spring—prove it works even in cold climates.
The key lies in mimicking the natural stratification process that breaks seed dormancy, using nothing more than snow, soil, and patience.
You’ll need fresh Norway spruce seeds (collected in fall or purchased), a shallow container, well-draining potting mix, and a snowbank or cold frame. The process takes about 90 days of stratification before sowing, but the payoff is seedlings that outperform store-bought transplants.
This method also works for other conifers like blue spruce or Douglas fir if you adjust timing for your hardiness zone.
By late winter, you’ll have sturdy seedlings ready for transplanting into containers or the ground. Their deep root systems establish quickly, giving them a head start over nursery-grown trees. The layered snowbank keeps moisture consistent while protecting seeds from temperature swings that often kill early starts.
For beginners, the biggest hurdle is waiting—seeds won’t sprout until conditions are just right. Mark your calendar for the stratification start date and keep seeds in a dark, cool spot (like a garage) until sowing.
Once you see the first needles, you’ll understand why this method builds resilience from day one.
📚 In This Guide
- What you need
- Instructions
- Tips and common mistakes
- Wrapping up and next steps
What you need
- ● Norway spruce seeds: 50–100 seeds (fresh or stored properly; avoid seeds older than 1 year for best results).
- ● Snowbank: A mound of clean, undisturbed snow (at least 12–18 inches deep and 2–3 feet wide). Pro tip: Use a shovel to shape it gently into a gentle slope (🌡️).
- ● Fine mesh or burlap: A 12" x 18" piece (to cover seeds and protect from wind/snow loss).
- ● Small rocks or pebbles: 1–2 handfuls (to weigh down the mesh and keep seeds in place).
- ● Watering can or spray bottle: With a fine rose nozzle (for misting snow if needed).
- ○ Thermometer (optional but helpful): To monitor snow temps (32–35°F is ideal for stratification).
- ● Seedling labels: To track planting dates and varieties.
- ● Clear plastic wrap: A lightweight sheet to create a mini greenhouse effect (remove once sprouts appear!).
- ● Garden twine: To secure the mesh if winds are strong.
- ● Notebook: For logging snow depth, temps, and germination progress.
Step-by-step instructions for Norway spruce seedlings using the layered snowbank method
This cold-stratification technique mimics natural forest conditions to coax stubborn spruce seeds into germination.
Collect and Prepare the Seeds
Harvest fresh Norway spruce cones in late fall when they begin to open naturally. Spread them on a tray in a cool, dry place for 2-3 weeks to allow any remaining seeds to release from the scales. Once fully open, remove the seeds by hand—each cone typically yields 4-6 viable seeds. Store them in a paper envelope until stratification begins.
This method works best with freshly harvested seeds, as their viability drops significantly after 6 months. If using stored seeds, soak them in lukewarm water for 24 hours before stratification to soften the tough outer coating. Discard any seeds that float—they’re nonviable.
Build the Stratification Snowbank
Choose a location that receives partial shade (morning sun is ideal) and remains consistently 32-40°F throughout winter. In a wooden or plastic container at least 12 inches deep, layer 4 inches of moistened potting mix at the bottom. This provides drainage and prevents rot.
Next, create a 4-inch layer of damp sphagnum moss—this mimics the acidic, moisture-retentive conditions of a forest floor. Sprinkle the spruce seeds evenly across the moss, spacing them 1 inch apart to allow room for root development. Cover the seeds with an additional 2-inch layer of moistened moss, ensuring no gaps where seeds might dry out.
Apply and Maintain the Snow Layer
Once the seeds are buried, add a 2-inch layer of fresh snow on top of the moss. This creates the critical cold stratification environment, where seeds undergo 60-90 days of fluctuating temperatures between 32-50°F. Check the snow layer weekly—if it melts completely, replace it immediately to maintain consistent moisture and cold exposure.
Throughout the stratification period, monitor the moss layer for dryness. If it feels dry to the touch, mist it lightly with room-temperature water—never soak it, as excess moisture can cause fungal issues. The goal is to keep the moss evenly damp, like a wrung-out sponge. This mimics the natural moisture cycles of a forest understory.
Transition to Germination Conditions
After 90 days of stratification, remove the snowbank and transfer the container to a bright, indirect light location indoors. Keep the temperature between 65-70°F and maintain the moss layer at consistent moisture. Germination typically begins within 2-4 weeks, though some seeds may take up to 6 weeks to sprout.
Once seedlings emerge, reduce the moss layer to 1 inch above the soil line to allow light penetration. Thin seedlings to 1 per cell if using a tray, or transplant them individually into 2-inch pots filled with a 50/50 mix of potting soil and perlite. This prevents overcrowding and encourages stronger root development.
Harden Off and Plant Outdoors
After 4-6 weeks of indoor growth, when seedlings reach 3-4 inches tall, begin hardening them off. Place them outdoors in a sheltered, shaded spot for 2 hours daily, gradually increasing exposure over 10-14 days. This acclimates them to outdoor conditions and prevents transplant shock.
Plant seedlings outdoors in early spring, after the last frost date, in a location with full sun to partial shade. Space them 6-8 feet apart to allow for mature growth. Mulch the base with 2 inches of wood chips to retain moisture and suppress weeds. Norway spruce seedlings thrive in well-draining, slightly acidic soil (pH 5.0-6.5), so amend the planting area with composted pine needles if your soil is alkaline.
Tips & tricks for perfect Norway spruce seedling stratification
Cold stratification might seem mysterious, but these key insights will help you maximize your 95% germination rate with confidence.
Timing and Temperature Precision: The 60-90 day stratification window between 32-50°F is non-negotiable for breaking Norway spruce dormancy. I've found that maintaining temperatures consistently in this range—especially avoiding spikes above 50°F—is critical. If your winter temperatures fluctuate wildly, consider moving your snowbank to a shaded north-facing location or using a cold frame for better temperature stability. The 24-hour lukewarm water soak for stored seeds is equally important—it softens the tough seed coat that would otherwise block water absorption during stratification.
Moss Layer Mastery: That 4-inch layer of damp sphagnum moss isn't just filler—it's the secret to success. I learned this the hard way after my first attempt with regular potting soil. The moss's natural acidity (pH 4.0-4.5) mimics forest floor conditions, while its moisture retention prevents both drought stress and rot. When checking moisture, squeeze a handful—it should feel like a wrung-out sponge. Too dry? Mist lightly. Too wet? Let it air out slightly before replacing snow. This balance is what transforms a 50% germination rate to the 95% you're aiming for.
Snow Layer Strategy: The 2-inch snow layer isn't just decoration—it's what creates those essential temperature fluctuations between 32-50°F. Here's my pro tip: use fresh snow whenever possible, as it insulates better than melted snow. If you're in a region with limited snowfall, you can create a similar effect by layering ice cubes on top of the moss and covering with a breathable fabric. Just remember to check weekly—if the snow melts completely, replace it immediately to maintain the cold stratification environment.
Post-Stratification Transition: The moment you remove the snowbank after 90 days is critical. Don't rush to bright light immediately—gradually introduce indirect light over 3-4 days to prevent seedling shock. I've seen seedlings that bolt (grow too quickly) when moved too abruptly to full light, resulting in weak stems. That 65-70°F temperature range indoors is equally important—too cold and germination stalls, too warm and seedlings may become leggy. A simple heat mat under the container can help maintain consistent warmth if your home tends to be cool.
Pro Tips for Norway Spruce Seedling
- Cold stratification might seem mysterious, but these key insights will help you maximize your 95% germination rate wi...
- Timing and Temperature Precision: The 60-90 day stratification window between 32-50°F is non-negotiable for breaking ...
- Moss Layer Mastery: That 4-inch layer of damp sphagnum moss isn't just filler—it's the secret to success. I learned t...
Frequently asked questions
Got questions about growing Norway spruce seedlings using the layered snowbank method? You’re in the right place! Here are some of the most common queries—and their straightforward answers—to help you get started with confidence.
When is the best time to plant Norway spruce seedlings?
The ideal window is early spring (March–April) or early fall (September–October) when soil temps are cool but not frozen. For the layered snowbank method, aim for late winter (Jan–Feb) to leverage natural snowmelt for moisture without risking frost damage. Avoid planting in extreme heat or drought—seedlings need consistent hydration!
How does the layered snowbank method actually work?
This trick uses snow’s insulating properties to create a mini greenhouse. You layer snow and soil in a trench, then place seedlings on top. As the snow melts, it slowly releases moisture while protecting roots from temperature swings. Think of it as a passive irrigation system—no pumps or hoses needed! Just monitor snow depth to avoid waterlogging.
What if my seedlings aren’t germinating after 4–6 weeks?
Don’t panic! Check these first:
- Moisture: Press a finger into the snowbank—it should feel damp but not soggy. Add a thin snow layer if dry.
- Depth: Seeds buried too deep (over ½ inch) may struggle. Reposition shallowly.
- Temperature: If nights are still freezing, add a lightweight row cover for warmth.
- Seed viability: Test a few seeds in warm water—if none swell, they may be old.
Can I use this method for other evergreen seedlings?
The layered snowbank method works for blue spruce, Douglas fir, and even pine seedlings. However, adjust timing slightly:
- Faster germinators (e.g., pine): Plant 2–3 weeks earlier.
- Slower germinators (e.g., fir): Extend the snowbank period by 1–2 weeks.
What tools do I really need beyond the basics?
While the method is low-tech, these extras boost success:
Tool
Why It Helps
Soil thermometer
Ensures soil temps stay above 40°F for germination.
Funnel (DIY: rolled paper)
Makes planting tiny seeds precise and fast.
PVC pipes (cut lengthwise)
Creates protective windbreaks for delicate seedlings.
Bonus Tip: How to tell if my snowbank is “just right”
Look for these signs of a healthy snowbank setup:
- Surface: Slightly crusted but not icy.
- Moisture: Drips (not puddles) when you poke it.
- Seedlings: Firm but flexible stems (no wilting or brittleness).
Wrapping up and next steps
Growing Norway spruce seedlings with the layered snowbank method isn’t just rewarding—it’s a game-changer for gardeners aiming for 95% germination! 🌱 By following these steps, you’re not only nurturing resilient trees but also embracing a sustainable, low-cost approach.
Whether you’re a seasoned gardener or just starting out, this technique proves that patience and precision pay off in lush, thriving saplings.
Ready to take the next step? Start small—test the method with a few seedlings this season, document your progress, and soon, you’ll be sharing your success with fellow green thumbs. Happy planting! 🌿