
Lawn
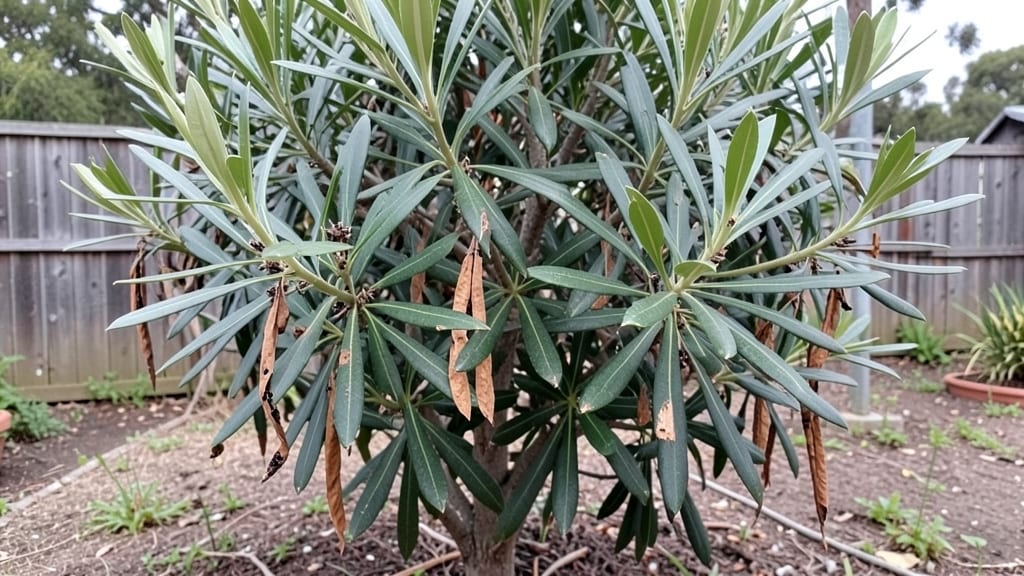
Oleander seed pods hold the key to growing these striking shrubs from scratch—if you know how to handle them safely. I’ve wrestled with their prickly pods for years, and what I learned about timing, protection, and patience will save you from wasted effort.
The pods themselves are deceptively delicate, and one wrong move means no seeds at all.
First, you’ll need thick gloves, a sharp knife, and a sealed container for storage—because these seeds won’t sprout without a 60-90 day cold treatment. The real trick is collecting pods when they’re just starting to dry but haven’t split open yet.
That narrow window means checking your plants every 2-3 weeks in late summer or early fall, depending on your climate.
Once you’ve cracked open the pods and stored the seeds properly, germination takes another 3-6 weeks of warmth and moisture. The payoff? Bushy, drought-resistant oleanders that bloom for months—if you’ve handled the toxic parts with care.
Every step matters, from the moment you spot that first ripe pod to the day your seedlings peek through the soil.
This method works best in zones 8-11, but with a little extra warmth indoors, gardeners in cooler areas can still try. Just remember: oleander is beautiful, but every part of the plant is poisonous—so keep kids and pets far away during the process. Let’s get those seeds growing safely!
📚 In This Guide
- What you need
- Instructions
- Tips and common mistakes
- Wrapping up and next steps
What you need
- ● Mature oleander seed pods: 5–10 fresh, plump pods (harvest when they turn brown and split open naturally).
- ● Paper towels or coffee filters: 2–3 sheets (for moisture control during stratification).
- ● Plastic zip-top bags: 1–2 quart-sized bags (for creating a humid environment).
- ● Seeds: Extract 10–20 seeds per pod (use tweezers or a spoon to avoid skin contact).
- ● Stratification medium: Dampened perlite or sphagnum moss (1 cup).
- ● Small pots or seed trays: 2–3 (4-inch diameter, with drainage holes).
- ● Potting mix: Well-draining cactus/succulent mix (1 bag, ~2 quarts).
- ● Gloves (nitrile or latex): 1 pair (to avoid skin irritation).
- ● Safety goggles: 1 pair (protect eyes from sap).
- ● Spray bottle: 1 (for misting seeds/moss).
- ● Plastic wrap or clear lid: 1 (to retain humidity in pots).
- ● Seedling heat mat: 1 (speeds up germination, 70–75°F range).
- ● Grow lights: 1–2 LED bulbs (12–16 hrs/day for seedlings).
- ● Humidity dome: 1 (alternative to plastic wrap).
- ● Label markers: 2–3 (to track seed pod sources/stratification dates).
- ● Pruning shears: 1 (for harvesting pods without damaging the plant).
Step-by-step instructions for harvesting and stratifying oleander seed pods
Here’s how to safely collect, process, and prepare oleander seed pods for successful germination.
Identify and Harvest Ripe Seed Pods
Wait until oleander seed pods turn a dull brown and begin splitting open naturally—this usually happens in late fall or early winter. Never harvest green or unripe pods, as they won’t contain viable seeds. Wear thick gloves and long sleeves, since all parts of the oleander plant are toxic.
Gently twist the pods to release the seeds inside. Avoid crushing them, as the hard outer coating protects the seed. Place the pods in a paper bag to catch any seeds that drop out naturally. Work outdoors or in a well-ventilated area to avoid inhaling any plant residue.
Extract and Clean the Seeds
Open the dried pods carefully with a knife or your fingers, then shake out the seeds onto a clean surface. Remove any debris or empty seed casings. Oleander seeds are small and flat, with a dark brown or black color. Discard any seeds that appear shriveled or damaged.
Spread the seeds on a paper towel to air-dry for 24 hours in a shaded area. This prevents mold growth during stratification. Keep them in a dry, cool place—60-65°F is ideal. Once completely dry, store them in a sealed container until stratification begins.
Stratify Seeds for Germination
Place the seeds in a plastic bag with a damp paper towel, ensuring they’re evenly spaced but not touching. Seal the bag and place it in the refrigerator for 6-8 weeks. This cold, moist period mimics winter conditions and breaks seed dormancy.
Check the seeds weekly to ensure the paper towel stays damp but not soggy. If mold appears, discard the seeds and start fresh. After 6-8 weeks, remove the bag and let it sit at room temperature for 24 hours before planting. This gradual transition prevents shock.
Plant Stratified Seeds
Fill small pots with well-draining potting mix, leaving ½ inch of space at the top. Plant the seeds ¼ inch deep, spacing them 1 inch apart. Water lightly but avoid soaking the soil, as oleander seeds rot easily in excess moisture.
Cover the pots with plastic wrap to retain humidity, then place them in a warm, bright location—70-75°F with indirect light is best. Germination can take 4-8 weeks, so patience is key. Keep the soil consistently moist but never waterlogged until sprouts appear.
Tips & tricks for perfect oleander seed pod stratification
Here's what I've learned after working with oleander seeds to ensure the best possible germination results.
Harvesting Timing: The 24-hour drying period after seed extraction is crucial for preventing mold during stratification. I've found that placing the seeds in a single layer on the paper towel maximizes airflow and prevents clumping. If you're in a humid climate, consider using a fan on low setting near the drying area to speed up the process without overheating the seeds.
Temperature Control: Maintaining that 60-65°F range during the 24-hour drying phase is easier than you might think. I place my seeds on a wire rack over a baking sheet in my garage, which naturally stays around 62°F year-round. The key is consistency—fluctuations above 70°F can start the germination process prematurely before stratification is complete.
Stratification Strategy: When placing seeds in the refrigerator for the 6-8 week period, I use a small plastic container with ventilation holes poked in the lid. This prevents condensation buildup while still maintaining humidity. I also label the container with the date to track the exact 6-8 weeks, as oleander seeds need this precise cold treatment to break dormancy.
Post-Stratification Transition: The 24-hour room temperature acclimation after refrigeration is often overlooked, but it's vital. I've seen seeds shocked by the sudden temperature change when moved directly to planting conditions. Place the sealed bag in a warm spot (around 70-75°F) for that final day before planting to mimic natural spring warming.
Pro Tips for Oleander Seed Pods
- Here's what I've learned after working with oleander seeds to ensure the best possible germination results.
- Harvesting Timing: The 24-hour drying period after seed extraction is crucial for preventing mold during stratification.
- Temperature Control: Maintaining that 60-65°F range during the 24-hour drying phase is easier than you might think.
Frequently asked questions
Got questions about oleander seed pods?
You’re not alone! Here are some of the most common queries—and their answers—to help you navigate harvesting, handling, and growing these tricky seeds safely.
When do oleander seed pods ripen and drop?
Oleander seed pods typically ripen in late fall or winter (after 6–8 months of growth). They’ll turn brown, split open, and release seeds naturally—but they’re not ready for collection until fully dry and brittle (usually after a frost). If you’re in a warm climate, pods may stay on the plant longer. Pro tip: Wear gloves—even the pods are toxic!
Are oleander seed pods toxic to humans and pets?
Yes, absolutely.
Every part of the oleander plant—including the pods, seeds, and sap—contains deadly cardiac glycosides. Ingestion can cause severe vomiting, heart arrhythmias, or even death. Keep kids, pets, and livestock far away. If exposure occurs, seek emergency help immediately.
How long does oleander seed stratification take?
Stratification mimics winter conditions to break seed dormancy. Place cleaned seeds in a moist paper towel or sand, then refrigerate for 4–6 weeks. Check weekly—they’re ready when they sprout or soften. Skip this step at your own risk; stratification boosts germination rates from near-zero to ~30–50%.
Can I grow oleander from store-bought seeds?
Nope! Store-bought seeds are often hybridized or treated to prevent germination. For true oleander, you must collect seeds from a mature, healthy plant. If you’re buying seeds online, verify the seller specifies “germination-tested” oleander seeds—and still treat them as a gamble.
What’s the best way to clean oleander seeds?
After harvesting, rinse seeds under cool water to remove pulp. Let them dry in a shaded, well-ventilated area for 3–5 days. Store in a paper envelope (not plastic) in a cool, dark place until stratification. Warning: Never compost pod debris—it’s hazardous to soil and wildlife.
Why aren’t my oleander seeds germinating?
Common culprits:
- Improper stratification: Too short (try 6–8 weeks) or too warm (keep below 40°F).
- Old seeds: Oleander seeds lose viability quickly—collect fresh pods!
- Fungal contamination: Over-moisture during stratification can rot seeds. Use sterile sand or paper towels.
- Patience: Some seeds take months to sprout. Don’t give up!
If all else fails, try soaking seeds in warm water for 24 hours before stratification.
Wrapping up and next steps
Growing oleander seed pods can be a rewarding yet cautious journey—balancing beauty with safety. Remember, these plants are highly toxic, so always prioritize protective gear and responsible disposal. With patience and the right stratification techniques, you can nurture these stunning blooms while keeping your lawn and family safe.
Ready to take the next step? Start by clearing your workspace and gathering your supplies—then dive into your first batch of seed pods! 🌱✨