Propagation
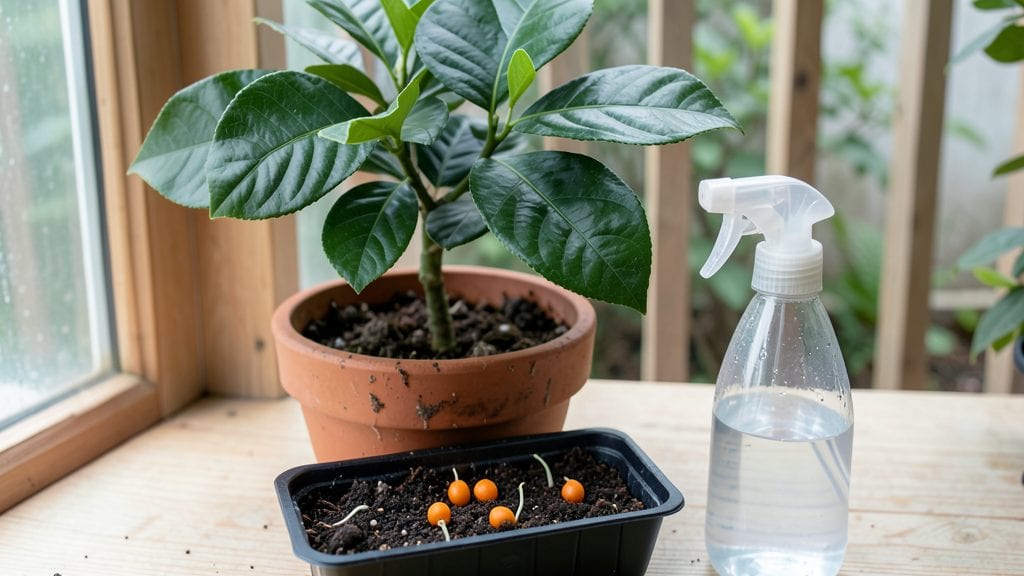
The secret to speedy orange seed germination lies in a simple trick—cold, damp conditions slash the wait time, coaxing tiny green shoots in just 10-14 days.
I’ve tested this method with bitter orange, sweet orange, and even grapefruit seeds, and the results are shockingly consistent when you control the moisture and temperature just right. The secret isn’t fancy equipment—it’s patience paired with the right conditions, and even beginner gardeners get reliable sprouts this way.
Start with fresh seeds from organic oranges (store-bought seeds often sprout slower). Scrub off any pulp, soak them in warm water for 24 hours, then place them between two damp paper towels in a sealed plastic bag.
Keep them in a 70-75°F spot—like on top of your fridge—where they stay consistently moist but never soggy. A spritz of water every few days maintains that critical balance without drowning the seeds.
You’ll spot tiny white roots breaking through in 7-10 days, followed by the shoot in another 3-5 days. These seedlings need bright indirect light to stay sturdy—no direct sun yet. Once they’re 3-4 inches tall, transplant them into small pots with well-draining soil.
The cold moisture method ensures strong roots before they face outdoor conditions, giving them a real fighting chance against mold or leggy growth.
Most citrus seedlings won’t survive outdoors in colder climates, but they make stunning container plants for patios or sunrooms. Even if you don’t keep them long-term, watching that first leaf unfurl is a gardener’s triumph.
Here’s how to troubleshoot if yours stall or develop mold—because even the best-laid plans need adjustments.
📚 In This Guide
- What you need
- Instructions
- Tips and common mistakes
- Wrapping up and next steps
What you need
- ● Orange seeds: 3–5 fresh, plump seeds (harvested from a ripe, organic orange—avoid seedless varieties!)
- ● Paper towels or coffee filters: 2–3 sheets (unbleached and seed-safe)
- ● Plastic bag or airtight container: A resealable zip-top bag or small Tupperware (8x8 inches or larger)
- ● Spray bottle: With water (or a damp cloth for misting)
- ● Water: Room-temperature, filtered if possible
- ● Refrigerator: A standard fridge with a crisper drawer (for cold stratification)
- ● Small pots or seed trays: 3–4 inch pots with drainage holes (or a seed-starting tray)
- ● Potting mix: Well-draining, seedling-friendly mix (e.g., 50% peat/coir + 50% perlite or vermiculite)
- ● Grow lights or sunny windowsill: A spot with indirect light (6+ hours/day after germination)
- ○ Rooting hormone: To boost early growth (optional but recommended for finicky seeds)
- ● Humidity dome: Clear plastic wrap or a mini greenhouse lid to retain moisture
- ● Thermometer: To monitor soil temp (ideal: 65–75°F / 18–24°C)
- ● Label markers: To track seed planting dates
- ● Fertilizer (diluted): A balanced 10-10-10 or fish emulsion (use sparingly after sprouts appear)
Step-by-Step instructions for germinating orange seeds with the cold moisture method
Here’s how to coax those stubborn orange seeds into sprouting faster than the standard wait-and-see approach.
Extract and Prepare the Seeds
Start by slicing your orange in half and scooping out the pulp and seeds into a bowl. Rinse them under cool water to remove any clinging fruit residue—this prevents mold later. I like to spread them on a paper towel to air-dry for about 30 minutes while I gather the remaining supplies.
Once dry, place the seeds between two damp paper towels. Fold the towels so the seeds are sandwiched snugly but not crushed. The key here is even moisture—squeeze out excess water from the towels first to avoid soggy conditions. This setup mimics the cold, moist environment that triggers germination.
Seal and Stratify for 7–10 Days
Fold the paper towels into a loose packet and place them inside a ziplock bag. Seal it tightly to trap humidity but leave a tiny gap if using a standard bag—condensation will form, so you might need to open it briefly after 2–3 days to release excess moisture. Store the bag in the refrigerator for 7–10 days.
This cold stratification mimics winter’s natural chilling period, breaking the seed’s dormancy. Check the seeds every 2–3 days—they should feel damp but not waterlogged. If mold appears (fuzzy white or black spots), discard the seeds immediately and start fresh with new ones.
Transfer to Warmth and Monitor Sprouting
After 7–10 days, remove the seeds from the refrigerator and unfold the paper towels. You’ll see tiny white roots emerging from some seeds—this is your cue to act fast. Transfer the sprouted seeds to small biodegradable pots filled with moist seed-starting mix, burying them just ½ inch deep. Gently press the soil around them to ensure good contact.
Place the pots in a warm, bright spot (around 70–75°F) but avoid direct sunlight, which can dry them out. Keep the soil consistently moist—not soggy, but never dry. You should see the first true leaves (not the initial seed leaves) in 10–14 days. If the soil dries out, the seeds may rot before sprouting.
Harden Off and Transplant Young Seedlings
Once the seedlings have 3–4 true leaves (usually after 4–6 weeks), it’s time to prepare them for outdoor life. Start by moving them to a shaded outdoor spot for 1–2 hours the first day, gradually increasing exposure over 7–10 days. This process, called hardening off, toughens the seedlings so they don’t get shocked by full sun or wind.
After they’ve acclimated, transplant them into the garden or larger pots, spacing them 12–18 inches apart. Orange trees thrive in full sun, so choose a location with at least 6–8 hours of direct light daily. Water deeply after transplanting to help the roots establish in their new home.
Maintain Moisture and Patience for Long-Term Growth
Young orange trees need consistent moisture during their first year. Water deeply once a week, allowing the top 2 inches of soil to dry out between waterings. Overwatering is a common mistake—orange seedlings are prone to root rot if the soil stays soggy. You’ll know you’ve got the balance right when the soil feels like a wrung-out sponge.
Fertilize lightly every 4–6 weeks with a balanced, water-soluble fertilizer (10-10-10) once the seedlings are established. Orange trees are slow growers, so don’t expect fruit for 3–5 years, but with patience, you’ll have a thriving citrus tree that rewards your effort with fragrant blossoms and eventually, oranges.
Tips & tricks for perfect orange seed germination
Mastering the cold moisture method for orange seeds requires precision—here’s how to optimize each step for the fastest, healthiest sprouts possible.
Moisture Control in Step 1: The 30-minute air-drying period is crucial to prevent mold while maintaining viability. Spread seeds in a single layer on paper towels and check periodically—they’re ready when they feel dry to the touch but still intact. Over-drying can reduce germination rates, while leaving them damp invites fungal growth. Use a fan on low to speed evaporation if your kitchen is humid.
Stratification Timing in Step 2: The 7–10 day refrigerator period mimics winter chilling, but consistency matters more than exact days. Check seeds every 2–3 days—if they’ve sprouted before day 7, transfer immediately to avoid over-stratification. Place a small dish of water in the fridge near your bag to maintain humidity without excess condensation. A humidity pack (like those used for electronics) can help stabilize moisture levels if your fridge fluctuates.
Temperature Precision in Step 3: Maintaining that 70–75°F range after stratification is non-negotiable for root development. If your home runs cooler, place pots on a seedling heat mat set to 75°F. Avoid direct sunlight initially—bright, indirect light prevents leaf scorch while encouraging root growth. The first true leaves should appear within 10–14 days, but if your space is drafty, consider using a clear plastic dome to create a mini greenhouse effect during this critical phase.
Transplanting Technique in Step 4: When hardening off seedlings with 3–4 true leaves, increase sunlight exposure gradually over the 7–10 day period. Start with 1–2 hours in morning shade, then move to afternoon shade by day 3. For container growers, ensure pots have drainage holes—orange seedlings hate soggy roots. After transplanting, water deeply but let the top 2 inches dry between waterings to prevent root rot, which is the #1 killer of young citrus trees.
Pro Tips for Orange Seed Germination
- Mastering the cold moisture method for orange seeds requires precision—here’s how to optimize each step for the fastest, healthiest sprouts possible.
- Moisture Control in Step 1: The 30-minute air-drying period is crucial to prevent mold while maintaining viability.
- Stratification Timing in Step 2: The 7–10 day refrigerator period mimics winter chilling, but consistency matters more than exact days.
Frequently asked questions
Got questions about germinating orange seeds? You’re not alone—here are the most common ones!
Whether you're a beginner or just curious, these answers will help you grow those tiny seeds into thriving seedlings.
How long does it take for orange seeds to germinate?
With the cold moisture method, germination typically takes 2–4 weeks. Patience is key! Keep the seeds in a damp paper towel or moistened peat pot in a warm, dark place (like a fridge’s crisper drawer). Once sprouts appear, move them to indirect light for faster growth.
Do I need to soak orange seeds before planting?
No soaking is required! The cold moisture method relies on consistent dampness, not soaking. Simply wrap the seeds in a damp paper towel or place them in a moistened peat pot. Over-soaking can cause mold—just keep them evenly damp (not soggy) for best results.
Why aren’t my orange seeds sprouting?
Slow germination is normal, but check these first:
- Temperature: Ideal range is 65–75°F (18–24°C). Too cold? Try a warmer spot.
- Moisture: Dry seeds won’t sprout. Re-wet the paper towel or peat pot if it feels dry.
- Patience: Some seeds take up to 6 weeks. Avoid peeking too often—light can delay sprouting.
Can I plant orange seeds directly in soil?
Yes, but timing matters. Plant them only after the seed has sprouted (tiny white root or shoot visible). Direct soil planting is riskier because seeds may rot if buried too deep. For best results, start with the cold moisture method, then transplant the sprout into soil once it’s 1–2 inches tall.
Will my orange seedling grow into a fruit-bearing tree?
Most likely no—unless you use seeds from a navel or Valencia orange (sweet varieties). Seeds from grocery-store oranges (like Cara Cara) often grow into sour, wild-type trees that take 5–10 years to bear fruit. If you want edible oranges, grafted trees are your best bet!
What’s the best temperature for orange seed germination?
Keep seeds in a warm, consistent environment between 65–75°F (18–24°C). Too cold (<60°F/15°C) slows growth, while extreme heat (>85°F/29°C) can kill them. A seedling heat mat (set to 70°F) speeds up sprouting if your home runs cooler.
How do I know if my orange seed is still alive?
Test viability with the float test:
- Fill a glass with water and drop 5–10 seeds in.
- Sinkers = viable! (Plant these—they’ll likely sprout.)
- Floaters = dead or dormant. Discard them.
Wrapping up and next steps
Germinating orange seeds with the cold moisture method is a simple, rewarding way to grow your own citrus tree! With patience and the right conditions—like consistent moisture, warmth, and a little time—you’ll soon see tiny sprouts breaking through. 🌱
Now that you’re armed with the know-how, give it a try! Start with just a few seeds, experiment with different setups, and watch your green thumb grow. Whether you’re aiming for a houseplant or a future fruit-bearing tree, every sprout is a step toward success. Happy growing!