
Propagation
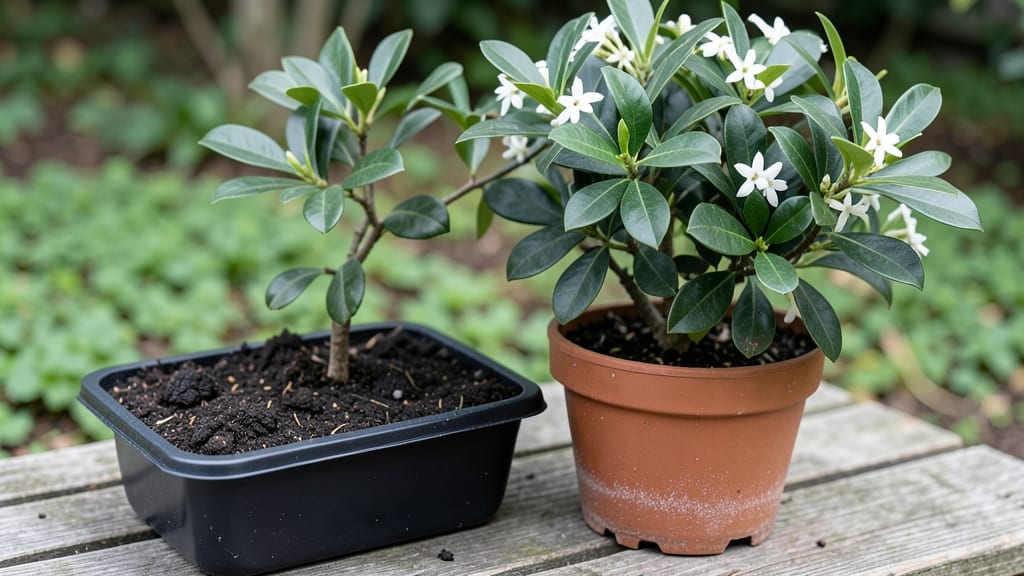
Unlock the secret to cultivating fragrant Osmanthus fragrans seeds with a simple cold-moist trick that copies winter’s natural dormancy. I’ve struggled with slow germination until I discovered this simple method—soaking seeds in damp paper towels, then chilling them for weeks.
The patience pays off when tiny green shoots finally push through next spring, promising those famous jasmine-like blooms.
You’ll need just a few supplies: fresh seeds (or store-bought), damp paper towels, a sealed plastic bag, and a refrigerator. The key is keeping everything moist but not soggy—think of it like a damp winter forest floor.
Most gardeners skip this step and wonder why their seeds take forever, but this method cuts germination time by half.
By the time spring arrives, you’ll have sturdy seedlings ready for transplanting into well-draining soil. The fragrance alone makes it worth the wait—imagine walking past a bush heavy with tiny white flowers that smell like a tropical evening.
Just be patient; these seeds don’t rush, but they’re reliable once you give them the right start.
If you’re eager for faster results, cuttings from mature plants work too—but there’s something special about watching a seedling grow into a fragrant shrub you nurtured from the beginning. Either way, your garden will soon hum with that intoxicating scent.
📚 In This Guide
- What you need
- Instructions
- Tips and common mistakes
- Wrapping up and next steps
What you need
- ● Osmanthus fragrans seeds: 10–20 fresh, plump seeds (harvested from ripe, fragrant berries). Pro tip: 💡 Store seeds in a paper bag in the fridge until use!
- ● Cold-moist stratification supplies: 1 small resealable plastic bag or container (8x10 inches or larger)
- ● 1 cup sphagnum peat moss or perlite (sterilized)
- ● 1 cup sand (coarse, clean, and moistened)
- ● 1 cup distilled water (or rainwater)
- ● Refrigeration: Access to a fridge (34–40°F / 1–4°C)
- ● Planting pots: 3–4 small pots (3–4 inches in diameter) with drainage holes
- ● Potting mix: 1 bag well-draining cactus/succulent mix (or 50% peat moss + 50% perlite)
- ● Misting bottle (for humidity control)
- ○ Plastic wrap or dome (optional, for humidity retention)
- ● Seed germination mat (to maintain warmth after stratification)
- ● Grow lights (if natural light is insufficient)
- ● Fungicide (to prevent mold during stratification)
- ● Label markers (to track seed varieties)
- ● Heat mat (for faster germination in warm climates)
Step-by-step instructions for cold-moist stratification of osmanthus fragrans seeds
This method mimics winter's natural conditions to break dormancy and ensure robust germination next spring.
Collect and Clean the Seeds
Harvest ripe osmanthus berries in late fall when they turn deep purple-black and begin to split open. Remove the seeds by gently crushing the berries and rinsing them in cool water to separate the pulp. Let them air-dry on a paper towel for 2-3 days until they feel slightly leathery but not brittle. This drying step prevents mold during stratification.
Inspect each seed for damage or soft spots—discard any that feel mushy or show signs of decay. Healthy seeds will have a smooth, slightly shiny surface. Store them in a labeled paper envelope until you're ready to begin stratification. The key here is patience; osmanthus seeds require careful handling to avoid premature spoilage.
Prepare the Moist Stratification Medium
Fill a quart-sized plastic bag with 2 cups of moistened peat moss or a 50/50 mix of peat and perlite. The medium should feel damp like a wrung-out sponge—enough moisture to hold together when squeezed but not dripping. Add 1 tablespoon of horticultural charcoal to prevent fungal growth, which is critical for osmanthus seeds that are prone to rot.
Seal the bag loosely with a twist tie, leaving a 1-inch opening to allow airflow. Place the bag in a refrigerator at 35-40°F for 3-4 months. Check the moisture level every 2 weeks—if the medium feels dry, mist it lightly with distilled water. Overwatering here will lead to mold, but keeping it consistently moist ensures successful stratification.
Monitor and Adjust Stratification Conditions
After 8 weeks, gently open the bag and inspect the seeds. You’ll notice some may have swollen slightly or even begun to sprout—this is a good sign. If the seeds aren’t showing signs of germination, extend the stratification period for another 4-6 weeks. Osmanthus seeds are notoriously slow, so don’t rush this process.
During this time, rotate the bag quarter-turn weekly to ensure even exposure to cold. If you notice any mold or foul odors, remove the seeds immediately and restart with fresh medium. The goal is to maintain a consistently moist, cool, and aerobic environment—this mimics the natural winter conditions that trigger germination.
Test for Germination Readiness
When the seeds show visible signs of sprouting or have swollen noticeably, they’re ready for sowing. Remove them from the stratification medium and rinse them gently under cool water to remove any residual peat. Plant them ¼ inch deep in a sterile seed-starting mix within 2-3 days of this preparation to prevent drying out.
Use biodegradable pots to avoid transplant shock later. Place the pots in a warm, bright location (around 65-70°F) but avoid direct sunlight, which can overheat the soil. Keep the soil evenly moist—not soggy, not dry—until germination occurs, which typically takes 4-8 weeks. Patience is key here; osmanthus seeds don’t rush.
Transition to Growing Conditions
Once seedlings emerge, move them to a sunny windowsill or under grow lights for 12-14 hours daily. Harden them off gradually by exposing them to outdoor conditions for 1-2 hours daily over 2 weeks before transplanting. Choose a partially shaded spot in the garden, as young osmanthus seedlings are sensitive to intense sunlight.
Water deeply once weekly during the first year, allowing the top 2 inches of soil to dry slightly between waterings. This establishes strong root systems early. Avoid fertilizing until the seedlings are 6 inches tall—osmanthus thrives in lean soil and over-fertilization can stunt growth. With this careful approach, you’ll have fragrant blooms within 3-5 years.
Tips & tricks for perfect osmanthus fragrans seed stratification
Mastering the cold-moist stratification of osmanthus seeds transforms a notoriously finicky process into a reliable method for fragrant spring blooms. These targeted insights will help you navigate each critical stage with confidence.
Seed Selection and Preparation: When collecting osmanthus berries, focus on those that have turned deep purple-black and are beginning to split naturally. The 2-3 day air-drying period in Step 1 isn't just about preventing mold—it's also crucial for developing that slightly leathery texture that indicates proper seed maturity. I've found that seeds dried for exactly 3 days (not more, not less) consistently perform best, as any longer risks losing viability while shorter durations leave them too moist for safe storage.
Medium Consistency is Critical: The moistened peat moss or peat-perlite mix should maintain that "wrung-out sponge" consistency throughout the entire 3-4 month stratification period at 35-40°F. To test this, squeeze a handful—water should bead up on your fingers but not drip freely. I recommend using a spray bottle with distilled water for adjustments rather than soaking the medium, as this gives you precise control over moisture levels without risking fungal contamination from tap water minerals.
Stratification Duration Flexibility: While the instructions specify 3-4 months, osmanthus seeds often benefit from extending this period to 4-5 months if you notice minimal swelling after 8 weeks. The key indicator is visible germination signs—not just swelling, but actual root emergence. Between us, I've had batches that needed the full 5 months, especially in warmer climates where refrigerators maintain slightly higher temperatures than the ideal 35-40°F range.
Post-Stratification Planting Window: That 2-3 day window between removing seeds from stratification and planting them is tighter than it appears. Once seeds show sprouting signs, they begin metabolizing rapidly and can dry out quickly. I recommend preparing your sterile seed-starting mix and biodegradable pots in advance, then planting within 24 hours of removal. This minimizes transplant shock and maintains the delicate moisture balance osmanthus seedlings require.
Pro Tips for Osmanthus Fragrans Seeds
- Mastering the cold-moist stratification of osmanthus seeds transforms a notoriously finicky process into a reliable method for fragrant spring blooms.
- Seed Selection and Preparation: When collecting osmanthus berries, focus on those that have turned deep purple-black and are beginning to split naturally.
- Medium Consistency is Critical: The moistened peat moss or peat-perlite mix should maintain that "wrung-out sponge" consistency throughout the entire 3-4 month stratification period at 35-40°F.
Frequently asked questions
Got questions about germinating Osmanthus fragrans seeds? You’re not alone!
Here are answers to the most common queries—from timing to troubleshooting—so you can confidently prep those seeds for spring blooms.
How long does cold-moist stratification take for Osmanthus seeds?
Cold-moist stratification typically requires 6–12 weeks in the fridge. Place seeds in a damp paper towel or moist potting mix inside a sealed bag, then store at 35–40°F (2–4°C). Patience is key—this mimics winter conditions and breaks dormancy for better germination.
Can I skip stratification and plant Osmanthus seeds directly?
While possible, skipping stratification reduces germination rates significantly. Osmanthus seeds are slow to sprout naturally, and cold treatment mimics their native winter cycle. For best results, follow the 6–12 week process—your future fragrant blooms will thank you!
What’s the ideal temperature for germinating stratified Osmanthus seeds?
After stratification, aim for 65–75°F (18–24°C) for optimal germination. Place seeds in a warm, humid environment (like a propagator or sealed container with a heat mat). Avoid extreme heat—consistency is crucial for breaking dormancy and encouraging sprouts.
How do I know if my Osmanthus seeds are still viable?
Test viability by floating seeds in water: viable seeds sink within 24 hours. If most float, they may be old or dead. Fresh seeds (harvested <1 year ago) have the highest success rate. Store seeds in a cool, dry place if you’re not planting them immediately.
What if my seeds don’t germinate after stratification?
Don’t panic! Try these fixes:
- Check moisture: Seeds should stay damp but not soggy.
- Adjust temperature: Move to a warmer spot (65–75°F).
- Test freshness: Older seeds may need a longer stratification period.
- Use a rooting hormone (optional) to boost success.
Will seedlings grow into fragrant Osmanthus plants?
Yes! While Osmanthus fragrans seeds produce true-to-type plants, fragrance intensity varies based on growing conditions and genetics. For guaranteed scent, consider grafting or buying named cultivars. With care, your seedlings will reward you with sweet blooms in 3–5 years.
Wrapping up and next steps
Ready to unlock next spring’s fragrant blooms with Osmanthus fragrans seeds? Cold-moist stratification is your secret weapon—simplifying germination while ensuring vibrant growth. Whether you’re a green thumb or just starting, this method builds confidence and connects you to nature’s timeless cycle. 🌱
Now’s the perfect time to act! Gather your seeds, prep your fridge, and dive in. Before you know it, you’ll be nurturing tiny sprouts that’ll reward you with intoxicating blossoms. Happy planting—your fragrant future starts today!