
Propagation
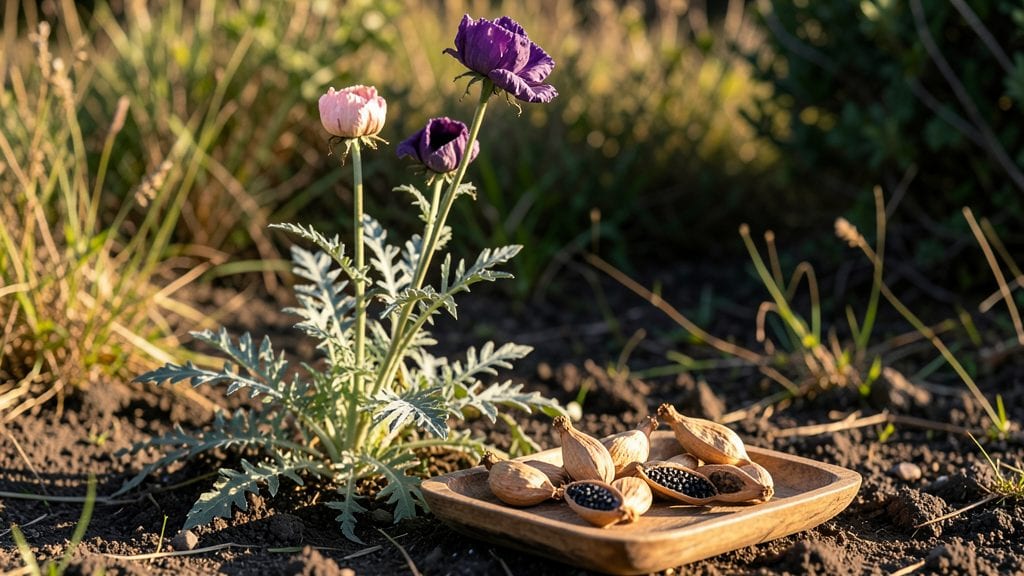
Papaver somniferum seeds need patience and precision—but the results are worth it. 🌱 I’ve struggled with their stubborn dormancy, but once you crack the timing, these poppies reward you with velvety blooms and edible seeds.
The key isn’t just throwing seeds in the ground; it’s understanding their quirks, from cold stratification to delicate seedlings.
You’ll need a sunny spot with well-draining soil, a mix of patience, and a few simple tools. Stratification—either in the fridge for 4-6 weeks or outdoors over winter—breaks dormancy, while thin, sandy soil prevents rot.
Most gardeners overwater, but these seeds hate soggy soil. Think "moist, not wet," and you’ll see those first pale green leaves emerge.
By mid-summer, you’ll have towering stems topped with cup-shaped blooms, each lasting just a day but leaving behind clusters of seeds. These aren’t just decorative—they’re the source of poppy seeds for baking, oil, or even decorative arrangements. The trade-off? They grow fast, bolt easily, and attract aphids if left unchecked.
Legal note: While the seeds themselves are often legal, growing this species may be restricted in some areas. Always check local regulations before planting. Here’s how to do it right—without the guesswork.
📚 In This Guide
- What you need
- Instructions
- Tips and common mistakes
- Wrapping up and next steps
What you need
- ● Papaver somniferum seeds (10–50 seeds, depending on desired yield; opt for certified organic or heirloom varieties for best results).
- ● Seed-starting trays or small pots (3–4 inches deep, with drainage holes; 6–12 cell packs work well).
- ● High-quality seed-starting mix (sterile, well-draining; avoid garden soil to prevent damping-off).
- ● Plastic wrap or humidity dome (to retain moisture during germination).
- ● Spray bottle (for gentle watering to avoid disturbing seeds).
- ● Grow lights or sunny windowsill (12–16 hours of light daily; poppies thrive in bright conditions).
- ○ Heat mat (optional but helpful) (70–75°F for faster germination; poppy seeds germinate best in warmth).
- ● Slow-release fertilizer (balanced 10-10-10 or organic options like worm castings).
- ● Transplanting tools (small trowel, tweezers for delicate seedlings).
- ● Pest deterrents (neem oil or insecticidal soap, as poppies can attract aphids).
- ● Journal or labeling system (to track germination dates and growth stages).
- ● Outdoor hardening-off space (if transplanting later; poppies prefer cooler climates).
Step-by-Step instructions for germinating Papaver somniferum seeds
Here’s how to coax these delicate seeds into strong, healthy seedlings—no guesswork involved.
🌱 Step 1: Prepare the Seed Starting Mix and Containers
Fill your 4-inch deep pots with a sterile seed-starting mix (never garden soil—it’s too dense and may harbor pathogens). I like to mix in a 10% perlite ratio to improve drainage, as opium poppy seeds dislike soggy conditions. Moisten the mix until it’s damp but not dripping, then press it down lightly to create a firm, even surface. This prevents seeds from sinking too deep, which can delay germination.
Poppy seeds are tiny, so I use a fine-mesh sieve to distribute them evenly. Scatter 2-3 seeds per pot—they germinate unpredictably, so extra seeds ensure at least one sprout. Gently press them into the top ¼ inch of soil; they don’t need covering, as light aids germination. Label each pot with the variety and date, since seedlings can look identical at first glance.
💧 Step 2: Create Ideal Moisture and Warmth Conditions
Place the pots in a humidity dome or cover them with clear plastic wrap to retain moisture and warmth. Opium poppy seeds thrive in temperatures between 65-75°F—a seedling heat mat set to 70°F speeds up germination dramatically. Keep the soil consistently moist but never waterlogged; I check daily by pressing a finger into the soil. If the top ½ inch feels dry, mist lightly with a spray bottle.
Germination can take 7-21 days, depending on conditions. Patience is key—don’t disturb the soil or move the pots until you see tiny green cotyledons breaking through. If condensation forms on the dome, lift it briefly to air out the seeds and prevent fungal growth. Once sprouts appear, remove the dome entirely to avoid damping-off, a fungal disease that can kill seedlings overnight.
☀️ Step 3: Provide Gentle Light After Germination
The moment seedlings emerge, move them to bright, indirect light—direct sun at this stage can scorch their delicate leaves. A south-facing window works well, but if natural light is weak, supplement with a grow light positioned 6 inches above the pots. Poppy seedlings need 12-14 hours of light daily to prevent leggy growth, where stems stretch weakly toward the light.
Watch for first true leaves (the second set after cotyledons) as a sign of progress. At this stage, you can thin seedlings to the strongest one per pot. Use clean scissors to snip unwanted sprouts at soil level—never pull them, as this can damage roots. Water gently at the base to avoid disturbing the remaining seedling, and reduce moisture slightly to encourage root development.
✂️ Step 4: Harden Off and Transplant Young Seedlings
When seedlings have 4-6 true leaves and are 3-4 inches tall, they’re ready for hardening off. Place them outside in a sheltered, shaded spot for 1-2 hours the first day, gradually increasing exposure over 10-14 days. This acclimates them to outdoor conditions and prevents transplant shock. Choose a cloudy day for the final move to minimize stress.
Transplant into individual 6-inch pots filled with well-draining potting mix (opium poppies hate wet feet). Dig a hole slightly deeper than the seedling’s root ball, place it in, and firm soil around the base. Water deeply but avoid soaking the soil—poppies prefer moderate moisture and can rot in soggy conditions. Mulch lightly with ½ inch of perlite to retain moisture without suffocating roots.
Tips & tricks for perfect Papaver somniferum germination
These simple yet crucial strategies will help you navigate the quirks of opium poppy germination without frustration.
Soil Preparation Secret: The 10% perlite ratio in Step 1 isn't just about drainage—it creates microscopic air pockets that prevent compaction. After moistening your mix, press it down just enough to firm the surface, but don't pack it like lasagna dough. Too much pressure will bury those tiny seeds deeper than their ¼-inch ideal planting depth, delaying germination by up to 7 days. Think "light as a feather" when pressing.
Temperature Consistency: Maintaining that 65-75°F range in Step 2 is critical, but here's what nobody tells you: the 70°F sweet spot isn't just about warmth—it's about stability. Fluctuations of more than 5°F can shock the seeds. I use a small digital thermometer tucked into the soil to monitor real-time temps. If your home runs cooler, consider a seedling heat mat set to low (around 68°F) rather than pushing to 70°F, which can actually stress the seeds.
Light Transition Strategy: When moving seedlings to light in Step 3, don't rush the 12-14 hour transition. Start with just 6 hours of light on day one, then add 2 hours daily. This gradual acclimation prevents shock that can cause seedlings to wilt or develop leggy stems. I place my grow light on a timer to automate this process—set it for 6 hours the first week, then increase by 2 hours weekly. The gradual increase mimics natural daylight progression.
Thinning Technique: That 4-6 true leaves stage in Step 4 is your cue to thin, but timing matters. Wait until you see the second set of true leaves fully unfurled before thinning—this ensures you're removing weaker seedlings while keeping the strongest one. Use clean, sharp scissors to snip at soil level rather than pulling, which can tear delicate roots. I like to thin on a cloudy day when light is diffused, as this reduces stress on the remaining seedling.
Pro Tips for P. Somniferum Seeds
- These simple yet crucial strategies will help you navigate the quirks of opium poppy germination without frustration.
- Soil Preparation Secret: The 10% perlite ratio in Step 1 isn't just about drainage—it creates microscopic air pockets that prevent compaction.
- Temperature Consistency: Maintaining that 65-75°F range in Step 2 is critical, but here's what nobody tells you: the 70°F sweet spot isn't just about warmth—it's about stability.
Frequently asked questions
What’s the best time to plant Papaver somniferum seeds?
Plant P. somniferum seeds in early spring or late summer for optimal germination. These seeds thrive in cool soil (60–70°F)—avoid planting when temperatures exceed 80°F, as heat can reduce viability. If you’re in a warm climate, opt for fall planting so seeds germinate in cooler winter months.
Do I need to soak Papaver somniferum seeds before planting?
No soaking is required! Unlike some seeds, P. somniferum seeds do not need pre-treatment. Simply scatter them on the soil surface (they need light to germinate) and press lightly. Overwatering before planting can cause rot—keep soil moist but not soggy until sprouts appear (usually 7–21 days).
Are there legal alternatives to Papaver somniferum for ornamental use?
Yes! If you’re looking for legal, poppy-like alternatives, try Papaver rhoeas (corn poppy) or Papaver orientale (Oriental poppy). Both are non-regulated, easy to grow, and offer stunning blooms. For a similar seed shape, Eschscholzia californica (California poppy) is another great option—zero legal restrictions!
Why aren’t my P. somniferum seeds germinating?
Common issues include too-warm soil, poor drainage, or overwatering. Ensure seeds are in well-draining soil and kept consistently moist (not waterlogged). If germination fails, try stratifying seeds (chilling for 4–6 weeks) or testing a fresh batch—some seeds lose viability over time.
How long does it take for Papaver somniferum to flower?
From seed to bloom, expect 8–12 weeks under ideal conditions. Fastest results occur with cool nights (50–60°F) and full sun. If growth stalls, check for pests (slugs, aphids) or nutrient deficiencies. Deadhead spent blooms to encourage more flowers—but save seeds for next season if you’re growing for propagation!
Wrapping up and next steps
Papaver somniferum seeds offer a fascinating journey into propagation—whether for ornamental beauty, culinary adventures, or historical curiosity. With the right conditions, patience, and a dash of care, you can successfully sprout these delicate seeds into thriving plants. 🌱
Now that you’re armed with knowledge, why not take the next step? Start with a small batch, experiment with your setup, and watch your garden flourish. Happy growing—your poppy patch awaits! 🌿✨