
Propagation
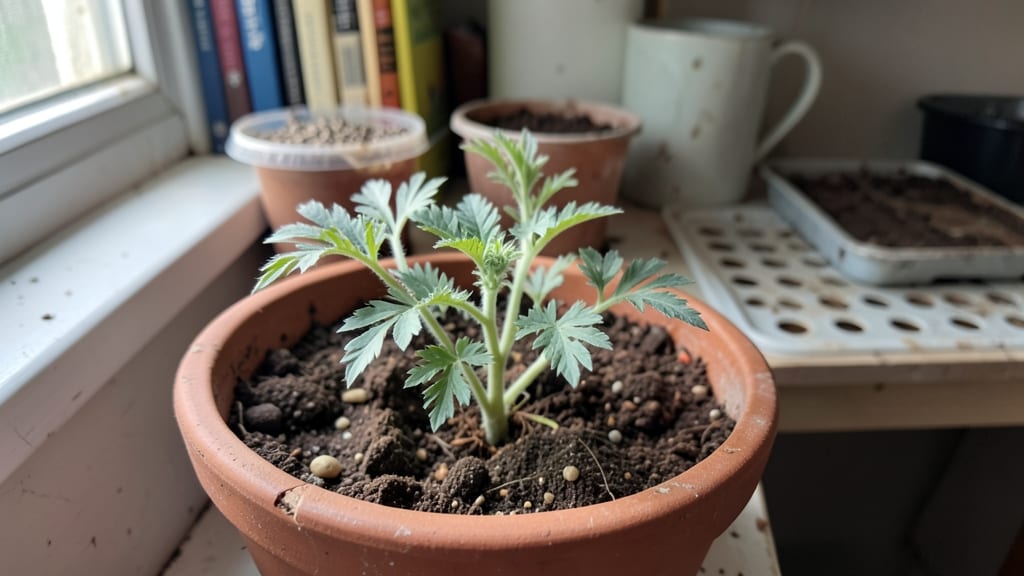
Growing poppy seed sprouts starts with a cold-moist prep that cuts germination time from weeks to days. ✨ I learned this trick after struggling with stubborn seeds that took forever—now mine pop up in just 3-5 days with the right soaking technique.
The secret lies in mimicking nature’s moisture cues while keeping things cool enough to prevent mold.
You’ll need just three simple supplies: organic poppy seeds, a clean jar with a mesh lid, and a damp paper towel. No fancy equipment—just patience and the right balance of moisture.
The key is soaking seeds overnight in lukewarm water, then draining them before planting in moist potting mix or a hydroponic setup. Too dry, and they won’t wake up; too wet, and you risk rot.
Within days, you’ll see tiny white roots emerge, followed by delicate green shoots reaching for light. These sprouts grow fast—ready to harvest in 5-7 days—and their mild, nutty flavor works in salads, sandwiches, or even as a garnish.
The cold-moist method also works for ornamental varieties, giving you lush greenery without the wait.
Here’s where it gets interesting: if your sprouts lag, check the temperature—60-65°F is ideal—and avoid overcrowding. A little sunlight after germination boosts vigor, but direct sun too soon can scorch them. Let’s get those seeds sprouting like clockwork!
📚 In This Guide
- What you need
- Instructions
- Tips and common mistakes
- Wrapping up and next steps
What you need
- ● Poppy seeds: ½ cup (about 70g) – choose organic, raw seeds for best results.
- ● Sprouting jar or container: 1 quart-sized mason jar (or a wide-mouth glass jar with a mesh lid).
- ● Mesh lid or sprouting lid: 1 (ensure it fits snugly and has small holes for drainage).
- ● Cheesecloth or fine mesh screen: 1 piece (for covering the jar if no lid is available).li> Rubber band: 1 (to secure the cheesecloth or mesh lid in place).
- ● Water: Filtered or distilled (avoid tap water with chlorine).
- ● Colander or strainer: 1 (for rinsing sprouts).
- ● Paper towels or clean kitchen towel: 1-2 sheets (for drying sprouts).
- ● Sprouting trays or stackable containers: For larger batches or multi-day sprouting.
- ● Food dehydrator: To dry sprouts for longer storage (set to 115°F/46°C).
- ● Small fan: For airflow during drying (speeds up the process!).
- ● pH strips: To test water acidity (ideal pH: 6.5–7.0 for sprouting).
- ● Glass storage container: With an airtight lid (for keeping sprouts fresh in the fridge).
- ● Clean workspace (sanitize jars/containers with hot water or vinegar).
- ● Time commitment: ~3–5 days for full sprouting (check daily!).
- ● Patience for the cold-moist method—this slows mold risk but speeds up germination!
Step-by-step instructions for growing poppy seed sprouts
This cold-moist method guarantees fast, vibrant sprouts within days—not weeks.
🌱 Step 1: Soak Seeds Overnight in Cold Water
Place 1 tablespoon of poppy seeds in a clean bowl and cover with 2 cups of cold, filtered water. Let them soak for 8-12 hours—this softens the seed coat and kickstarts germination. I use a fine-mesh strainer later to drain excess water, so I don’t lose any seeds during rinsing.
Check the seeds after 10 hours. They should feel slightly plump and swollen to the touch, signaling they’ve absorbed enough moisture. If they still feel hard, extend the soak by another 2 hours. Never use warm water—poppy seeds germinate best in cold, consistent moisture.
💧 Step 2: Rinse and Drain Daily for 3 Days
After soaking, drain the seeds in a fine-mesh strainer and rinse them under cool running water for 30 seconds. This removes any remaining debris and prevents mold. Place the strainer in a wide-mouth jar or bowl at a 45-degree angle so excess water drains while seeds stay moist.
Store the jar in a dark, cool place (like a pantry) and rinse the seeds 2-3 times daily for 3 days. You’ll see tiny white sprouts emerge within 24-48 hours. Keep the seeds covered with a damp paper towel or cloth between rinses to maintain moisture—this is critical for fast growth.
☀️ Step 3: Transition to Light for Chlorophyll Development
Once sprouts reach ¼ inch in length (usually by day 3), move them to indirect sunlight or under a grow light for 8-12 hours daily. Poppy sprouts need light to develop chlorophyll, but direct sun can scorch them. I place mine on a kitchen counter near a window, ensuring they get gentle morning light.
Continue rinsing 2 times daily to prevent bacterial growth. After 5-7 days total, the sprouts will be 1-2 inches tall with vibrant green leaves. At this stage, they’re ready to eat raw or lightly cook. If you notice any slimy residue or foul odor, discard the batch immediately—this signals spoilage.
✂️ Step 4: Harvest and Store Properly
Harvest sprouts by cutting the stems just above the base with clean scissors. Rinse them one last time in cool water to remove any lingering debris, then pat dry with a paper towel. Poppy sprouts are delicate—handle them gently to avoid crushing.
Store in an airtight container lined with a damp paper towel in the fridge for up to 5 days. For longer storage, spread them on a clean towel to dry completely, then store in a sealed jar away from light. You’ll love their nutty, earthy flavor—perfect for salads, sandwiches, or garnishes!
Tips & tricks for perfect poppy seed sprouts
A few simple strategies will help you achieve fast, vibrant sprouts every time—no guesswork required.
The Soak Factor: The 8-12 hour soak is non-negotiable for poppy seeds. I learned this the hard way after trying to rush the process—seeds need this full time to soften their tough outer shells. For best results, use a bowl large enough to accommodate the seeds without overcrowding, which can lead to uneven hydration. If your kitchen is chilly, extend the soak by 1-2 hours beyond the 10-hour check point.
Rinsing Technique: Those 30 seconds of rinsing under cool water might seem trivial, but they're crucial for removing debris and preventing mold. I use a dedicated strainer just for sprouting to avoid cross-contamination. After rinsing, tilt the jar at that 45-degree angle—this ensures proper drainage while keeping seeds moist. A damp paper towel over the jar between rinses maintains the perfect moisture balance without making the seeds soggy.
Light Transition: The move to light at day 3 is where chlorophyll development happens. I place my sprouts near an east-facing window to avoid harsh afternoon sun. If you don't have natural light, a simple LED grow light on a timer works perfectly. Watch for that vibrant green color—it's your sign the sprouts are developing properly. Continue the 2 daily rinses during this phase to prevent bacterial growth.
Harvesting Wisdom: When harvesting, cut just above the base with clean scissors to avoid crushing the delicate sprouts. I've found that patting them dry with a paper towel before storage extends their freshness. For longer storage, drying completely and storing in a sealed jar preserves their flavor for weeks. The nutty, earthy aroma is your reward for following these steps precisely.
Pro Tips for Sprouts Poppy Seeds
- A few simple strategies will help you achieve fast, vibrant sprouts every time—no guesswork required.
- The Soak Factor: The 8-12 hour soak is non-negotiable for poppy seeds.
- Rinsing Technique: Those 30 seconds of rinsing under cool water might seem trivial, but they're crucial for removing debris and preventing mold.
Frequently asked questions
How long do poppy seeds take to sprout?
Poppy seeds are fast—typically sprouting in 12–24 hours with the cold-moist method! For best results, soak them overnight (8–12 hours), then rinse 2–3 times daily. By day 2–3, you’ll see tiny white sprouts peeking through. Pro tip: Keep them in a dark, warm spot (70–75°F) to speed things up!
Do I need to soak poppy seeds before sprouting?
Yes! Soaking kickstarts germination. Rinse your seeds in a fine-mesh strainer, then soak in room-temperature water for 8–12 hours. This softens the hard outer shell, helping sprouts emerge faster. Skip soaking? They’ll still sprout, but it may take 2–3 days longer.
Can I eat raw poppy seeds straight from the jar?
Not ideal! Raw, unsprouted poppy seeds are safe but lack the nutrient boost of sprouted seeds. Sprouting increases vitamin C, enzymes, and digestibility—plus, it mellows their earthy flavor. Warning: Avoid seeds from bulk bins if unsure about mold or contaminants.
What if my poppy sprouts turn moldy?
Mold is a red flag—act fast! If you see fuzzy spots or discoloration, toss the batch immediately (even a whiff of moldy sprouts is unsafe). Prevent mold:
- Use clean jars and strainers.
- Rinse 2–3 times daily (not just once).
- Drain well after rinsing to avoid excess moisture.
- Store in a well-ventilated container.
What’s a good alternative if poppy seeds won’t sprout?
Try these easy-to-sprout seeds instead:
Seed
Sprouting Time
Flavor/Nutrition Boost
Alfalfa
3–5 days
Peanut-like, high in vitamin K & C
Radish
2–3 days
Spicy kick, rich in antioxidants
Sunflower
2–4 days
Crunchy, packed with vitamin E
Poppy seeds stubborn? Check for old or stale seeds—freshness is key! Store them in the fridge for up to 6 months.
Wrapping up and next steps
Growing sprouts with poppy seeds is a rewarding and nutritious adventure—especially with the cold-moist prep method! You’ve now got all the tools, tips, and troubleshooting advice to kickstart your harvest in just days.
Whether you’re a beginner or a seasoned sprouter, these tiny seeds pack a punch of flavor and health benefits 🌱✨.
Ready to dive in? Start with a small batch—test your setup, refine your technique, and soon you’ll be enjoying fresh, homegrown sprouts in salads, smoothies, or even baked goods. Happy sprouting!