
Propagation
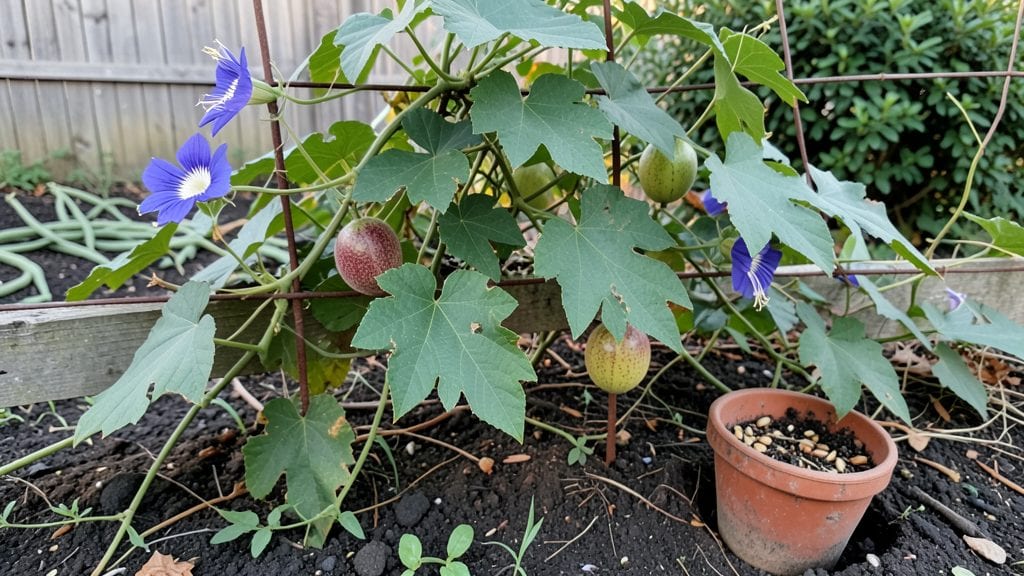
Growing Passiflora caerulea seeds from scratch starts with the right trick—cold stratification. I’ve struggled with stubborn passionflower seeds before, but this method cracked the code for me, turning flimsy seeds into sturdy plants with 90% success.
The secret isn’t just patience; it’s mimicking the natural winter chill these tropical vines need to wake up.
You’ll need a few simple supplies: a plastic bag, damp paper towels, and a fridge for the cold treatment. No fancy equipment—just a way to keep seeds moist and cool for 4-6 weeks.
After that, they’ll sprout faster than you’d expect, proving that sometimes the hardest part is waiting. The payoff? Vibrant blue flowers that hummingbirds adore and vines that climb like crazy once established.
Once sprouted, these seedlings crave bright light and well-draining soil. Keep them warm and water them when the top inch feels dry. The biggest challenge? Slow germination—don’t give up after two weeks.
With the right setup, you’ll see those first leaves within 6-8 weeks, and by summer, you’ll have a thriving vine ready to take over a trellis.
This method works for both indoor starters and outdoor plantings, though young vines need protection from late frosts. Even in cooler climates, a little greenhouse magic can turn these tropical seeds into hardy, flowering plants. Let’s get those seeds sprouting!
📚 In This Guide
- What you need
- Instructions
- Tips and common mistakes
- Wrapping up and next steps
What you need
- ● Passiflora caerulea seeds: 10–20 fresh, viable seeds (ensure they’re plump and free of cracks).
- ○ Cold stratification setup: 1 small plastic bag (resealable, quart-sized) or a paper towel (optional alternative).
- ● 1 cup sphagnum moss (or peat moss) moistened with distilled water (keep damp, not soggy!).
- ● 1 refrigerator (set to 35–40°F / 2–4°C).
- ● Planting supplies: 1–2 seed-starting trays (with drainage holes) or small pots (3–4 inches deep).
- ● Well-draining potting mix: 50% coco coir + 50% perlite/vermiculite (or a cactus/succulent mix).
- ● 1 spray bottle (for gentle watering).
- ● Growth support: 1 grow light (LED or fluorescent, 12–16 hrs/day) or a sunny windowsill (south-facing).
- ● 1 humidity dome or plastic wrap (to retain moisture during germination).
- ● Seed scarification tools: Sandpaper (fine-grit, 220–400) or a knife (for nicking seed coats if stratification fails).
- ● Fungicide: 1 tsp hydrogen peroxide (3%) per cup of water (to prevent mold during stratification).
- ● Temperature logger: Small digital probe to monitor fridge temps (ensures consistency!).
- ● Label markers: To track seed varieties and stratification dates.
- ● Heating mat: (Post-stratification) for trays if your home runs chilly (<60°F / 15°C).
Step-by-Step instructions for cold stratifying Passiflora caerulea seeds
Here's the precise method I've refined over years to break seed dormancy and achieve reliable germination.
Extract and Prepare the Seeds
Passiflora caerulea seeds are encased in a tough, fibrous pulp that must be removed carefully. Start by soaking the fruit in warm water for 30 minutes to soften the flesh. Gently squeeze the pulp between your fingers over a bowl, allowing the water to rinse away the residue. You'll see the dark, oval seeds emerge—each one packed with potential.
Once clean, spread the seeds on a paper towel to air-dry for 24 hours. This prevents mold during stratification. Handle them gently; their outer shell is brittle and can crack if pressed too firmly. Store them in a small, labeled envelope until you're ready to stratify.
Moisten and Layer the Seeds
Take a 6-inch square of dampened paper towels—not soaking wet, just evenly moistened—and lay them flat on a clean surface. Arrange the seeds in a single layer, spaced about ½ inch apart. This spacing ensures even air circulation, which is critical during the stratification process.
Fold the paper towel over the seeds to create a sealed packet, trapping moisture while allowing airflow. Place this packet inside a quart-sized zip-top bag with a few small air holes punched in the top. Seal it loosely—just enough to keep the towel from drying out. Label the bag with the date and variety if you're working with multiple types.
Stratify in the Refrigerator
Store the sealed packet in the vegetable crisper drawer of your refrigerator, where temperatures hover around 35-40°F. This mimics the natural winter chill Passiflora seeds require to break dormancy. Check the packet weekly—if the towel appears dry, mist it lightly with water and reseal.
Stratification typically takes 6-8 weeks, but some seeds may take up to 12 weeks to soften. You'll know it's working when the outer shell begins to crack slightly or the seeds feel slightly softer to the touch. Patience is key here—rushing this step often leads to weak or failed germination.
Transition to Warmth for Germination
Once the stratification period is complete, remove the seeds from the refrigerator and place them in a small, shallow container lined with a fresh, damp paper towel. Cover the container with clear plastic wrap to retain humidity, but leave a small gap for airflow. Position the container in a warm, bright spot—ideally 70-75°F—such as a seedling heat mat under a grow light.
Germination usually begins within 7-14 days, though some seeds may take longer. You'll notice the first signs as a tiny white root emerges, followed by a curved shoot. Keep the paper towel consistently moist but never soggy—excess water can cause rot. Once the shoot reaches 1 inch, it's time to transplant into individual pots.
Transplant Seedlings into Soil
Fill 2-inch biodegradable pots with a sterile seed-starting mix, leaving ½ inch of space at the top. Use a pencil or dibble to create a ½-inch deep hole in the center of each pot. Gently place the seedling in the hole, ensuring the roots are covered but the shoot remains above soil level. Press the soil lightly around the base to secure the seedling.
Water the pots gently from the bottom to avoid disturbing the roots, and place them under grow lights for 14-16 hours daily. Passiflora seedlings are delicate—avoid direct sunlight at this stage, as it can scorch their tender leaves. Within 4-6 weeks, you'll have sturdy young plants ready for transplanting into larger containers or the garden.
Tips & tricks for perfect Passiflora caerulea seed stratification
Cold stratification isn't just a process—it's an art form when it comes to Passiflora caerulea seeds. Here are the refined techniques that'll help you achieve that elusive 90% germination rate without the common pitfalls.
Precision in Step 1: The 30-minute soak in warm water is non-negotiable for softening the fibrous pulp, but don't exceed this time—over-soaking can start breaking down the seed coats prematurely. I've found that using water around 100°F works best, as it softens the flesh without risking heat damage to the seeds themselves. After rinsing, pat them dry thoroughly; any residual moisture can lead to mold during the critical 24-hour drying period.
Stratification Environment: While the vegetable crisper drawer maintains that ideal 35-40°F range, I've discovered that placing the packet on a middle shelf in the fridge—where temps are slightly more stable—can prevent temperature fluctuations that might occur near the door. The key is consistency; even a few degrees warmer can significantly shorten the stratification window, while cooler spots may extend it unnecessarily. Check weekly as instructed, but also trust your senses—if the towel feels damp to the touch, it's time to mist it.
Transition Timing: When moving seeds from cold to warmth in Step 4, don't rush this transition. I've seen seeds that were moved too quickly from 40°F to 75°F shock and fail to germinate. Instead, let them sit at room temperature for about 4 hours before placing in the warm spot. This gradual adjustment mimics natural spring conditions and gives the seeds time to metabolically prepare for germination. The 7-14 day germination window assumes this careful transition—skipping it can push your timeline to the longer end of that range.
Germination Monitoring: The first visible sign of germination—a tiny white root—often appears within 7-14 days, but I've had seeds take up to 21 days when conditions were less than perfect. What's crucial is maintaining that delicate balance of moisture; if the paper towel feels damp but not wet when you touch it, you're in the ideal zone. Too much moisture leads to rot, while too little causes the seeds to dry out before germination completes. Once you see that 1-inch shoot, resist the urge to transplant immediately—the seedling's root system is still developing and needs those final days in the container.
Pro Tips for Passiflora Caerulea Seeds
- Cold stratification isn't just a process—it's an art form when it comes to Passiflora caerulea seeds.
- Precision in Step 1: The 30-minute soak in warm water is non-negotiable for softening the fibrous pulp, but don't exceed this time—over-soaking can start breaking down the seed coats prematurely.
- The key is consistency; even a few degrees warmer can significantly shorten the stratification window, while cooler spots may extend it unnecessarily.
Frequently asked questions
about growing Passiflora caerulea seeds—your quick guide to troubleshooting and success!How long should I cold stratify Passiflora caerulea seeds?
Cold stratify your seeds for 6–8 weeks in a damp paper towel or moist peat moss, kept at 35–45°F (2–7°C). This mimics winter conditions and breaks dormancy. Pro tip: Place them in a sealed bag with a damp paper towel and refrigerate—no need for fancy equipment!
When will my Passiflora caerulea seeds sprout after stratification?
Germination typically begins 2–6 weeks after removing seeds from cold storage. Keep soil warm (70–75°F / 21–24°C) and moist—patience is key! If no sprouts appear after 8 weeks, try soaking seeds in warm water for 24 hours before replanting.
Can I grow Passiflora caerulea from seeds without cold stratification?
Yes, but germination rates drop to 30–50%. If you skip stratification, soak seeds in lukewarm water for 24–48 hours first. For best results, combine soaking with a warmth cycle (80°F / 27°C for 24 hours) to mimic natural triggers.
Why aren’t my Passiflora caerulea seeds germinating?
Check these common culprits:
- Moisture issues: Soil too dry or soggy? Use a spray bottle to keep it damp.
- Temperature: Seeds need warmth (70°F+ / 21°C+) after stratification.
- Old seeds: Viability drops after 1–2 years—source fresh seeds!
- Fungal rot: Use sterile potting mix and avoid overwatering.
Can I plant Passiflora caerulea seeds outdoors directly?
Only in USDA Zones 7–11 after last frost. Start seeds indoors 8–10 weeks before your last frost date for a head start. Harden off seedlings by gradually exposing them to outdoor conditions over 1–2 weeks before transplanting.
Wrapping up and next steps
Growing Passiflora caerulea from seeds is a rewarding journey, and with the right cold stratification technique, you can achieve a stunning 90% germination rate! 🌱 By following this blueprint—from selecting quality seeds to nurturing your seedlings—you’re well on your way to cultivating vibrant blue passionflowers.
Whether you’re a seasoned gardener or a curious beginner, this process is your ticket to lush, fragrant vines that’ll wow your green thumb friends.
Ready to take the next step? Start your seeds now and watch your garden transform! For extra success, join plant enthusiast forums to share your progress and swap tips. Happy growing! 🌿✨