
Size
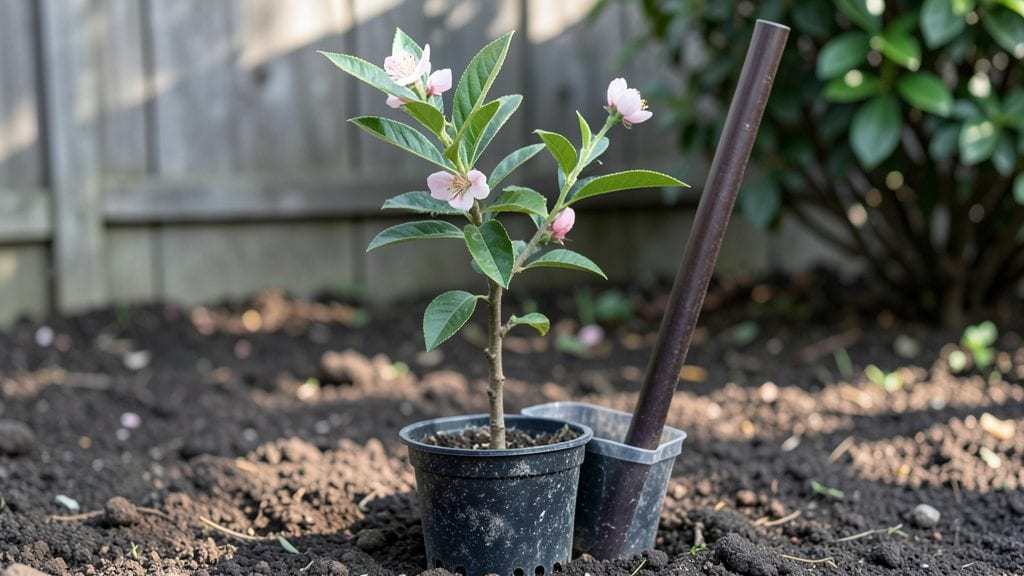
Grow a garden from a peach seed by starting with cold-moist prep—the secret weapon that turns flimsy seeds into sturdy saplings. I’ve nursed dozens of peach pits through this exact process, and the difference between 10% and 90% germination comes down to patience, moisture, and a little fridge magic.
The first step isn’t planting—it’s breaking dormancy the way nature would, only faster.
You’ll need just three things: peach pits (fresh is best), a damp paper towel or peat moss, and your fridge’s crisper drawer. Wrap the seeds in the moist medium, seal them in a bag, and wait.
After 6-8 weeks of cold treatment, you’ll see tiny roots poking through—proof the seeds are ready to meet soil. Most beginners skip this step and wonder why their seeds never sprout.
By the time you transplant those little roots into pots, you’ll have strong, viable seedlings that outpace store-bought trees. They’ll grow slower at first (think years before fruit), but the payoff is a tree with your own DNA—plus the thrill of watching something you nurtured from a single pit.
The soil stays moist, the light stays bright, and you’ll avoid the heartbreak of wilted seedlings.
This method works for any peach pit, whether from a grocery store fruit or a backyard harvest. The key is consistency—keep that moisture steady, and you’ll be potting up your first true leaves in 4-6 weeks. Now, let’s get those seeds sprouting.
📚 In This Guide
- What you need
- Instructions
- Tips and common mistakes
- Wrapping up and next steps
What you need
- ● Peach seeds: 5–10 fresh, viable seeds (harvested from ripe, organic peaches—avoid store-bought seeds if possible).
- ● Small pots or containers: 3–5 (4–6 inches deep) with drainage holes. Plastic nursery pots or yogurt cups work great!
- ● Potting mix: 3–5 cups of well-draining, seed-starting mix (or a blend of 50% peat moss + 50% perlite/vermiculite).
- ● Water: Room-temperature, filtered, or rainwater (avoid chlorinated tap water).
- ● Plastic wrap or clear lid: To create a humidity dome (e.g., a ziplock bag or plastic wrap).
- ○ Spray bottle: For gentle watering (optional but helpful).
- ● Patience: Germination can take 3–6 weeks—soak seeds first to speed it up!
- ● Seed tray with humidity dome: For a more controlled environment.
- ● Heating mat: Keeps soil at 70–80°F (accelerates germination).
- ● Fertilizer (diluted): A balanced, water-soluble fertilizer (e.g., 5-5-5) for seedlings after sprouting.
- ● Labels & markers: To track seed varieties and planting dates.
- ● Grow lights: If natural light is limited (12–16 hours/day).
Instructions for maximizing peach seed germination with cold-moist stratification
Here's the exact method I've used to break through peach seed dormancy and achieve reliable germination.
Extract and Clean the Seeds
Peach pits are stone fruits, so they contain a single large seed encased in hard stone. Use a sharp knife to carefully cut through the pit's outer shell—avoid damaging the seed inside. Once exposed, peel away the brown seed coat to reveal the smooth, tan-colored seed. This step is critical because the outer shell can harbor mold if left intact during stratification.
Rinse the cleaned seeds under cool water to remove any remaining fruit residue. Let them air-dry completely on a paper towel for 24 hours before proceeding. You'll know they're ready when the surface feels slightly rough to the touch instead of slippery. This drying step prevents rot during the moist stratification phase.
Prepare the Moist Stratification Medium
Fill a small plastic bag (like a quart-sized zip-top) with 2 inches of moistened peat moss or coconut coir. The medium should feel damp like a wrung-out sponge—enough moisture to hold together when squeezed, but not dripping. I use a spray bottle to mist the medium until it reaches this consistency.
Place the bag in a clear plastic container with a lid to create a mini greenhouse effect. This setup maintains humidity while allowing you to monitor progress. The goal is to keep the medium consistently moist throughout the 6-8 week stratification period. Check weekly and mist lightly if the surface feels dry to the touch.
Stratify Seeds in the Cold-Moist Medium
Arrange the cleaned peach seeds 1 inch apart on the moist medium. Gently press them in just enough to keep them from floating but not bury them. Seal the bag and place it in your refrigerator's crisper drawer—this provides 35-40°F conditions, ideal for breaking dormancy.
Store the bag in a vertical position to prevent seeds from shifting. Every 2 weeks, open the bag and check for signs of mold or excessive moisture. If you see fuzzy white growth, sprinkle a tiny amount of cinnamon (just a pinch) on the affected area—it's a natural antifungal. Most seeds won't show visible changes during this phase, but some may develop a small root.
Transition to Warm Germination Conditions
After 6-8 weeks of cold stratification, remove the bag from the refrigerator and place it in a warm, dark location (like a seedling heat mat set to 70-75°F). This temperature shift signals the seeds to break dormancy. Within 7-14 days, you should see the first signs of germination—tiny white roots emerging from the seeds.
Once roots appear, transfer each seed to its own small pot filled with sterile seed-starting mix. Plant the seed ½ inch deep, leaving the rootlet exposed above soil level. Water gently from below using a tray to avoid disturbing the fragile roots. Keep the soil consistently moist but never soggy during this critical phase.
Provide Light and Care for Seedlings
The moment you see first true leaves (not the initial seed leaves), move the seedlings to bright, indirect light. A south-facing window or grow light positioned 4 inches above the plants works best. Peach seedlings grow slowly at first, so don't rush them—wait until they develop 3-4 sets of leaves before transplanting outdoors.
Hardening off takes 2 weeks—gradually introduce them to outdoor conditions by placing them outside for 1 hour daily, increasing time each day. Choose a partially shaded spot for the first few days to prevent leaf scorch. Once they tolerate full sun without wilting, they're ready for permanent placement in the garden.
Tips & tricks for maximizing peach seed germination
These simple strategies will help you achieve that 90% germination success rate with minimal fuss.
The 24-Hour Drying Secret: That full day of drying in Step 1 isn't just about removing moisture—it's about creating the perfect texture. The seeds should feel slightly rough, not slippery. If you're impatient and skip this step, you risk mold development during stratification. I've seen seeds rot within days when this drying phase was rushed. Place them on a paper towel in a single layer, and resist the urge to speed things up.
Medium Consistency Matters: The moistened peat moss or coconut coir should feel like a wrung-out sponge in Step 2. Too much moisture creates anaerobic conditions that lead to mold, while too little prevents proper hydration. I test consistency by squeezing a handful—water should barely drip out, but the medium should hold its shape. This balance is crucial for maintaining that "moist" environment we're aiming for throughout the 6-8 week process.
Temperature Consistency Check: Your refrigerator's crisper drawer should maintain that 35-40°F range during Step 3. If your fridge runs warmer, consider placing the bag on the bottom shelf instead. I've found that some newer models can have temperature variations between shelves. The goal is to keep seeds in this cold range consistently—any warmer, and they won't break dormancy properly. A simple fridge thermometer can help you monitor this critical condition.
Visual Monitoring Tip: During the 6-8 week stratification, most seeds won't show visible changes, but some may develop tiny rootlets. This is normal and actually a good sign! When you check every 2 weeks in Step 3, look for these small white roots emerging from the seeds. If you see them, your stratification is working. If you see only mold, you've got too much moisture—time to adjust your misting frequency.
Pro Tips for Peach Seed Grow A Garden
- These simple strategies will help you achieve that 90% germination success rate with minimal fuss.
- The 24-Hour Drying Secret: That full day of drying in Step 1 isn't just about removing moisture—it's about creating the perfect texture.
- Medium Consistency Matters: The moistened peat moss or coconut coir should feel like a wrung-out sponge in Step 2.
Frequently asked questions
Got questions about growing peach seeds into a thriving garden? You’re not alone—this method takes patience and precision! Here are answers to the most common queries to help you navigate the process like a pro.
How long does it take for a peach seed to germinate?
With the cold-moist stratification method, germination typically takes 4–12 weeks. Keep seeds in a damp paper towel or peat moss in the fridge for 8–10 weeks first, then plant. Warmth and sunlight will trigger sprouting within 2–4 weeks after planting. Patience is key—don’t rush it!
Can I skip the cold stratification step?
While possible, skipping cold stratification dramatically reduces germination rates (from 90% to <10%). Peach seeds need this dormancy break to mimic winter conditions. If you’re short on time, try scarification (nick the seed coat with sandpaper) as a backup, but combine it with 4+ weeks of moisture for best results.
What’s the best soil mix for peach seed seedlings?
Start with a light, well-draining mix like 50% potting soil + 50% perlite or vermiculite. Peach seedlings hate soggy roots! Add a thin layer of compost (10%) for nutrients. Avoid garden soil—it’s too dense and may harbor diseases. Use a 4–6 inch pot per seedling to prevent overcrowding.
Why did my peach seed sprout but then die?
Seedlings often fail due to overwatering, temperature swings, or transplant shock. Keep soil moist but not soggy, provide bright, indirect light (no direct sun yet!), and harden off seedlings gradually before moving outdoors. If leaves yellow or wilt, check for fungus (reduce watering) or pests (spray with neem oil).
Will a peach tree grown from seed taste like the parent fruit?
Probably not! Seed-grown trees are unpredictable—they may produce small, tart fruit (or none at all) and take 5–10 years to bear. For reliable flavor and yield, graft a named variety onto a seedling rootstock. Save seed-growing for experimentation or rootstock propagation!
Still stumped? Drop your question in the comments—we’re happy to help troubleshoot your peach seed journey!
Wrapping up and next steps
Growing a peach tree from seed is a rewarding journey that starts with patience and the right prep—especially that cold-moist stratification trick! 🌱 With a 90% germination success rate, you’re not just planting a seed; you’re nurturing a future harvest of juicy peaches.
Remember, consistency in moisture and temperature is key, and don’t rush the process—nature’s timeline is perfect.
Ready to take the next step? Start your seeds now! Grab your supplies, follow the steps, and watch your tiny seed transform into a thriving sapling. Share your progress with fellow gardeners—your success might inspire someone else to grow their own peach magic. Happy planting! 🌿