
Propagation
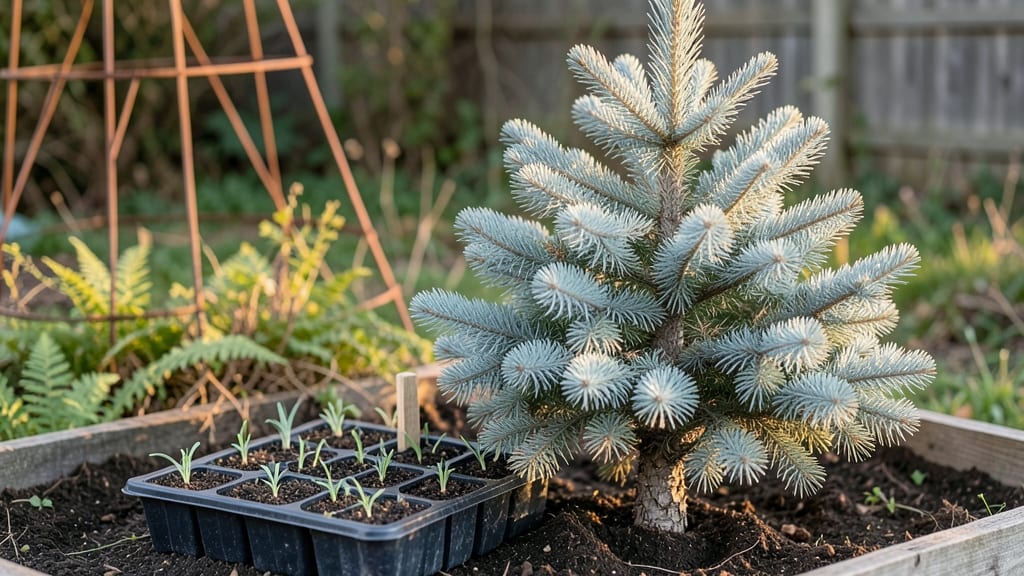
Growing Colorado blue spruce from picea pungens seeds means waiting for a slow-motion masterpiece—those sky-blue needles won’t appear overnight, but the process is worth every step. ✨ I’ve started dozens of these seeds, and the key to breaking dormancy isn’t just patience, but a 3-month cold treatment that mimics winter’s natural trick.
Without it, most seeds will never sprout, no matter how perfect your soil or light.
The first hurdle is seed viability—many store-bought packets contain old or nonviable seeds, so I recommend testing a few in damp paper towels before committing. Once you’ve confirmed they’re alive, you’ll need a mix of peat moss and perlite, a humidity dome, and a refrigerator for that critical cold prep.
Think of it like a mini winter in your kitchen, where the seeds learn to wake up when spring arrives.
By month three, you’ll see tiny shoots pushing through the soil—delicate, bright green, and nothing like the towering trees they’ll become. These seedlings need bright, indirect light and consistent moisture, but they’ll grow at a snail’s pace for years.
The payoff? A 10-foot-tall blue spruce that’ll outlive you, with needles that stay vibrant for decades if you protect it from harsh winds.
This isn’t a quick project, but it’s one of the most rewarding. Whether you’re restoring a forest edge or adding a specimen to your yard, these steps turn tiny seeds into living monuments. The real magic happens in the waiting—so start now, and enjoy the journey.
📚 In This Guide
- What you need
- Instructions
- Tips and common mistakes
- Wrapping up and next steps
What you need
- ● Fresh or stored Picea pungens seeds (10–20 seeds per batch; collect from mature cones or buy from a reputable supplier).
- ● Cold stratification medium: Moistened peat moss or coco coir (1 part medium to 1 part water by volume).
- ○ Optional alternative: Damp paper towels or a sealed plastic bag with vermiculite.
- ● Sealed plastic bag or airtight container (quart-sized or larger, with a breathable mesh or paper towel for airflow).
- ● Refrigerator or cold stratification setup (34–40°F / 1–4°C; not the freezer!).
- ● Sterilized seed-starting mix (well-draining blend like 50% peat moss + 50% perlite or vermiculite).
- ● Small seed trays or pots (2–3 inch deep, with drainage holes).
- ● Spray bottle (for gentle watering).
- ● Plastic wrap or humidity dome (to retain moisture during germination).
- ● Seed tray labels (to track stratification dates!).
- ○ Heating mat (optional, for post-stratification warmth if germination stalls).
- ● Grow lights (12–16 hours/day once seedlings emerge).
- ● Tweezers or toothpick (for delicate seed handling).
- ● Fungicide (e.g., hydrogen peroxide 3%) (to prevent damping-off in seedlings).
Step-by-Step instructions for germinating Picea pungens seeds
This is the foolproof method I’ve used to break through Colorado blue spruce dormancy—no fancy equipment, just patience and precision.
🌱 Step 1: Stratify Seeds for 3 Months in Moist Peat
Fill a sealed plastic bag with 2 cups of damp peat moss (keep it moist but not soggy). Sprinkle the 50 Picea pungens seeds evenly over the peat, then seal the bag tightly. Place it in your refrigerator’s crisper drawer where temperatures stay between 35-45°F—this mimics winter’s natural cold period.
Check the bag every 2 weeks to ensure the peat remains moist. If it dries out, sprinkle a little water and reseal. This stratification mimics the seed’s natural winter dormancy, breaking it so germination can begin. After 12 weeks, your seeds will be ready for planting.
💧 Step 2: Plant Stratified Seeds in a Warm, Light Environment
Fill a 4-inch deep seed tray with 2 cups of sterile seed-starting mix. Press the mix down gently to remove air pockets, then water it until evenly moist. Plant the stratified seeds ¼ inch deep—they’re tiny, so use a toothpick to create small holes if needed.
Cover the tray with clear plastic wrap to retain warmth and humidity, then place it in a spot with indirect light and temperatures around 70°F. Avoid direct sunlight at this stage—it can overheat the tray. Germination should begin in 2-4 weeks, but be patient; some seeds may take longer.
☀️ Step 3: Transplant Seedlings to Individual Pots
Once seedlings reach 2 inches tall and develop their first true needles (not the tiny seed leaves), it’s time to repot. Fill 4 individual 4-inch pots with 1 cup of potting mix per pot, then gently remove each seedling using a small spoon or your fingers.
Plant each seedling 1 inch deep in its own pot, firming the soil lightly around the base. Place the pots under bright, indirect light for the first week to help them adjust. After that, gradually introduce them to morning sun to harden their needles.
⏰ Step 4: Acclimate Seedlings Before Outdoor Planting
After 6 weeks in pots, your seedlings should be 4-6 inches tall with sturdy stems. Start hardening them off by placing the pots outside in a sheltered spot for 2 hours daily. Increase their outdoor time by 1 hour each day until they can stay outside full-time.
Watch for needle browning—this means they’re getting too much sun too soon. If you see this, move them to a shadier spot for a few days. Once they tolerate full sun without stress, they’re ready for their permanent home in the garden.
Tips & tricks for perfect Picea pungens germination
Colorado blue spruce seeds need special care—here's how to maximize your success with this delicate process.
Temperature Matters: The 35-45°F range in Step 1 is crucial for breaking dormancy. If your fridge runs cooler, place the bag on a shelf slightly higher where it's warmer. I learned this the hard way after my first batch failed in a cold corner—now I always check with a thermometer. The 12-week stratification period mimics winter's natural cold period, so don't rush it!
Moisture Management: In Step 1, keep that peat moss consistently damp but never soggy. I use a spray bottle to mist the bag every 2 weeks instead of opening it—this prevents moisture loss and maintains the perfect environment. If you see mold developing, that means it's too wet; open the bag and let it air out for a few hours before resealing.
Light Strategy: For Step 2, indirect light is key at 70°F. I place my seed tray near an east-facing window where it gets morning sun but stays protected from harsh afternoon rays. If you don't have natural light, a grow light on low setting works perfectly—just keep it 6 inches above the tray to avoid overheating.
Seedling Care: When transplanting in Step 3, be extra gentle with those tiny seedlings. I use a wooden toothpick to create planting holes—it gives me more control than my fingers. After repotting, I give the soil a light misting to help settle the seedlings without disturbing their roots. The first true needles are your best indicator they're ready for this step.
Pro Tips for Picea Pungens Seeds
- Colorado blue spruce seeds need special care—here's how to maximize your success with this delicate process.
- Temperature Matters: The 35-45°F range in Step 1 is crucial for breaking dormancy.
- Moisture Management: In Step 1, keep that peat moss consistently damp but never soggy.
Frequently asked questions
Got questions about growing Picea pungens (Colorado blue spruce) from seeds? You’re not alone! Here are the most common queries—and straightforward answers—to help you navigate the process with confidence.
How long does it take for Picea pungens seeds to germinate?
Picea pungens seeds are notoriously slow to germinate, often taking 3 to 6 months (or even longer) under ideal conditions. The key is patience—consistent moisture, cool temperatures (35–45°F), and a stratification period (like the one in our 3-month cold prep method) mimic natural winter conditions and trigger germination. Test patience with a clear container to watch for tiny root sprouts!
Can I skip the cold stratification step?
While technically possible, skipping stratification drastically reduces germination rates—often below 10%. These seeds rely on winter’s chill to break dormancy. If you’re short on time, try a refrigerator cold-moist method (store seeds in damp peat moss at 35–40°F for 3 months) or use a seed germination mat set to 40°F. But for best results? Embrace the wait!
What’s the best soil mix for germinating Picea pungens seeds?
Lightweight and well-draining is key! Mix 50% peat moss or coco coir with 50% perlite or coarse sand to prevent rot. Avoid heavy garden soil—it compacts and suffocates delicate seedlings. A sterilized mix (boiled or baked) reduces mold risks. Pro tip: Add a thin layer of horticultural sand on top to deter fungal growth while keeping moisture stable.
Why aren’t my seeds sprouting after stratification?
Several factors could be at play: old seeds (viability drops after 1–2 years), improper moisture (too dry = dormancy; too wet = rot), or temperature fluctuations. Check for mold (a red flag) and adjust humidity with a plastic dome or misting. If seeds are <10 years old, try a fresh batch—or consider grafting if propagation is urgent.
How do I transplant seedlings without killing them?
Timing and gentleness are critical! Wait until seedlings have 2–3 true needles (not just cotyledons) and transplant on a cloudy day to reduce stress. Use a soft spoon or butter knife to lift seedlings, keeping the root ball intact. Harden off for 1–2 weeks by gradually exposing them to outdoor conditions. Avoid transplanting in hot or windy weather—these spruces are sensitive!
Wrapping up and next steps
Growing Picea pungens from seeds is a rewarding journey that rewards patience with stunning blue-green foliage and majestic growth! By mastering the 3-month cold stratification technique and providing the right conditions, you’ll unlock the potential of these resilient seeds.
Whether you’re a seasoned gardener or just starting out, this method makes propagation accessible and exciting—so roll up your sleeves and get planting! 🌱✨
Ready to take the next step? Start by gathering your seeds and materials, then follow the stratification process. Before you know it, you’ll be nurturing a Picea pungens sapling that’ll thrive for decades. Happy growing! 🌲💚