
Propagation
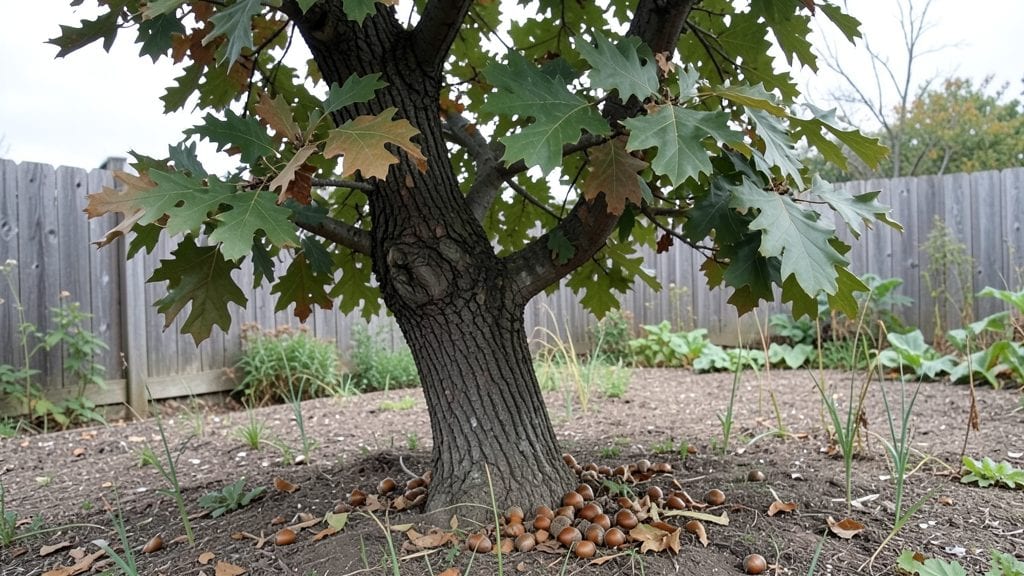
Growing pin oak seeds into sturdy trees starts with a trick nature already knows: layered cold stratification. ✨ This process mimics winter's slow release of dormancy, and when done right, you'll see those first pale green leaves breaking through soil by next spring.
The key isn't just patience—it's recreating the exact conditions oak seeds need to wake up after months of dormancy.
You'll need just three things: fresh pin oak acorns, a damp paper towel or peat moss, and a sealed container for the cold treatment. Most people skip the stratification step and wonder why their acorns never sprout—this is where the magic happens.
The process takes about 90 days, but it's the difference between a failed attempt and a thriving young oak in your yard.
Once germinated, those little seedlings grow surprisingly fast once they hit soil, though pin oaks are famously slow starters. By year three, you'll have a 3-foot sapling with that classic lobed leaf shape, and with proper spacing, it'll develop into a shade-providing giant in decades.
The real reward? A tree that thrives with almost no maintenance once established.
This method works in zones 4 through 8, though southern gardeners may need slightly shorter stratification. The biggest challenge? Waiting—pin oaks don't rush, but neither do they give up. Here's how to get them started without the guesswork.
📚 In This Guide
- What you need
- Instructions
- Tips and common mistakes
- Wrapping up and next steps
What you need
- ● Pin oak acorns (seeds): 10–20 fresh, plump acorns (harvested in fall, ideally from healthy, mature trees). Pro tip: Avoid acorns with holes or cracks!
- ● Stratification medium: Option 1: 2–3 cups moistened perlite or sphagnum moss (sterilized, pH-neutral).
- ● Option 2: 1 part peat moss + 1 part sand (pasteurized to prevent mold).
- ● Containers: 1–2 resealable plastic bags (quart-sized, with air holes punched in).
- ● OR 1–2 small plastic or ceramic pots (3–4" diameter, with drainage holes).
- ○ Refrigeration: Standard fridge (34–40°F / 1–4°C) with a humidity tray (optional but helpful).
- ● Seed scarification: Sandpaper (100–120 grit) to lightly nick acorn shells (speeds up germination).
- ● Fungicide: 1 tsp hydrogen peroxide (3%) per cup of water (for sterilizing medium).
- ● Grow lights: LED bulb (for post-stratification sprouting phase).
- ● Journal: Notebook to track stratification dates and seed progress!
How to cold-stratify pin oak seeds for successful germination
This tried-and-true method mimics nature's way of breaking dormancy—just follow along.
🌱 Step 1: Collect and Prepare the Seeds
Harvest pin oak acorns in late fall when they've fallen naturally—they'll have the highest viability. Remove any that show signs of insect damage or soft spots, as these won't germinate. Store the healthy acorns in a cool, dry place until you're ready to start stratification.
Before stratification, soak the acorns in lukewarm water for 24 hours. This softens the hard seed coat and jumpstarts hydration. Drain them thoroughly afterward—you don't want them sitting in water, just damp. This step is crucial because pin oak seeds have thick shells that resist water absorption.
🪴 Step 2: Layer Stratification in a Moist Medium
Fill a 12-inch deep container with a mix of sphagnum peat moss and perlite (equal parts) to create your stratification medium. Keep it moist but not soggy—squeeze a handful and it should feel like a damp sponge. This balance is key because too much moisture causes rot, while too little prevents germination.
Arrange the soaked acorns in a single layer at the bottom of the container, spacing them about 2-3 inches apart. Cover them with 2 inches of the moist medium, then add another layer of acorns on top. Repeat until all acorns are layered, finishing with a 1-inch layer of medium on the very top. Label the container with the date and variety—pin oak germination can take months, so tracking is essential.
⏰ Step 3: Cold Stratify for 90-120 Days
Place the container in a location where temperatures stay between 35-45°F—a refrigerator's crisper drawer works perfectly. Check the moisture every 2-3 weeks and mist lightly if the top layer feels dry. You'll know the stratification is working when tiny white roots emerge from the acorns after about 6-8 weeks.
Resist the urge to peek too often—consistent conditions are more important than frequent checks. If mold appears, discard the affected acorns immediately and refresh the medium for the rest. Real talk: some acorns may never sprout, but don't be discouraged—even a 50% success rate is great for oak trees.
☀️ Step 4: Transition to Warmth for Germination
Once roots are 1-2 inches long, move the container to a warm spot with 65-75°F temperatures. Place it under grow lights or near a sunny window (south-facing is ideal) to encourage shoot growth. You'll see the first green shoot emerge within 2-4 weeks—this is your signal that germination is underway.
Keep the medium consistently moist but not waterlogged during this phase. Overwatering now can drown the tender sprouts. Transplant each seedling into its own 4-inch pot with well-draining soil once the shoot reaches 3-4 inches tall—this prevents root competition and encourages stronger growth.
🌿 Step 5: Harden Off and Plant Outdoors
After the seedlings have 4-6 true leaves and are at least 6 inches tall, it's time to harden them off. Start by placing them outside in a shaded area for 1 hour daily, gradually increasing exposure over 2 weeks. Watch for wilting—if it happens, they're not ready yet.
Plant outdoors after the last frost when soil temperatures reach 60°F or warmer. Choose a location with full sun and well-draining soil. Space seedlings 10-15 feet apart—pin oaks grow large and need room to thrive. Mulch around the base with 2-3 inches of organic mulch to retain moisture and regulate soil temperature.
Tips & tricks for perfect pin oak seed stratification
Between us, I've watched countless acorns fail to sprout because of small oversights in this process. Here's what I've learned to make sure your pin oak seeds thrive.
The Soaking Secret: That 24-hour soak in lukewarm water isn't just about hydration—it's about breaking the seed coat's resistance. Use water that's warm enough to feel comfortable in a sink (around 75°F), not boiling. I've seen seeds absorb water unevenly when using cold water, which leads to inconsistent germination. After draining, pat them dry with a paper towel to prevent mold from forming during stratification.
Layering Like a Pro: The 2-3 inch spacing between acorn layers in Step 2 might seem generous, but it prevents root competition and allows each seedling room to develop. If you're short on container depth, you can stack layers more closely but reduce the number of acorns per layer. The key is maintaining that 1-inch top layer—it protects the seeds from drying out while still allowing airflow.
Temperature Troubleshooting: Your refrigerator's crisper drawer might be the perfect 35-45°F zone, but if it's not, don't panic. A basement storage room or even a garage with good insulation can work too. The critical thing is consistency—fluctuations of just 5°F can delay germination. I keep a small thermometer in my stratification container to monitor temps, especially if I'm using alternative locations.
Root Watching: Those tiny white roots emerging after 6-8 weeks are your first sign of success, but don't expect all your acorns to sprout. Pin oaks are notoriously finicky—even with perfect conditions, you might see only 30-50% germination. That's normal! The roots will grow fastest in the 65-75°F warmth of Step 4, so move them to that warm spot as soon as they reach 1-2 inches. This transition is where most failures happen—rushing it can shock the delicate roots.
Pro Tips for Pin Oak Seeds
- Between us, I've watched countless acorns fail to sprout because of small oversights in this process.
- The Soaking Secret: That 24-hour soak in lukewarm water isn't just about hydration—it's about breaking the seed coat's resistance.
- Layering Like a Pro: The 2-3 inch spacing between acorn layers in Step 2 might seem generous, but it prevents root competition and allows each seedling room to develop.
Frequently asked questions
How long does cold stratification for pin oak seeds take?
Pin oak seeds typically need 90–120 days of cold stratification (around 34–40°F) to break dormancy. Start in late fall or early winter for best results—this mimics natural winter conditions. Patience is key, as rushing can reduce germination rates!
Can I skip cold stratification and still grow pin oak seeds?
While possible, skipping stratification drastically lowers success rates. Without it, seeds may rot or fail to sprout. If you’re in a hurry, try soaking seeds in warm water for 24 hours first, but combine this with a short cold period (even 30 days) for better odds.
Why aren’t my pin oak seeds germinating after stratification?
Check these common culprits:
- Insufficient cold exposure: Ensure seeds stayed consistently cold (not freezing).
- Poor moisture: Keep the medium damp (not soggy) during stratification.
- Old seeds: Pin oak seeds lose viability over time—use fresh ones if possible.
- Depth issues: Plant seeds only 1/4-inch deep; too deep = delayed sprouting.
What’s the best medium for stratifying pin oak seeds?
Use a moist, well-draining mix like:
- 50% peat moss or coco coir
- 30% perlite or sand
- 20% vermiculite
When should I plant stratified pin oak seeds outdoors?
Wait until late spring after the last frost (when soil temps reach 60°F+). Pin oaks thrive in full sun, so choose a well-draining site. If transplanting seedlings, do it on a cloudy day to reduce shock. Young trees grow slowly—give them space to establish!
Wrapping up and next steps
Mastering the art of pin oak seed stratification unlocks the potential for thriving trees in your landscape—no more guessing games! 🌱 By following this layered cold stratification blueprint, you’ve equipped yourself with the science-backed steps to break dormancy and coax those stubborn seeds into vibrant growth.
The key? Patience, precision, and a little winter magic in your fridge or outdoor setup.
Ready to turn those tiny seeds into towering oaks? Start small: gather your seeds this fall, prep your materials, and dive into stratification before winter’s peak.
Whether you’re a green thumb or a curious beginner, every seed you nurture today could be the foundation of tomorrow’s shade. Happy growing—and may your pin oaks bloom beautifully! 🌳✨