
Planting
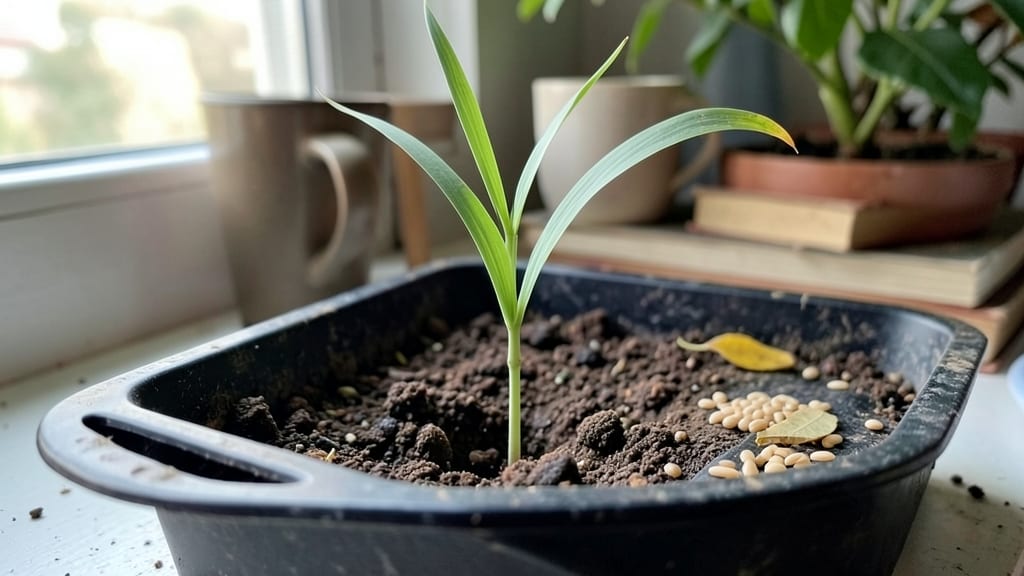
Planting rice seeds successfully comes down to keeping that soil consistently moist—not soggy, not dry, but just right—through every stage of growth. 🌱 I learned the hard way that rice seeds need a delicate balance of water and air, and once I cracked the moisture code, my little patch produced more than I expected in just 90 days.
The trick starts with pre-soaking seeds for 24 hours to jumpstart germination, then planting them just beneath the surface in warm, moistened soil.
You’ll need a shallow tray or container with drainage holes, a fine misting spray bottle, and a clear plastic dome or plastic wrap to create a mini greenhouse effect. This setup keeps humidity high while preventing waterlogging.
Within a week, you’ll spot those first tiny shoots breaking through the soil—velvety green and eager.
The key is maintaining that layered moisture: keep the top inch damp but never waterlogged, and you’ll watch your seedlings grow into sturdy plants ready for transplanting or harvesting in just a few months. The payoff? Fresh rice from your own garden, no matter the season.
Works for both indoor windowsill setups and outdoor beds, though outdoor rice needs warmer temperatures and more space. Here’s how to keep those seeds thriving from start to finish—no rice paddy required!
📚 In This Guide
- What you need
- Instructions
- Tips and common mistakes
- Wrapping up and next steps
What you need
- ● Rice seeds: 1 lb (or ~500 seeds) of high-quality, heirloom or hybrid rice varieties (e.g., Calrose, Jasmine, or Basmati). Choose short-grain for sweeter rice or long-grain for firmer texture.
- ● Growing containers: 2–3 large pots (12–18 inches deep) with drainage holes or a raised bed (minimum 12 inches deep). Use food-grade containers if growing indoors.
- ● Growing medium: 60% peat moss or coco coir (for moisture retention).
- ● 30% perlite or vermiculite (for aeration).
- ● 10% compost or worm castings (for nutrients).
- ○ Watering system: Submersible water pump (optional but ideal for layered moisture).
- ● Spray bottle (for seedling care).
- ● Watering can with a fine rose nozzle.
- ● Fertilizer: Balanced liquid fertilizer (e.g., 10-10-10) or organic options like fish emulsion or seaweed extract.
- ● Hand trowel (for transplanting seedlings).
- ● Pruning shears (to trim dead leaves or adjust plant spacing).
- ● pH testing kit (to maintain soil pH between 5.0–7.0).
- ● Thermometer (to monitor water temperature, ideally 70–85°F).
- ● Grow lights (if indoors; LED full-spectrum recommended).
- ● Plastic wrap or humidity dome (to retain moisture during germination).
- ● Sunlight: 6–8 hours of direct sunlight daily (or equivalent under grow lights).
- ● Temperature: Keep soil between 70–85°F for germination; 60–90°F for growth.
- ● Space: Allow 12–18 inches between plants for mature growth.
- ● Patience: Rice takes 3–6 months to harvest, depending on variety and conditions!
- ● Moisture meter (to track soil hydration levels).
- ● Automatic timer for grow lights/watering.
- ● Companion plants like duckweed (natural fertilizer) or azolla (weed suppressant).
- ● Journal to log growth stages and adjustments.
Step-by-Step instructions for planting rice seeds
Here's how to create the perfect moist environment for rice seeds to thrive indoors or in containers.
🪴 Step 1: Prepare Containers and Water for Layered Moisture
Fill your 4-inch deep containers with 2 inches of water—this creates the shallow water layer rice needs to germinate. I like to use wide, shallow trays because rice seeds spread out as they sprout. Place the containers in a warm spot where the temperature stays between 70-80°F.
Rice seeds require consistent moisture, but they won’t tolerate soggy soil. The water level should stay just below the seed surface—never fully submerged. You’ll notice tiny white roots emerge within 3-5 days if moisture levels are just right.
🌱 Step 2: Sow Seeds Evenly for Uniform Germination
Spread the rice seeds across the water surface, spacing them about 1 inch apart. Press them lightly into the water with your fingers—just enough to keep them in place without burying them. A gentle tap on the container helps them settle evenly.
Cover the container with a clear plastic lid or plastic wrap to trap humidity. This creates a mini greenhouse effect that speeds up germination. Check daily for condensation—if the lid fogs up, your moisture level is perfect. Remove the lid once seeds sprout to prevent mold.
💧 Step 3: Maintain Consistent Moisture Without Overwatering
After germination, keep the water level at 1 inch deep—never let it drop below that. Rice seedlings are sensitive to dry soil, but they’ll drown if submerged too deeply. I add a splash of water every 2-3 days to maintain that level.
Watch for yellowing leaves—they signal either too much or too little water. Healthy seedlings will have vibrant green leaves and sturdy stems. If the water turns cloudy, drain and refresh it immediately to prevent bacterial growth.
☀️ Step 4: Provide Indirect Light for Strong Growth
Place the containers in bright, indirect light—like a south-facing window with sheer curtains. Direct sunlight can scorch tender seedlings, so avoid placing them in harsh afternoon rays. You’ll see the first true leaves emerge in about 10-14 days.
Rotate the containers a quarter turn daily so all seedlings get even light exposure. Uneven growth is a dead giveaway that your plants are leaning toward the light. If stems stretch too tall and thin, they’re begging for more light—just move them closer to the window.
⏰ Step 5: Thin Seedlings and Transition to Soil
Once seedlings reach 2 inches tall, carefully thin them to 3 inches apart using small scissors or your fingers. Remove weaker seedlings at the base to avoid disturbing the roots of the ones you’re keeping. This prevents overcrowding and ensures each plant gets enough nutrients.
After thinning, gradually reduce the water level to ½ inch deep over 5 days. This prepares the seedlings for soil. Once they’re ready, transplant them into moist potting mix, keeping the roots covered but the crown above soil level.
Tips & tricks for perfect rice seed germination
Creating the ideal conditions for rice seeds to sprout is all about precision—especially with moisture and temperature. Here's how to avoid common pitfalls and maximize success.
Temperature Matters: The 70-80°F range in Step 1 is critical because rice seeds germinate fastest in warm conditions. If your home runs cooler, place containers on a heating pad set to low or near a sunny window—just avoid direct heat sources. I've seen germination times double when seeds are kept below 70°F, so monitor closely.
Moisture Monitoring: In Step 3, maintaining that 1-inch water level is an art, not a science. Use a clear container so you can see the water level without disturbing the seeds. If you notice condensation on the lid every morning, your humidity is perfect. If it stays dry, add a tiny splash of water—just enough to maintain that level without drowning the seeds.
Light Strategy: The quarter-turn rotation in Step 4 prevents leggy seedlings that reach for light. I like to place my containers on a lazy Susan for easy rotation. If you don't have one, just mark the container with a pencil to track which side faces the window. Uneven growth is your first sign that seedlings need more even light exposure.
Transplanting Transition: That 5-day reduction to ½-inch water in Step 5 is what prepares seedlings for soil. I find it helpful to make small marks on the container sides to track the water level reduction. This gradual adjustment prevents shock when you finally transplant into potting mix.
Pro Tips for Plant Rice Seeds
- Creating the ideal conditions for rice seeds to sprout is all about precision—especially with moisture and temperature.
- Temperature Matters: The 70-80°F range in Step 1 is critical because rice seeds germinate fastest in warm conditions.
- Moisture Monitoring: In Step 3, maintaining that 1-inch water level is an art, not a science.
Frequently asked questions
Got questions about planting rice seeds? You’re not alone! Whether you're a beginner or a seasoned gardener, these FAQs will help you grow lush rice plants with confidence.
How deep should I plant rice seeds?
Plant rice seeds about ¼ to ½ inch deep in moist soil. If planting in water (like for direct sowing in flooded fields), ensure they’re just covered—rice seeds need darkness to germinate but not too much depth. For containers, use a well-draining mix with consistent moisture.
When is the best time to plant rice seeds?
Rice thrives in warm soil (70–85°F), so plant after the last frost when nighttime temps stay above 60°F. In tropical climates, you can plant year-round, but cooler seasons may slow growth. For indoor containers, use grow lights if natural light is limited.
How often should I water rice seeds?
Keep soil consistently moist but not waterlogged—rice seeds rot in soggy conditions. Water gently daily (or use a misting bottle) until sprouts appear. Once seedlings emerge, maintain 1–2 inches of standing water (for flooded methods) or deep watering 2–3 times weekly for potted rice.
Can I grow rice from store-bought rice?
No—store-bought rice is processed and won’t sprout. Use organic, unpolished rice seeds (like jasmine or basmati varieties) from seed suppliers. Look for labels specifying "rice seed" or "grain rice" to ensure viability.
What should I do if my rice seeds aren’t sprouting?
Check these fixes:
- Soil temp: Too cold? Use a heat mat or wait for warmer weather.
- Moisture: Dry soil? Soak seeds overnight before planting.
- Depth: Too deep? Replant shallower (¼ inch max).
- Viability: Old seeds? Test a few in a damp paper towel—if no sprouts in 7–10 days, replace them.
Do rice plants need full sun?
Yes! Rice requires 6–8 hours of direct sunlight daily. In shady spots, growth slows, and yields drop. For containers, place near south-facing windows or use grow lights (12–16 hours/day). If outdoors, choose a sunny, sheltered location to avoid strong winds.
Wrapping up and next steps
Planting rice seeds with layered moisture control is a rewarding way to enjoy fresh, homegrown rice year-round—whether you're a seasoned gardener or just starting out! 🌱 By mastering the right soil, watering techniques, and container setup, you’ll create the perfect environment for your seeds to thrive.
Remember, patience and consistency are key, and soon you’ll be harvesting your own delicious rice.
Ready to take the next step? Start small with a single container or tray, and once you’ve nailed the basics, expand your setup. Happy planting—your future harvest is waiting! 🌾