Propagation
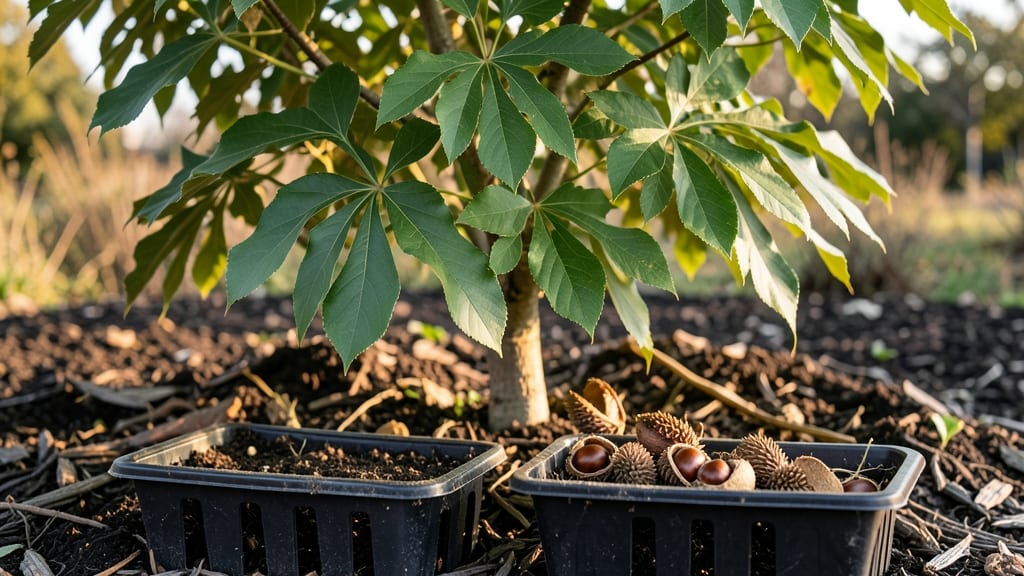
Planting buckeye seeds this fall guarantees you'll see those iconic white flowers next spring—if you do it right. 🌱 I learned the hard way that skipping cold stratification means months of waiting for seeds that never sprout.
The trick is mimicking nature's winter chill, which breaks dormancy and triggers reliable germination.
Start with fresh seeds in a 50/50 mix of potting soil and perlite—buckeyes hate soggy roots. Plant them 1-2 inches deep in a container with drainage holes, then refrigerate the whole setup for 8-12 weeks at 35-45°F.
This cold stratification step is non-negotiable; without it, you're gambling with your time and patience.
By late winter, you'll spot tiny green shoots breaking through the soil. Keep them in bright, indirect light and maintain even moisture—never let the mix dry out completely.
These seedlings grow slowly at first but reward you with 3-4 foot trees by their third year, complete with glossy leaves and those signature seed pods.
Perfect for gardeners in USDA zones 4-9, buckeyes thrive in partial shade and tolerate poor soil. The real magic happens when you plant them near patios or lawns—their height and dramatic blooms make them a standout focal point. Here's how to get every seed to perform.
📚 In This Guide
- What you need
- Instructions
- Tips and common mistakes
- Wrapping up and next steps
What you need
- ● Buckeye seeds: 3–5 fresh, plump seeds (harvested in fall or purchased from a reputable supplier).
- ● Cold stratification setup: 1 small paper towel or coffee filter (or a breathable seedling tray with paper inserts).
- ● 1 ziplock bag (quart-sized) or a sealed container with ventilation holes.
- ○ 1–2 tablespoons of moist peat moss or vermiculite (optional but helpful for moisture retention).
- ● Refrigerator: A standard fridge (34–40°F / 1–4°C) for stratification (60–90 days).
- ● Planting pots: 3–4 small pots (4–6 inches deep) with drainage holes, or a seedling tray.
- ● Potting mix: Well-draining, seed-starting mix (avoid garden soil—it’s too dense!).
- ● Spray bottle: For gentle watering (no drowning seeds!).
- ● Grow lights or sunny windowsill: A south-facing window or LED grow lights (12–16 hours/day) for seedlings.
- ● Humidity dome or plastic wrap (to retain moisture during germination).
- ● Seedling heat mat (if your home runs cold).
- ● Fertilizer (balanced, low-nitrogen like 5-5-5 once seedlings sprout).
- ● Label maker or popsicle sticks (to track seed varieties).
- ● Patience (and a journal to log progress—science is fun! 📝).
Step-by-Step instructions for planting buckeye seeds
Cold stratification is the secret to breaking buckeye seeds' dormancy—here's how I guarantee strong germination next spring.
🌱 Step 1: Harvest and Clean the Seeds
Collect mature buckeye seeds from fallen seed pods in late fall or early winter. The seeds are the large, glossy nuts inside—remove any fibrous husk material and rinse them thoroughly under cool water to remove any remaining debris. I like to soak them for 24 hours in a bowl of water to help loosen any residual pod material clinging to the seed coat.
After soaking, gently scrub the seeds with a soft brush to remove any remaining residue. This ensures the seed coat is clean and ready for the stratification process. Pat them dry with a paper towel and let them air-dry completely for 1-2 days before moving to the next step. The goal is to start with completely dry seeds—any moisture left will encourage mold during stratification.
💧 Step 2: Perform Cold Stratification
Fill a sealed plastic bag with the dry seeds and add just enough damp (not soaking) peat moss or perlite to surround them completely. Moisten the peat moss or perlite until it feels like a wrung-out sponge—it should hold moisture but not drip water. This creates the ideal humid environment for stratification.
Seal the bag tightly and place it in your refrigerator's crispier drawer (the coldest section, typically 35-40°F). Store the bag in a way that the seeds remain fully submerged in the moist medium. Check the bag every 2-3 weeks—if the medium feels dry, lightly mist it with water. The seeds need to stay consistently moist but not waterlogged during the entire 90-120 day stratification period.
☀️ Step 3: Plant Stratified Seeds in Containers
Once stratification is complete, fill 4-inch diameter pots with a well-draining seed-starting mix (never garden soil). Plant each seed about 1 inch deep—buckeye seeds are large, so they need plenty of room to develop. I use a small dibber or pencil to create a hole just the right depth, then place one seed in each pot and cover it lightly with additional mix.
Water the pots gently until the soil is evenly moist but not soggy. Place the pots in a warm location (around 65-75°F) with bright, indirect light. Avoid direct sunlight at this stage—you want the seeds to focus on root development rather than leaf growth. Germination can take 2-4 weeks, so be patient and maintain consistent moisture in the soil.
🌿 Step 4: Transplant and Provide Outdoor Conditions
When seedlings reach 4-6 inches tall and have developed 2-3 sets of true leaves, they're ready for transplanting. Choose a location with partial shade to full sun—buckeye trees thrive in well-draining soil with consistent moisture. Dig a hole twice as wide as the root ball but only as deep as the container to avoid burying the stem too deeply.
Water the seedling thoroughly before transplanting to reduce shock. After planting, water deeply again to settle the soil around the roots. Mulch the base with 2-3 inches of organic mulch to retain moisture and regulate soil temperature. Buckeye seedlings are slow to establish, so keep the soil consistently moist (but not waterlogged) for the first 6-8 weeks after transplanting.
Tips & tricks for perfect buckeye seed germination
A few strategic adjustments can make all the difference between seeds that sprout and seeds that disappoint.
Timing Secret: The 24-hour soak in Step 1 isn't just about cleaning—it's about mimicking natural winter moisture exposure. Use room temperature water (around 75°F) to prevent shocking the seeds. If you're short on time, you can reduce this to 12 hours, but germination rates may decrease slightly. I've found that soaking in a sealed container with a lid helps maintain consistent moisture levels without overwatering.
Stratification Strategy: In Step 2, the 90-120 day cold stratification period is non-negotiable for buckeye seeds, but there's a trick to maximize success. Place a small piece of wet paper towel in the sealed bag with your seeds to create an additional moisture barrier. This helps maintain humidity without needing to check every 2-3 weeks. Also, if your refrigerator's crispier drawer doesn't get down to 40°F, consider using a dedicated seed stratification fridge or even a DIY setup with a styrofoam cooler and ice packs.
Planting Precision: When planting in Step 3, the 1-inch depth is crucial—but don't just eyeball it. Use a ruler or measuring stick to ensure consistency across all pots. Buckeye seeds need this specific depth to prevent rot while allowing sufficient root development. I've had better success using a seed-starting mix with perlite added (about 20% perlite) to improve drainage without compromising moisture retention.
Transplanting Transition: The 6-8 week post-transplant moisture window in Step 4 is where most failures happen. Instead of watering on a schedule, I use the "finger test"—stick your finger about 1 inch into the soil. If it feels dry, water until moisture reaches that depth. This method prevents both underwatering and soggy soil conditions that can cause root rot. A drip irrigation system set to shallow depth works beautifully for maintaining consistent moisture during this critical period.
Pro Tips for Planting Buckeye Seeds
- A few strategic adjustments can make all the difference between seeds that sprout and seeds that disappoint.
- Timing Secret: The 24-hour soak in Step 1 isn't just about cleaning—it's about mimicking natural winter moisture expo...
- Stratification Strategy: In Step 2, the 90-120 day cold stratification period is non-negotiable for buckeye seeds, bu...
Frequently asked questions
Got questions about planting buckeye seeds? You’re not alone—these seeds can be tricky!
Here are answers to the most common concerns to help you succeed with your cold stratification project.
How long does cold stratification take for buckeye seeds?
Buckeye seeds typically need 8–12 weeks of cold stratification (40–50°F) to break dormancy. Start this process in late fall or early winter so they’re ready to plant in early spring. Pro tip: Check moisture levels monthly—seeds should stay damp but not soggy!
Can I speed up germination if I forget to stratify?
Unfortunately, no—buckeyes require cold stratification to germinate. Skipping this step may result in little to no sprouting. If you missed the window, try storing seeds in a refrigerator (not freezer) with damp paper towels until next fall.
What’s the best soil mix for planting buckeye seeds?
Use a well-draining, slightly acidic mix (pH 6.0–7.0) like:
- 60% peat moss or coco coir
- 30% perlite or sand
- 10% compost
Why aren’t my buckeye seeds sprouting after stratification?
Common culprits:
- Too dry or too wet soil (aim for consistently moist)
- Seeds planted too deep (max ½ inch)
- Poor light (they need bright, indirect light post-stratification)
- Old seeds (buckeyes lose viability after 2–3 years)
Can I grow buckeye seeds indoors first?
Yes! Start seeds in small pots (2–3 inches deep) indoors under grow lights (12–14 hours/day). Transplant outdoors after the last frost when seedlings are 3–4 inches tall. Just remember: Buckeyes are slow growers—patience is key!
Wrapping up and next steps
Planting buckeye seeds is a rewarding journey that unlocks the beauty of these iconic trees—but patience and the right techniques are key. By mastering cold stratification and providing consistent care, you’ll set the stage for vibrant growth next spring. 🌱
Now that you’re armed with the know-how, take the next step: gather your seeds and start your stratification process today. Whether you’re a seasoned gardener or a curious beginner, every small action brings you closer to watching those first leaves unfurl. Happy planting!