
Propagation
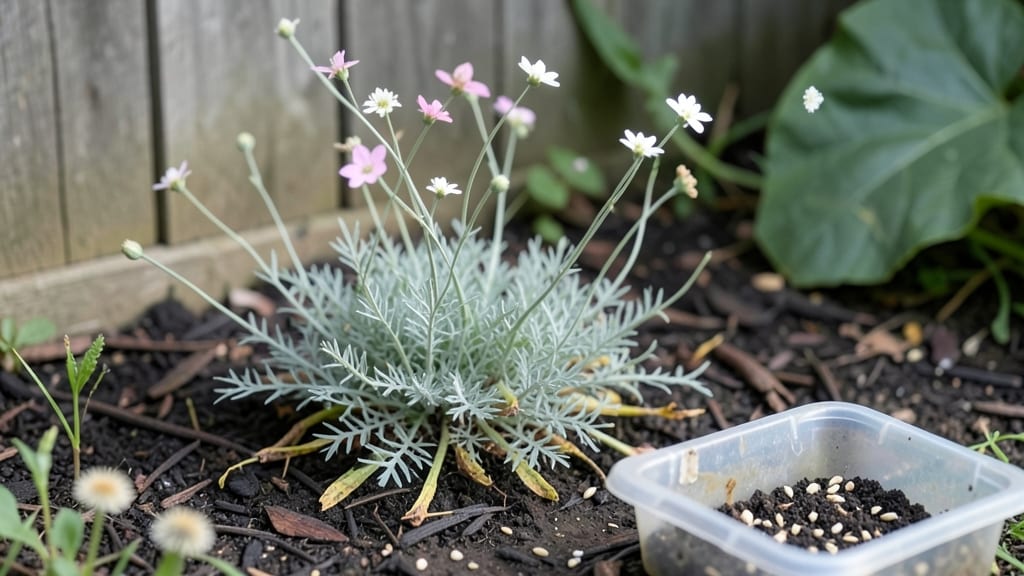
Planting gypsophila seeds transforms your garden into a dreamy, cloud-like wonder next spring. 🌿 I’ve grown gypsophila for years, and the secret to those lacy white blooms starts with a little winter patience—cold stratification is the game-changer that makes seeds germinate reliably.
Without it, you’ll be staring at empty soil come springtime.
The process is simpler than it sounds: gather seeds, mix them with damp sand, and tuck them in the fridge for 6–8 weeks. You’ll need well-draining soil, a sunny spot, and a gentle touch when transplanting those delicate seedlings.
Most gardeners overwater or crowd the plants—both kill gypsophila faster than anything else.
By summer, you’ll have airy, feathery clouds of blooms that dance in the breeze, perfect for cutting gardens or filling gaps between taller perennials. The key is spacing them 6–12 inches apart so they spread without fighting for space.
Once established, they’re nearly maintenance-free—just deadhead spent blooms to keep them flowering all season.
Works best in zones 3–9 and pairs beautifully with roses, peonies, or lavender. The trickiest part? Not letting them dry out during germination. Here’s how to nail it every time—no more missed opportunities for those magical, ethereal displays.
📚 In This Guide
- What you need
- Instructions
- Tips and common mistakes
- Wrapping up and next steps
What you need
- ● Gypsophila seeds – Choose Gypsophila paniculata (common baby’s breath) or other varieties. Aim for 10-20 seeds per planting area (adjust based on desired density).
- ● Cold stratification setup: Small paper towel or peat moss (moistened, not soggy)
- ● Sealed ziplock bag (gallon-sized works well)
- ● Refrigerator (set to 34–40°F for 4–6 weeks)
- ● Seed-starting containers – 4–6 inch pots or seed trays with drainage holes (2–3 per variety).
- ● High-quality seed-starting mix – Sterile, well-draining (avoid garden soil). 1–2 cubic feet per batch.
- ● Spray bottle – For gentle watering (16 oz capacity).
- ● Plastic wrap or humidity dome – To retain moisture during germination.
- ● Grow lights or sunny windowsill – 6–8 hours/day of light (LED grow lights preferred).
- ● Plant labels – Waterproof markers + stakes or toothpicks.
- ● Seed heat mat – Speeds up germination (70–75°F range).
- ● Fertilizer – Balanced liquid fertilizer (5-5-5 or 10-10-10) diluted to ½ strength for seedlings.
- ● Fine misting nozzle – For precision watering without disturbing seeds.
- ● Grow tent or propagator – Controls humidity and light for fussy seedlings.
- ● Pruning shears – For pinching back leggy seedlings later.
Step-by-Step instructions for planting gypsophila seeds
Cold stratification unlocks gypsophila’s potential—here’s how to break dormancy and grow those signature fluffy clouds.
🌱 Step 1: Prepare Seeds with Cold Stratification
Gypsophila seeds require 6-8 weeks of cold stratification to break dormancy. Mix the seeds with dampened sand or peat moss in a sealed container—about 1 part seeds to 3 parts moisture-retentive medium. Store in a 35-40°F environment, like a refrigerator’s crisper drawer, for 42-56 days. Check weekly: the mix should stay evenly damp but not soggy—squeeze gently to test.
Real talk: Skipping stratification means waiting months for germination, if it happens at all. I’ve tried planting untreated seeds in spring—zero results. The cold period mimics winter’s natural cycle, signaling seeds it’s safe to sprout. After stratification, you’ll see tiny white roots forming—this is your cue to proceed.
🪴 Step 2: Sow in Light, Well-Draining Soil
Fill 4-inch pots with a mix of 50% sterile potting soil and 50% perlite—gypsophila despises compacted roots. Sprinkle 2-3 stratified seeds per pot (they’re tiny, so use tweezers) on the soil surface—do not bury. Press lightly to ensure contact with the medium, then mist with room-temperature water until the surface glistens but doesn’t pool.
Cover the pots with clear plastic wrap to retain humidity, and place in a bright, indirect light spot (no direct sun yet). Germination takes 10-21 days at 65-70°F. Watch for first true leaves—they’ll emerge as tiny, feathery green rosettes. If condensation forms on the plastic, prop the cover slightly to prevent fungal rot.
☀️ Step 3: Transition to Sun and Thin Seedlings
Once seedlings show 2-3 sets of true leaves (about 4-6 weeks after sowing), remove the plastic and move pots to a south-facing windowsill or under grow lights for 12-14 hours daily. Gypsophila thrives in full sun, but harden off gradually: start with 2 hours of direct light, then increase by 1 hour daily over 7-10 days to avoid leaf scorch.
Thin seedlings to one per pot when they’re 2 inches tall, using scissors to snip at soil level. The remaining plant will grow fuller and bushier—crowded gypsophila becomes leggy and sparse. Pinch back the tips of surviving seedlings to encourage branching (use your fingernail to make a clean break just above a leaf node).
⏰ Step 4: Acclimate and Transplant Outdoors
Wait until after the last frost and soil temperatures reach at least 55°F before transplanting. Choose a well-drained, slightly alkaline spot (gypsophila loves limestone-rich soil). Dig holes twice as wide as the root ball but only as deep—planting too deep suffocates the shallow roots. Space plants 6-8 inches apart in rows 12 inches apart for that signature cloud effect.
Water deeply once after transplanting, then let the soil dry slightly between waterings—gypsophila hates soggy feet. Mulch with 1 inch of gravel or coarse sand to improve drainage and deter weeds. You’ll see new growth in 2-3 weeks if conditions are right. Avoid fertilizing until 4-6 weeks post-transplant—gypsophila prefers lean soil over rich amendments.
Tips & tricks for perfect gypsophila germination
Mastering gypsophila’s delicate germination process transforms those tiny seeds into lush, cloud-like blooms—here’s how to sidestep the common pitfalls.
Cold Stratification Precision: The 6-8 week stratification window at 35-40°F is non-negotiable—gypsophila seeds won’t break dormancy without it. For consistent results, use a refrigerator’s crisper drawer (most stable temperature zone) rather than the freezer or door shelves, which fluctuate wildly. I’ve found that wrapping the container in a thin towel helps maintain even moisture distribution during the 42-56 day period. The key visual cue: when you see those first white root hairs emerging, that’s your exact moment to proceed to Step 2.
Moisture Management: Gypsophila seeds need to stay evenly damp but never soggy during stratification. Here’s my foolproof test: squeeze the sand/peat mix gently—it should feel like a wrung-out sponge. If water drips out, you’ve overdone it; if it crumbles when pressed, add a tiny mist. In Step 2, when sowing, use a spray bottle with room-temperature water to avoid shocking the seeds with cold or hot water. The surface should glisten like a dew-covered lawn, not form puddles.
Light Transition Strategy: In Step 3, that gradual sun hardening (starting with just 2 hours of direct light) prevents leaf scorch while building resilience. I recommend using a timer for your grow lights to maintain that precise 12-14 hour daily cycle—gypsophila’s natural photoperiod. For windowsill growers, rotate pots daily so all sides receive equal light exposure. Watch for the first true leaves emerging as feathery rosettes—they’ll appear delicate but should stand upright rather than collapse when touched.
Transplanting Timing: Waiting for soil temperatures to reach at least 55°F before transplanting is critical—gypsophila’s shallow roots are extremely sensitive to cold. I always check soil temp with a thermometer at midday for accuracy. When planting, that "twice as wide but only as deep" rule prevents root suffocation. For extra insurance, I mix a handful of coarse sand into the planting hole to improve drainage right at the root zone.
Pro Tips for Planting Gypsophila Seeds
- Mastering gypsophila’s delicate germination process transforms those tiny seeds into lush, cloud-like blooms—here’s how to sidestep the common pitfalls.
- Cold Stratification Precision: The 6-8 week stratification window at 35-40°F is non-negotiable—gypsophila seeds won’t break dormancy without it.
- Moisture Management: Gypsophila seeds need to stay evenly damp but never soggy during stratification.
Frequently asked questions
Got questions about growing these delicate blooms? You’re not alone! Here are the most common concerns—and their solutions—to help you cultivate lush gypsophila with confidence.
Do gypsophila seeds need cold stratification, and how long should I leave them in the fridge?
Yes! Gypsophila seeds love cold stratification—it mimics winter and breaks dormancy. Place them in a sealed bag with damp paper towels, then refrigerate for 4–6 weeks. Pro tip: Label the bag with the date to avoid over-stratifying. Once sprouts appear (usually in 2–4 weeks after planting), move them to a sunny windowsill or grow light.
How long does it take for gypsophila seeds to germinate after planting?
Patience is key! After cold stratification, germination typically takes 14–30 days at 60–70°F (15–21°C). Keep the soil consistently moist (not soggy) and use a humidity dome or plastic wrap to speed things up. If nothing sprouts after 6 weeks, try re-stratifying a fresh batch—some seeds are stubborn!
Can I plant gypsophila seeds directly outside, or do they need to start indoors?
For best results, start indoors 8–10 weeks before your last frost. Gypsophila seeds are tiny and delicate, making them vulnerable to outdoor pests and uneven soil temps. However, if you’re in a mild climate (Zone 7+), you can direct-sow in early spring after soil warms to 50°F (10°C). Just cover seeds lightly with soil—they need light to germinate!
Why aren’t my gypsophila seedlings thriving? Troubleshooting weak or leggy plants.
Leggy or weak seedlings often mean too little light or overcrowding. Move trays to a sunny window or under grow lights (12–16 hours/day). Thin seedlings to 1 inch apart once they have 2–3 true leaves. Yellowing leaves? Check for overwatering—gypsophila hates soggy roots. A balanced fertilizer (diluted to half-strength) can also give them a boost.
Are there any easy alternatives to gypsophila for filling gaps in floral arrangements?
If gypsophila feels finicky, try these low-maintenance fillers:
- Baby’s breath (Gypsophila paniculata)—hardier than annual varieties but still fluffy.
- Statice (Limonium)—drought-tolerant and comes in vibrant colors.
- Sweet alyssum (Lobularia maritima)—fast-growing, fragrant, and great for borders.
- Cornflower (Centaurea cyanus)—self-seeds easily and adds cheerful pops of blue.
Wrapping up and next steps
Growing gypsophila from seeds is a rewarding journey that rewards patience with breathtaking, ethereal blooms! 🌸 With the right cold stratification technique and a little care, you’ll soon be enjoying fluffy clouds of pink, white, or purple in your garden.
Remember, the key is consistency—whether it’s chilling those seeds or keeping them moist as they sprout.
Now that you’re armed with the know-how, roll up your sleeves and get planting! 🌱 Start with a small batch, experiment with varieties, and soon you’ll be sharing your lush gypsophila displays with neighbors. Happy gardening—your future floral masterpiece awaits!