
Propagation
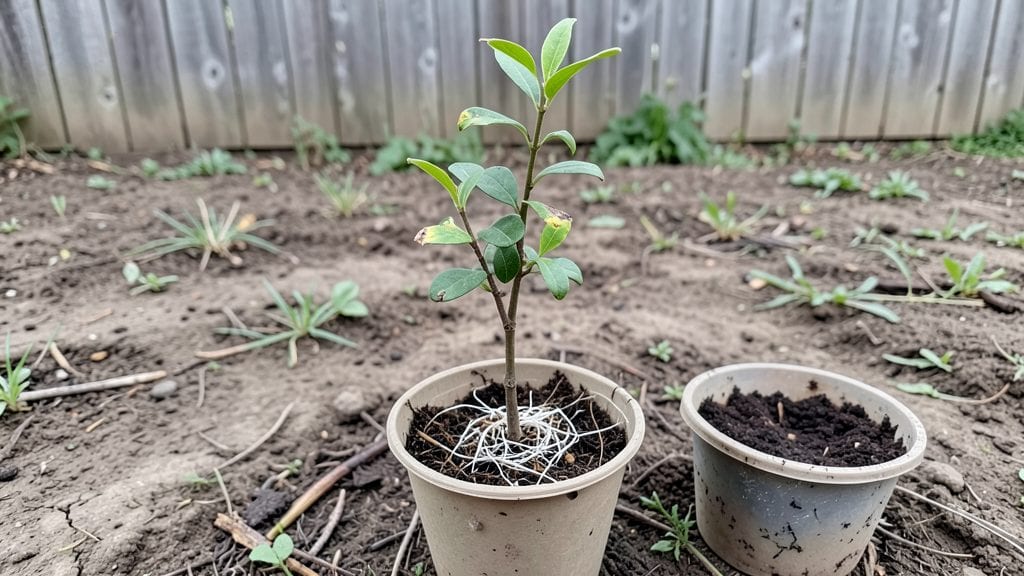
Turn your kitchen scraps into a future fruit bonanza with pomegranate seed propagation—if you know the tricks. 🌱 The seeds inside those jewel-toned arils hold the potential for a 10-foot tree, but they need patience and the right conditions to break dormancy.
I’ve turned grocery-store seeds into thriving saplings by mimicking their natural germination cycle, and you can too.
The secret lies in cold stratification and consistent moisture. You’ll need a shallow tray, damp paper towels, and a few weeks of refrigerator time to trick the seeds into thinking winter has passed.
Most people rush this step, but taking the time ensures stronger seedlings that won’t flop when transplanting. Think of it as giving your seeds a winter vacation before their spring planting party.
By the time you’re ready to plant, you’ll have sturdy little sprouts with true leaves—proof they’re ready for soil. These seedlings will grow into hardy trees that produce fruit in 3-5 years, with the right care.
The first harvest might not be showstopping, but the journey of watching those first red blossoms unfold is worth every step.
Works best in zones 7-11, but with a little extra winter protection, you can try it almost anywhere. The key is staying consistent—seeds, soil, and sunlight all play their part in this slow-burning reward. Let’s get those seeds sprouting!
📚 In This Guide
- What you need
- Instructions
- Tips and common mistakes
- Wrapping up and next steps
What you need
- ● Pomegranate seeds: 5–10 fresh, plump seeds (harvested from a ripe, organic pomegranate for best results).
- ● Well-draining potting mix: 1–2 bags (look for a blend labeled for citrus or tropical plants, or mix equal parts perlite, vermiculite, and peat moss).
- ○ Small pots or seed trays: 2–4 (3–4 inches deep, with drainage holes). Optional: Biodegradable peat pots if you prefer transplanting without root disturbance.
- ● Plastic wrap or clear lid: 1 sheet (to create a humidity dome).
- ● Spray bottle: 1 (for gentle watering).
- ● Grow lights or sunny windowsill: Access to 6–8 hours of indirect light daily (south-facing windows or a 12–16 inch LED grow light work well).
- ● Seed-starting heating mat: 1 (keeps soil warm, 70–85°F, to speed up germination).
- ● Fertilizer: A balanced, water-soluble fertilizer (5-5-5 or 10-10-10, diluted to half-strength) for seedlings after 4–6 weeks.
- ● Humidity tray: 1 (if your space is dry, place pots on a tray filled with pebbles and water).
- ● Pruning shears: Small pair (for trimming leggy seedlings later).
- ● A warm, bright spot (pomegranate seeds germinate best in 70–85°F soil).
- ● Patience! Germination can take 2–4 weeks (sometimes longer).
- ● Dedication to care: Seedlings need consistent moisture and light to thrive.
Step-by-step instructions for growing pomegranate trees from seeds
Here's how I grow sturdy pomegranate seedlings from grocery store seeds—no nursery needed.
🌱 Step 1: Extract and Prepare the Seeds
Save the seeds from a fresh, ripe pomegranate—these germinate best. Scoop them out and spread them on a paper towel to dry for 24 hours. This prevents rot during the next steps. I like to work with seeds that have a slightly rough, papery coating still attached—they handle moisture better.
Fill a small bowl with lukewarm water and soak the seeds for 24-48 hours. You'll see the papery coating soften and begin to loosen. Swirl the water occasionally to keep the seeds submerged. After soaking, gently rub the seeds between your fingers to remove any remaining coating—this speeds up germination.
🪴 Step 2: Plant Seeds in Moistened Potting Mix
Use the 4-inch biodegradable pots filled with 1 gallon of potting mix (sterilized to prevent disease). Moisten the mix until it feels like a damp sponge—squeeze a handful, and just a few drops should come out. Press the soil down lightly to remove air pockets, then create ¼-inch-deep furrows with your finger.
Place 2-3 seeds per pot in each furrow, spacing them 1 inch apart. Cover them with a thin layer of soil—just enough to hide the seeds but not bury them too deeply. I tap the pot gently on the table to settle the soil around the seeds without compacting it. This ensures good root contact once they sprout.
💧 Step 3: Provide Warmth and Consistent Moisture
Place the pots in a warm, bright location—I use a seedling heat mat set to 75-85°F for the first 2-3 weeks. This warmth mimics the Mediterranean climate pomegranates love and speeds up germination. Keep the soil evenly moist but never soggy—water from the bottom by placing pots in a tray of ½ inch of water for 10 minutes every 2-3 days.
Cover the pots loosely with clear plastic wrap to retain humidity, but prop it up slightly so air can circulate. You'll see tiny sprouts in 2-4 weeks—this can vary based on seed freshness and warmth. Once 50% of seeds have sprouted, remove the plastic to prevent fungal issues. Thin to the strongest seedling per pot by snipping the others at soil level with clean scissors.
☀️ Step 4: Gradually Acclimate to Sunlight
When seedlings reach 3-4 inches tall, move them to a south-facing window or under a grow light providing 12-14 hours of light daily. Pomegranates need plenty of sun to develop strong stems. Start with 2-3 hours of direct light per day, then increase by 1 hour daily over 2 weeks to avoid sunburn.
You'll notice the leaves darken and stems thicken as they adjust. Keep the soil slightly dry between waterings—stick your finger 1 inch deep, and water only when it feels dry. Fertilize lightly with ½ teaspoon of balanced fertilizer (10-10-10) mixed into the soil every 4-6 weeks to encourage steady growth.
⏰ Step 5: Transplant and Prepare for Outdoor Life
After 3-4 months, when seedlings are 12-18 inches tall, transplant them into 5-gallon containers filled with 3 gallons of potting mix. Handle the roots gently—pomegranates are sensitive to root disturbance. Bury the stem 1 inch deeper than it was in the small pot to encourage a sturdy trunk.
Place the containers outside in a sheltered spot for 1 week, gradually increasing sun exposure over 2 weeks. Once they tolerate full sun without wilting, they're ready for the ground—or you can keep them in containers for years. Mulch with 1 inch of organic mulch to retain moisture and protect roots from temperature swings.
Tips & tricks for perfect pomegranate seed propagation
A few simple tricks will help you avoid common pitfalls and maximize your success rate with pomegranate seeds.
Seed Selection Matters: Choose seeds from a fresh, ripe pomegranate—the fresher the fruit, the higher your germination rate. I always look for seeds that still have their papery coating intact, as this helps them resist rot during the initial drying period. If you're using store-bought seeds, soak them for the full 24-48 hours to ensure the coating softens completely before planting. This extra time makes all the difference in preventing mold.
Warmth is Key: Those first 2-3 weeks with the heat mat at 75-85°F are critical. If your home stays cooler than 70°F, consider using a seedling heat mat or placing pots on top of your refrigerator. Warmth speeds up germination, and you'll see those first sprouts in 2-4 weeks instead of waiting months. I've seen germination rates double when maintaining consistent warmth during this phase.
Watering Technique: The 10-minute bottom-watering method every 2-3 days prevents overwatering while ensuring even moisture. I use a tray with ½ inch of water and let the pots soak up what they need—this avoids soggy soil that can rot seeds. After sprouts appear, let the top inch of soil dry out slightly between waterings to encourage deeper root growth.
Sunlight Transition: When your seedlings hit 3-4 inches, don't rush them into full sun. Start with just 2-3 hours of direct light daily and increase gradually over 2 weeks. I've seen seedlings get sunburned when moved too quickly—look for leaves that darken and stems that thicken as they acclimate. This slow transition builds resilience for their future outdoor life.
Pro Tips for Pomegranate Seed Propagation
- A few simple tricks will help you avoid common pitfalls and maximize your success rate with pomegranate seeds.
- Seed Selection Matters: Choose seeds from a fresh, ripe pomegranate—the fresher the fruit, the higher your germination rate.
- Warmth is Key: Those first 2-3 weeks with the heat mat at 75-85°F are critical.
Frequently asked questions
Got questions about growing pomegranates from seeds? You’re not alone! Here are some of the most common concerns—and straightforward answers—to help you succeed.
Can I grow a pomegranate tree from seeds bought at the grocery store?
Store-bought pomegranate seeds will germinate, but the resulting tree may not produce fruit identical to the parent plant. Pomegranates are self-pollinating but can take 5–10 years to bear fruit. For faster results, consider grafting or buying a young tree from a nursery.
How long does it take for pomegranate seeds to sprout?
Germination usually takes 2–4 weeks if kept in warm (70–80°F), moist conditions. Place seeds in a tray with damp paper towels or soil, and cover lightly with plastic wrap. Patience is key—some seeds may take up to 6 weeks. Keep the soil consistently moist but not soggy!
What’s the best temperature for germinating pomegranate seeds?
The ideal temperature range is 70–80°F (21–27°C). Use a seedling heat mat if your home runs cooler. Avoid cold drafts or direct sunlight until sprouts appear. Once seedlings emerge, move them to a sunny spot (6+ hours of light daily) to prevent legginess.
Why aren’t my pomegranate seeds sprouting?
Common culprits include:
- Dry soil: Keep seeds moist but not waterlogged.
- Cold temps: Seeds need warmth to activate.
- Old seeds: Use fresh seeds for best results.
- Poor airflow: Prevent mold by uncovering trays daily.
How big should my pomegranate seedling be before transplanting?
Wait until seedlings have 2–3 true leaves (not just cotyledons) and are at least 3–4 inches tall. Harden them off for a week by gradually exposing them to outdoor conditions before planting in the ground or a larger pot. Choose a spot with full sun and well-draining soil.
Wrapping up and next steps
Growing a pomegranate tree from store-bought seeds is a rewarding journey that connects you to nature’s bounty—and yes, it’s totally doable! 🌱 With patience, the right conditions, and a little care, you can nurture a thriving tree that may even produce fruit someday.
Start small, stay consistent, and celebrate each growth milestone along the way.
Ready to take the next step? Plant your first seed today! If you’re eager to learn more, explore local gardening forums or check out resources on pomegranate varieties suited to your climate. Happy growing!