
Lawn
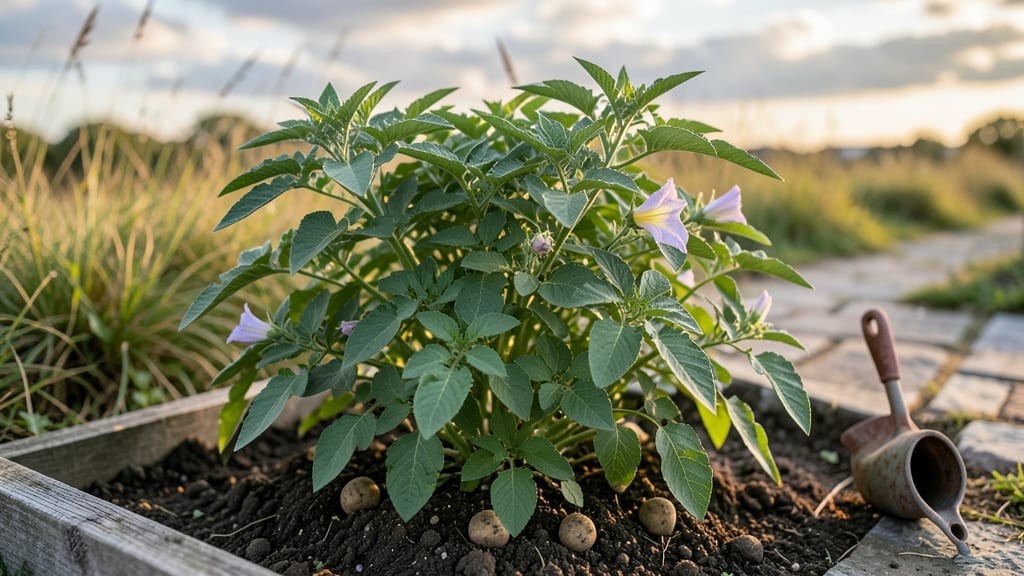
Growing potatoes from seed pods transforms your yard into a dual-purpose powerhouse—edible harvests and buzzing pollinator highways. 🌱 I planted my first seed potatoes last spring, and within months, my fence line became a lush, productive hedge teeming with bees.
The key difference? Seed potatoes are actual potato pieces with eyes, not the tiny true seeds you’d find in a store-bought bag.
Start with certified seed potatoes from a nursery—those little sprouted chunks you can find in bags. Cut them into 2-inch pieces with at least one eye each, let them dry for a day, then plant them 4-5 inches deep in loose, well-draining soil.
In cooler zones, get them in the ground 2-3 weeks before last frost; warmer climates wait until soil hits 45°F. The secret to success? Keep the soil consistently moist but never soggy.
By early summer, you’ll see those familiar potato leaves shooting up, but the real magic happens underground. Every few weeks, mound soil around the stems to encourage more tubers to form. When the plants flower and leaves yellow, it’s harvest time—dig carefully to avoid bruising those tender potatoes.
My first yield was enough for mashed potatoes, fries, and sharing with neighbors—all from a 10-foot fence line.
This method works in raised beds, containers, or along property edges, making it perfect for small spaces. Plus, the foliage provides year-round greenery while attracting bees and butterflies. Ready to turn your yard into both a pantry and a pollinator paradise? Let’s dig in.
The Hidden Triggers Behind Tubers
If your potato plants are producing seed pods instead of the usual tubers, don’t panic—it’s a fascinating (and sometimes frustrating) quirk of nature! These unexpected pods aren’t a sign of a failed crop; they’re actually a plant’s survival strategy.
But why does it happen? Let’s break down the key factors that turn your spuds into seed producers.
Potatoes (Solanum tuberosum) are perennial plants in their native South American habitats, meaning they naturally produce both tubers (for energy storage) and seeds (for reproduction). However, most commercial varieties have been bred to prioritize tuber production.
When conditions aren’t ideal for tuber formation—like short growing seasons or stress—the plant defaults to its ancestral survival mode and shifts energy toward seed pods instead.
💡 Pro Tip: If you’re growing heirloom or organic varieties, seed pod formation is more common. These plants retain closer ties to their wild ancestors and may produce pods as a reproductive insurance policy.
Potatoes thrive in cool, moderate climates. When exposed to extended heat waves (above 80°F/27°C) or insufficient daylight (less than 12–14 hours of sun), the plant’s metabolic priorities shift. High temperatures disrupt tuber formation by:
- Inhibiting starch synthesis: Tubers need cool nights to convert sugars into starch. Heat accelerates sugar breakdown, leaving the plant energy-starved.
- Triggering flowering: Warmth signals the plant to focus on reproduction (seed pods) rather than storage (tubers). Think of it like a plant version of "better safe than sorry!"
- Shortening the growing season: Early heat can force the plant to mature faster, leaving less time for tuber development.
🌡️ Actionable Fix: Use shade cloth during heatwaves or plant in partial shade (especially in hot climates). Extend the season with row covers to maintain cooler soil temps.
Potatoes are sensitive to moisture fluctuations. Both drought stress and overwatering can disrupt tuber formation and push the plant toward seed production:
| Issue | Effect on Plant | Solution |
|---|---|---|
| Drought Stress | Shallow roots struggle to store water, forcing the plant to prioritize seed survival over tubers. | Mulch heavily with straw or grass clippings to retain moisture. Water deeply 1–2 inches per week. |
| Overwatering | Soggy soil leads to root rot and nutrient leaching, starving the plant of energy for tubers. | Ensure well-draining soil (sandy loam ideal). Avoid waterlogging—potatoes hate "wet feet." |
| Nitrogen Deficiency | Too little nitrogen delays tuber growth, while excess nitrogen promotes leafy growth at the expense of tubers. | Test soil and amend with balanced fertilizer (10-10-10). Side-dress with compost mid-season. |
✨ Bonus Insight: Seed pods often appear when potatoes are planted too late in the season. The plant senses limited time to grow tubers and switches to seeds instead.
When potato plants experience physical stress—like hilling failure, pests, or mechanical injury—they may abandon tuber production in favor of seeds. Here’s how:
- Exposed tubers: If hills collapse or soil erodes, tubers get sunburned or dried out, signaling the plant to "save the genes" via seeds.
- Pest pressure: Wireworms, Colorado potato beetles, or even deer chewing leaves can stress the plant into reproductive mode.
- Root disturbance: Over-cultivating or over-tilling can damage the root system, triggering a survival response.
🛡️ Preventative Tip: Use row covers early in the season to deter pests. Hill soil gently (but firmly) to protect tubers from light exposure.
Understanding these triggers helps you work with your plants rather than against them. Next up: How to encourage tubers (or harvest those seed pods for next year’s crop!)
Fixing Common Seed Pod Problems
When your potato seed pods (or tuberous plants) aren’t thriving, the first step is identifying the root cause—then taking action. Below are practical, step-by-step solutions for the most frequent issues, from pests to poor growth, plus prevention tips to keep your plants healthy and productive.
If your plants look chewed, wilted, or covered in spots, pests or diseases are likely the culprits. Act fast to save your harvest!
🔥 Blight or Fungal Issues (Brown Spots, Wilting)
Fix It:
- Remove infected plants immediately 🚮—don’t compost them; toss in a sealed trash bag.
- Apply copper fungicide (like Bordeaux mixture) every 7–10 days for prevention.
- Improve airflow by spacing plants 12–18 inches apart and pruning foliage to dry quickly.
- Water at the base (not overhead) to keep leaves dry.
Prevention Tips: ✔ Rotate crops—don’t plant potatoes (or nightshades like tomatoes) in the same spot for 3+ years. ✔ Choose resistant varieties (e.g., ‘Red LaSoda’ or ‘Yukon Gold’ tolerate blight better). ✔ Mulch with straw to reduce soil splashing onto leaves.
🐜 Wireworms or Cutworms (Holes, Missing Tubers)
Fix It:
- Handpick larvae at dusk (they’re sluggish then) and drop them in soapy water.
- Use floating row covers early in the season to block egg-laying pests.
- Add beneficial nematodes (Heterorhabditis bacteriophora) to the soil—they hunt wireworms naturally.
- Plant trap crops like radishes or mustard greens nearby to lure pests away.
Prevention Tips: ✔ Test your soil—wireworms thrive in dry, sandy soil. Amend with compost to deter them. ✔ Avoid fresh manure near planting (it attracts pests). ✔ Interplant with onions or garlic—their scent repels many soil-dwelling bugs.
If your seed pods are stunted, yellowing, or producing few tubers, the issue might be nutritional, environmental, or cultural.
💡 Nutrient Deficiencies (Yellow Leaves, Stunted Growth)
Fix It: Diagnose the problem with a quick leaf color check:
- Pale green/yellow leaves? → Nitrogen deficiency
- Fix: Side-dress with compost or blood meal (1 tbsp per plant) or use a balanced organic fertilizer (5-5-5).
- Purple stems/leaves? → Phosphorus deficiency
- Fix: Add bone meal (2 tbsp per plant) or wood ash (sprinkle lightly).
- Brown leaf edges? → Potassium deficiency
- Fix: Use greensand or kelp meal (follow package rates).
Prevention Tips: ✔ Test your soil before planting—ideal pH for potatoes is 5.0–6.5. ✔ Avoid over-fertilizing with nitrogen late in the season (it encourages foliage over tubers). ✔ Mulch heavily (4–6 inches of straw) to retain moisture and nutrients.
🌡️ Temperature or Water Stress (Wilting, Cracked Tubers)
Fix It:
- Adjust watering: Potatoes need 1–2 inches of water per week (more in extreme heat). Drip irrigation is best—avoid overhead watering to prevent blight.
- Shade young plants if temps exceed 90°F (use row covers or shade cloth).
- Harvest early if a heatwave hits—tubers will toughen and crack if stressed.
Prevention Tips: ✔ Plant in early spring or late summer (avoid peak heat). ✔ Choose heat-tolerant varieties like ‘Kennebec’ or ‘Russet Burbank’ for warmer climates. ✔ Mulch with straw to keep soil temps stable and moisture locked in.
If your seed pods are small or deformed, they might be competing for space or nutrients.
Fix It:
- Thin seedlings to 12–18 inches apart when they’re 4–6 inches tall.
- Hill soil around stems every 2–3 weeks to encourage deeper tuber growth (cover up to the first set of leaves).
- Harvest early if tubers are crowding—smaller, new potatoes are ready in 2–3 weeks after flowering.
Prevention Tips: ✔ Plant in rows (not clumps) for easier access and airflow. ✔ Use raised beds if your soil is heavy or poorly draining. ✔ Avoid planting too deep—seed pods need light to sprout; bury 2–3 inches max.
- 💡 Crop rotation is non-negotiable—switch families yearly (e.g., after potatoes, plant beans or grasses). - 🌡️ Monitor soil moisture—potatoes hate soggy roots but also dry spells.
Aim for consistently damp (not waterlogged). - 🐝 Invite pollinators—plant borage or nasturtiums nearby to attract bees, which boost tuber set. - ✨ Store harvested tubers properly—cure them in a cool (50–60°F), dark, humid place for 1–2 weeks before storing in a ventilated box with straw.
Remember: Most issues with potato seed pods (or tubers) are preventable with good habits. Start with healthy soil, proper spacing, and vigilant pest control, and you’ll enjoy a bountiful harvest year after year! 🌱🥔
Frequently asked questions about growing potatoes from seed
What’s the difference between seed potatoes and true potato seeds?
Seed potatoes are actual potato pieces with "eyes" (buds) that you plant directly in soil. True potato seeds are tiny, like tomato seeds, and take much longer to mature. Seed potatoes give you harvests in 2-3 months, while true seeds can take 2+ years to produce edible tubers. Most gardeners use seed potatoes for faster, easier growing.
Can I use store-bought potatoes as seed potatoes?
Technically yes, but it’s risky. Store-bought potatoes may carry diseases or have been treated to prevent sprouting. For best results, buy certified disease-free seed potatoes from a nursery. If you must use grocery store potatoes, choose organic ones and let them sprout in a bright, cool spot for 2-3 weeks before planting.
How do I know when my seed potatoes are ready to plant?
Your seed potatoes are ready when they’ve developed 1-2 inch sprouts (eyes) and feel firm to the touch. Cut larger seed potatoes into 2-inch pieces with at least one eye per piece. Let the cut pieces dry/callous for 1-2 days before planting to prevent rot. Plant with the sprouts facing up, 4-5 inches deep in loose soil.
Why are my potato plants flowering but not producing tubers?
Flowering without tubers usually means your plants are stressed from heat, drought, or poor soil. Potatoes need cool nights (below 75°F) and consistent moisture to form tubers. Try shading plants during heatwaves, mulching heavily, and watering deeply 1-2 inches per week. Some varieties (like fingerlings) produce fewer tubers but focus on quality instead of quantity.
Can I grow potatoes in containers or small spaces?
Use containers at least 12 inches deep (deeper for larger varieties). Plant one seed potato per 5-gallon container or cluster 2-3 small potatoes in a larger pot. Grow them vertically by adding potting mix as vines grow. Perfect for patios, balconies, or even hanging bags—just ensure good drainage and 10+ hours of sunlight daily.