
Vegetables
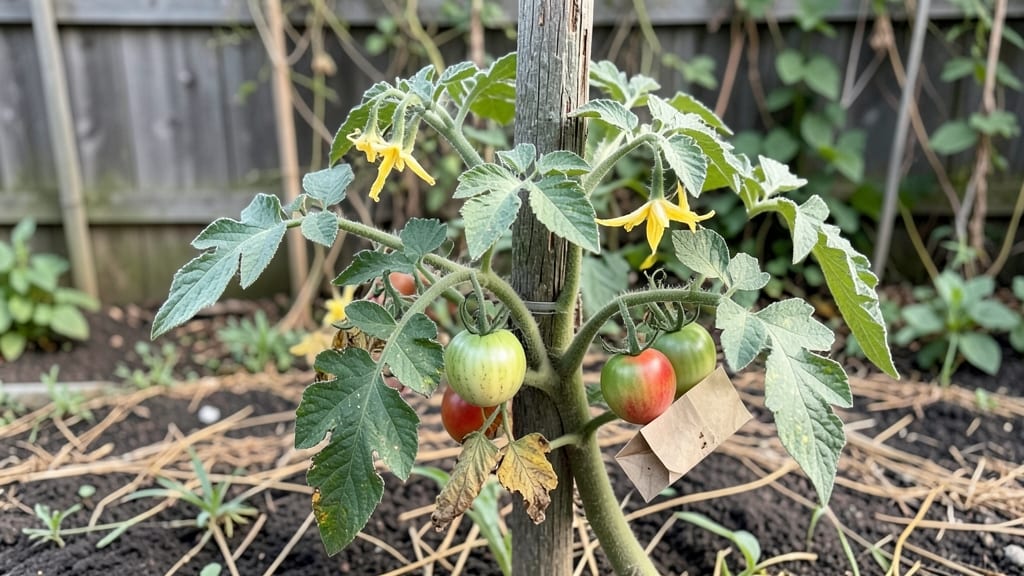
Collecting heirloom tomato seeds saves the flavors and stories of your garden. 🌱 I’ve saved seeds from my prized ‘Brandywine’ and ‘Cherokee Purple’ for years, and the process is simpler than it seems—just a little patience and a few household supplies.
The payoff? Next year’s tomatoes taste exactly like the ones you grew, not some store-bought hybrid. Plus, you’re preserving genetic diversity that matters for future gardens.
Start with fully ripe, slightly overripe tomatoes—they’ve got the most developed seeds. Cut them open, scoop out the gel-filled pulp, and ferment it in a jar for 3-5 days. This fermentation breaks down the sticky gel that clings to seeds, making them easy to clean.
You’ll know it’s ready when the seeds sink and the water smells like vinegar. Rinse them gently, then spread them on a paper towel to dry completely before storing.
Once dry, store your seeds in a cool, dark place—an airtight container with a silica packet keeps them viable for 3-5 years. The first time you plant these saved seeds and see those same heirloom flavors return, you’ll understand why gardeners go to such lengths.
It’s not just saving seeds; it’s keeping a piece of your garden’s history alive.
Mold or moisture can ruin a batch, but a little prevention goes a long way. Use sterilized jars, avoid damp towels, and label everything clearly. Even if you lose a few batches, the ones that succeed make it all worth it.
Next year’s harvest starts with this simple act of preservation.
📚 In This Guide
- What you need
- Instructions
- Tips and common mistakes
- Wrapping up and next steps
What you need
- ● Mature heirloom tomatoes: At least 3–5 ripe, healthy tomatoes per variety (more ensures genetic diversity). Choose fully colored, disease-free fruit.
- ● Paper towels or coffee filters: 1–2 sheets per tomato (unbleached, seed-free).
- ● Small bowls or containers: 1 per tomato (glass or ceramic preferred to avoid contamination).
- ● Water: Room-temperature, distilled if possible (tap water is fine for most cases).
- ● Fine-mesh strainer or cheesecloth: 1–2 pieces (for separating seeds from gel).
- ● Drying trays or paper plates: 1–2 (for seed drying).
- ● Permanent markers & envelopes: 1 envelope per variety (label with variety name, year, and any notes).
- ● Small paper clips or twist ties: To seal envelopes (prevents moisture damage).
- ● Notebook or seed-tracking app: To log varieties, harvest dates, and growing conditions.
- ● Seed-saving kit: Pre-packaged kits with strainers, labels, and storage containers (great for beginners!).
- ● Dehydrator or fan: Speeds up seed drying (critical for humid climates).
- ● Plastic zip-top bags: For short-term seed storage (transfer to envelopes later).
- ● Magnifying glass: Helps spot and remove debris from seeds.
- ● Humidity pack: Silica gel packets for long-term seed storage (keeps moisture at bay).
Step-by-step guide to collecting heirloom tomato seeds
Preserving heirloom tomato seeds is easier than you think—just follow these clear steps.
🌱 Step 1: Select the Best Tomatoes for Seed Saving
Pick tomatoes that are fully ripe and slightly overripe—this ensures the seeds are mature and viable. Look for fruits that have started to soften and may even show a few wrinkles or cracks. Avoid tomatoes that were damaged by pests or disease, as these can carry poor genetics or pathogens.
Choose at least 4-5 tomatoes from the same plant to increase genetic diversity in your saved seeds. This helps maintain the plant's true characteristics for next year. If you're saving from multiple plants, keep their seeds separate to prevent cross-pollination from affecting the variety.
💧 Step 2: Scoop Out and Ferment the Seeds
Cut open the tomatoes and scoop the gel-like pulp and seeds into a clean jar. Add warm water to cover the mixture completely—about 1 cup per 4-5 tomatoes. Stir well to break up the pulp, then let the jar sit at room temperature for 2-4 days. This fermentation process removes the gel that coats the seeds, which would otherwise prevent proper germination.
Stir the mixture once daily to keep the seeds suspended and prevent mold. You'll know fermentation is working when the mixture smells slightly sour and the seeds sink to the bottom while the pulp and debris float to the top. This usually happens within 2-3 days if the temperature stays between 65-75°F.
⏰ Step 3: Rinse and Dry the Seeds
After fermentation, pour the mixture through a fine-mesh strainer to separate the seeds from the pulp. Rinse the seeds under cool running water until the water runs clear—this removes any remaining gel or debris. Gently pat the seeds dry with a paper towel or clean cloth, but don’t rub them, as this can damage the seed coats.
Spread the seeds in a single layer on a clean, dry surface like a paper towel, coffee filter, or seed-saving screen. Place them in a warm, dry, and well-ventilated spot, away from direct sunlight. Let them dry for 1-2 weeks, stirring them every few days to ensure even drying. The seeds are ready when they’re hard, dark, and brittle to the touch.
🪴 Step 4: Store the Seeds Properly
Once completely dry, transfer the seeds to a small envelope or airtight container. Label it with the variety name, date collected, and any notes like color or flavor. Store the seeds in a cool, dark place—such as a refrigerator or seed vault—where the temperature stays between 35-50°F and humidity is low.
Seeds stored this way can remain viable for 3-5 years, though germination rates may decline over time. Check the seeds annually and replant the freshest ones first. If you notice mold or musty smells, discard those seeds immediately and start fresh with a new batch.
☀️ Step 5: Test Germination Before Planting
Before you plant your saved seeds in the spring, test a few to ensure they’re still viable. Moisten a paper towel, place 5-10 seeds on it, and fold it in half. Seal the towel in a ziplock bag and store it in a warm, dark place like your fridge’s produce drawer. Check for sprouts in 5-7 days—if at least half germinate, your seeds are ready to plant.
If germination is low, try storing the seeds in the freezer for 1-2 weeks before testing again. Cold stratification can sometimes break dormancy in stubborn seeds. Once you confirm viability, you’re ready to grow your heirloom tomatoes just like the original plants!
Tips & tricks for perfect heirloom tomato seed preservation
Between us, saving heirloom tomato seeds doesn't have to be tricky—just a few key moves make all the difference.
Tomato Selection Matters: Those wrinkled, slightly overripe tomatoes are your best bet for viable seeds. I learned this the hard way after trying to save seeds from firm, green tomatoes—only to get poor germination rates. Look for tomatoes that have started to soften and may even show a few cracks. This indicates the seeds inside are fully mature and ready for saving.
Fermentation Timing Secret: The 2-4 day fermentation window is critical—too short and you won't remove all the gel, too long and you risk mold. I keep my jar on the counter where it stays between 65-75°F. Stirring once daily helps prevent mold while keeping seeds suspended. You'll know it's working when you smell that slightly sour aroma and see seeds sinking to the bottom.
Drying Strategy: Spread those seeds in a single layer on something breathable like a coffee filter or paper towel. I use a seed-saving screen for maximum airflow. Place them in a warm, dry spot away from direct sunlight—my kitchen windowsill works perfectly. Stir every few days to prevent clumping. The seeds are ready when they're hard, dark, and brittle to the touch, usually within 1-2 weeks.
Storage Wisdom: Once dry, store your seeds in a cool, dark place between 35-50°F. I use small envelopes inside my refrigerator's crisper drawer. Label everything with the variety name and date—trust me, you'll forget otherwise! Check annually and replant the freshest seeds first. If you notice any mold or musty smells, toss those seeds immediately and start fresh.
Pro Tips for Collecting Heirloom Tomato Seeds
- Between us, saving heirloom tomato seeds doesn't have to be tricky—just a few key moves make all the difference.
- Tomato Selection Matters: Those wrinkled, slightly overripe tomatoes are your best bet for viable seeds.
- Fermentation Timing Secret: The 2-4 day fermentation window is critical—too short and you won't remove all the gel, too long and you risk mold.
Frequently asked questions
Got questions about saving heirloom tomato seeds?
You’re not alone—this process can feel tricky at first! Here are answers to the most common queries to help you succeed like a pro.
How do I know when my heirloom tomatoes are truly ripe for seed saving?
Wait until tomatoes are fully ripe—often overripe (soft, wrinkled, or splitting open). This ensures seeds have completed their germination-inhibiting coating, which is critical for heirloom varieties. Avoid green or partially ripe tomatoes, as their seeds may not store well.
How long does it take for tomato seeds to ferment properly?
Fermentation takes 2–4 days at room temperature (70–75°F). Stir the mixture daily to prevent mold. If you’re in a cooler climate, extend fermentation to 5–7 days. You’ll know it’s ready when the pulp smells sour and pungent (like vinegar), and mold is minimal.
What if my seeds develop mold during fermentation? Can I still use them?
Mold is normal to some degree, but heavy mold means it’s time to stop fermentation. Drain the seeds immediately, rinse them thoroughly, and dry them on a paper towel. While mold can reduce viability, many seeds will still germinate if dried quickly. For stubborn mold, try a shorter fermentation (1–2 days).
Can I save seeds from hybrid tomatoes, or do I need heirlooms?
Hybrid tomato seeds won’t produce true-to-type plants—you’ll likely get a mix of traits (or even wild types!). Stick to heirlooms for consistent flavors and varieties. If you’re unsure, check the seed packet: heirlooms are labeled as “open-pollinated” or “non-hybrid.”
How do I store seeds long-term to ensure they stay viable?
Once dry, store seeds in a cool, dark, and dry place (like a sealed envelope in the fridge or freezer). Label them with the variety and date! Most heirloom seeds stay viable for 3–5 years, though some last decades. Test germination every few years by planting a few seeds.
Wrapping up and next steps
Collecting heirloom tomato seeds is a rewarding way to preserve biodiversity and ensure your garden thrives with unique flavors year after year. By following proper drying, storing, and testing techniques, you’ll safeguard rare varieties for future harvests—plus, you’ll save money and deepen your connection to gardening traditions. 🌱
Ready to take the next step? Start small—try saving seeds from just one or two heirloom varieties this season, then expand as you gain confidence. Share your successes (or lessons learned!) with fellow gardeners—every seed saved helps keep these treasures alive. Happy growing! 🌿