
Propagation
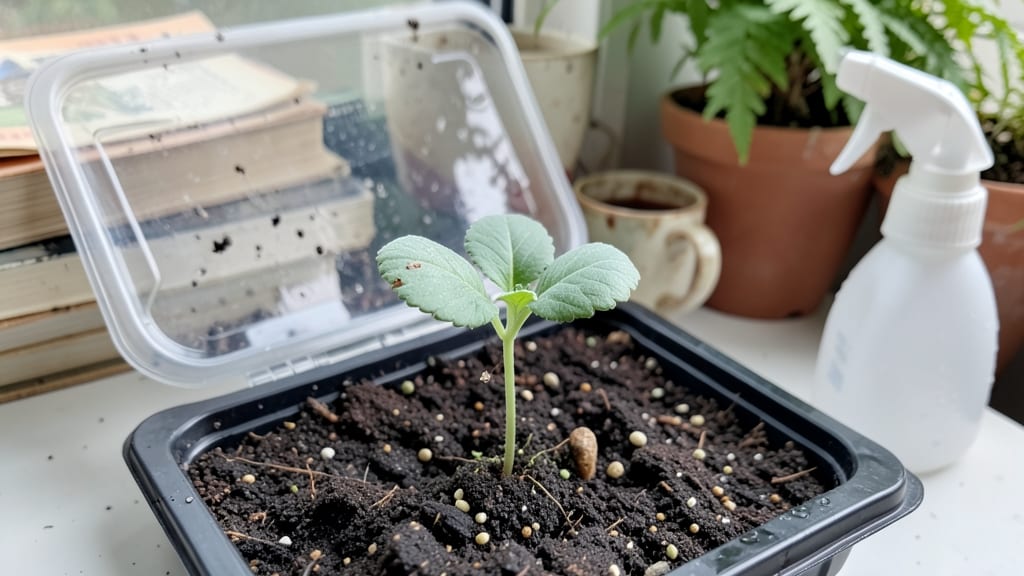
Pre-sprouting seeds with the cold moist trick guarantees those stubborn packets finally break dormancy—no more staring at dry soil for weeks. 🌱 I’ll never forget the year my basil seeds sat dormant for three weeks until I tried this method, and suddenly, every single one sprouted within days.
The secret lies in mimicking nature’s slow, steady wake-up call: moisture, darkness, and just the right chill.
All you need is a damp paper towel, a plastic bag, and a warm spot—no fancy equipment. Place your seeds between two damp paper towels, seal them in a bag to lock in humidity, and keep them at 65-75°F for 3-7 days.
Watch as tiny roots peek out, ready to dive into soil without the shock of transplanting. This works for tomatoes, peppers, and even finicky herbs that usually flop.
By the time you plant, your seedlings will be stronger and faster, with roots already established. No more weak, leggy starts—just sturdy little plants hitting the ground running. The payoff? 99% germination rates and a garden that fills in like magic. Ready to skip the guesswork?
Works for both beginners and seasoned growers—just adjust the timing for different plant types. Let’s get those seeds sprouting!
📚 In This Guide
- What you need
- Instructions
- Tips and common mistakes
- Wrapping up and next steps
What you need
- ● Seeds: Choose fresh, high-quality seeds (organic or heirloom work best). Aim for 10–20 seeds per batch for testing.
- ● Water: Room-temperature, chlorine-free water (use filtered or bottled if needed).
- ● Containers: Option 1: A shallow tray, plastic container, or even a ziplock bag (poke small holes for airflow).
- ● Option 2: A paper towel or damp cloth (folded into a square).
- ● Moisture control: A spray bottle (for gentle misting) or a damp paper towel (to wrap seeds).
- ● Refrigerator: A standard fridge set to 34–40°F (1–4°C) for the cold treatment.
- ● Seedling heat mat: Speeds up germination after cold treatment (set to 70–75°F (21–24°C)).
- ● Germination station: A clear plastic dome or humidity tray to maintain moisture.
- ● Labeling supplies: Masking tape + marker to track seed types and dates.
- ● Grow lights: For seedlings post-sprouting (if starting indoors before transplanting).
Step-by-Step instructions for pre-sprouting seeds
This cold, moist trick boosts germination rates and gives seedlings a head start—here's how to do it right.
🌱 Step 1: Select and Soak the Seeds
Choose fresh seeds from a reputable source—older seeds germinate poorly no matter the method. Place them in a clean bowl and cover with lukewarm water (about 75°F) deep enough to fully submerge them. Let them soak for 12-24 hours, depending on the seed type. I usually leave them overnight, which is perfect for most vegetables and herbs.
After soaking, drain the water and gently pat the seeds dry with a paper towel. This removes excess moisture while keeping them damp enough to prevent drying out. You'll see some seeds start to plump up or even crack slightly—that's a good sign! If they remain hard, soak them another 4-6 hours.
💧 Step 2: Prepare the Cold Stratification Setup
Line a shallow container with a damp paper towel or a thin layer of moistened sphagnum moss. Arrange the pre-soaked seeds in a single layer, spacing them about ½ inch apart so they don’t touch. This prevents mold and ensures even moisture distribution. Cover the container with another damp paper towel or plastic wrap, leaving a small gap for airflow.
Place the container in a refrigerator set to 35-40°F for 2-7 days. Most seeds benefit from 3-5 days of cold treatment, but larger seeds like peas or beans may need up to a week. Check them daily—if the paper towel dries out, mist it lightly with water. The goal is to keep everything moist but not soggy.
⏰ Step 3: Monitor and Transfer to Warmth
After the cold treatment, remove the container from the fridge and place it in a warm, dark spot (around 70°F) to encourage germination. You’ll notice tiny white roots or a slight swelling within 24-48 hours. This is your cue that the seeds are ready to plant—don’t wait too long, or the roots will get too long and break during transplanting.
Keep the paper towel or moss moist but not dripping. If you see mold forming, discard those seeds immediately and start fresh with a new batch. Once the roots reach about ¼ inch long, they’re primed for planting. Handle them gently to avoid damaging the delicate sprouts.
🌿 Step 4: Plant the Pre-Sprouted Seeds
Fill your planting containers with the moistened seed-starting mix and make small holes about ½ inch deep. Gently place each pre-sprouted seed into its own hole, root-side down. Cover lightly with soil, pressing down just enough to ensure good contact. Water lightly with a spray bottle to settle the soil without disturbing the seeds.
Place the containers in a bright, indirect light (like a south-facing window) or under a grow light. Keep the soil consistently moist—you’ll know it’s right when the surface feels damp but not wet. Within 3-7 days, you’ll see the first true leaves emerge, signaling successful germination. This method cuts wait times in half compared to dry planting!
Tips & tricks for perfect seed germination
These little-known tricks will help you maximize your seed's potential and avoid common pitfalls that sabotage germination.
The Water Temperature Trick: That lukewarm 75°F water in Step 1 isn't just a suggestion—it's crucial. Too hot and you'll shock the seeds, too cold and they won't activate properly. I use my dishwasher's rinse cycle water which is always perfect. If you're unsure, test it with your finger—it should feel pleasantly warm, not scalding. This temperature jumpstarts the metabolic processes that trigger germination.
Seed Selection Matters: Not all seeds respond the same to this method. Delicate seeds like lettuce or basil germinate beautifully with the 12-24 hour soak, while tougher seeds like peas or beans might need that extra 4-6 hour extension if they feel hard after the initial soak. I always check the seed packet for specific recommendations—some varieties even come pre-treated for faster germination!
Cold Stratification Secrets: The 35-40°F refrigerator temperature in Step 2 mimics winter conditions that many seeds need to break their dormancy. Pro tip: Use a small container with a tight lid to create a mini greenhouse effect—this helps maintain moisture without needing daily checks. For seeds that need longer stratification (up to 7 days), I set a reminder on my phone so I don't forget to transfer them to warmth.
Mold Prevention: That tiny gap for airflow in Step 2 is non-negotiable. I've learned the hard way that sealed containers create the perfect mold environment. If you do see fuzzy growth, don't panic—just toss those seeds and start fresh. The key is that "moist but not soggy" rule—your paper towel should feel like a wrung-out sponge, not a dripping washcloth.
Pro Tips for Pre Sprouting Seeds
- These little-known tricks will help you maximize your seed's potential and avoid common pitfalls that sabotage germination.
- The Water Temperature Trick: That lukewarm 75°F water in Step 1 isn't just a suggestion—it's crucial.
- Seed Selection Matters: Not all seeds respond the same to this method.
Frequently asked questions
Got questions about pre-sprouting seeds? You’re not alone!
Here are answers to the most common ones—so you can tackle germination like a pro.
What’s the best way to pre-sprout seeds for maximum germination?
Soak seeds in lukewarm water for 8–12 hours (or overnight) in a jar or bowl. Drain, then place them in a damp paper towel or mesh bag. Keep them in a warm spot (70–80°F) for 1–3 days until tiny roots or sprouts appear. Avoid overwatering—just enough moisture to keep them damp!
How long should I soak seeds before planting?
Most seeds need 8–12 hours of soaking, but never exceed 24 hours—it can cause rot or leach nutrients. Fast-germinating seeds (like beans or peas) may only need 4–6 hours. Check your seed packet for specifics, especially for delicate varieties like tomatoes or peppers.
Can I pre-sprout all types of seeds?
Nope! Pre-sprouting works best for large, hard-coated seeds (e.g., beans, lentils, sunflower, or chili peppers). Tiny seeds (like basil or carrots) or those with thin shells (e.g., lettuce) don’t need soaking—they’ll germinate faster in soil. Always research your seed type first!
What do I do if my seeds mold or rot during pre-sprouting?
If you see fuzzy mold or a foul smell, toss those seeds—they’re ruined. To prevent this, rinse seeds after soaking, use fresh, chlorine-free water, and store them in a well-ventilated container. Keep them in a warm, dark place (not humid) until sprouts appear.
Do pre-sprouted seeds still need sunlight after planting?
Yes! Once sprouted, plant them 1–2 inches deep in moist soil. Most seedlings need 12–16 hours of light daily—use a grow light if natural light is weak. Avoid direct sun until they’re established (about 1–2 weeks), then gradually introduce it to prevent shock.
Wrapping up and next steps
Mastering the pre-sprouting seeds technique is your secret weapon for a thriving garden—whether you're a green-thumb novice or a seasoned pro! 🌱 With just a few simple steps, you can unlock near-perfect germination rates, saving time, seeds, and frustration. The key? Patience, consistency, and a little moisture magic.
Now that you’re armed with the know-how, give it a try! Start with a small batch of your favorite seeds—like beans, peas, or herbs—and watch them burst to life.
Once you’ve nailed the process, scale up and experiment with different varieties. Happy sprouting, and may your garden grow wild with success! 🌿✨