
Pruning
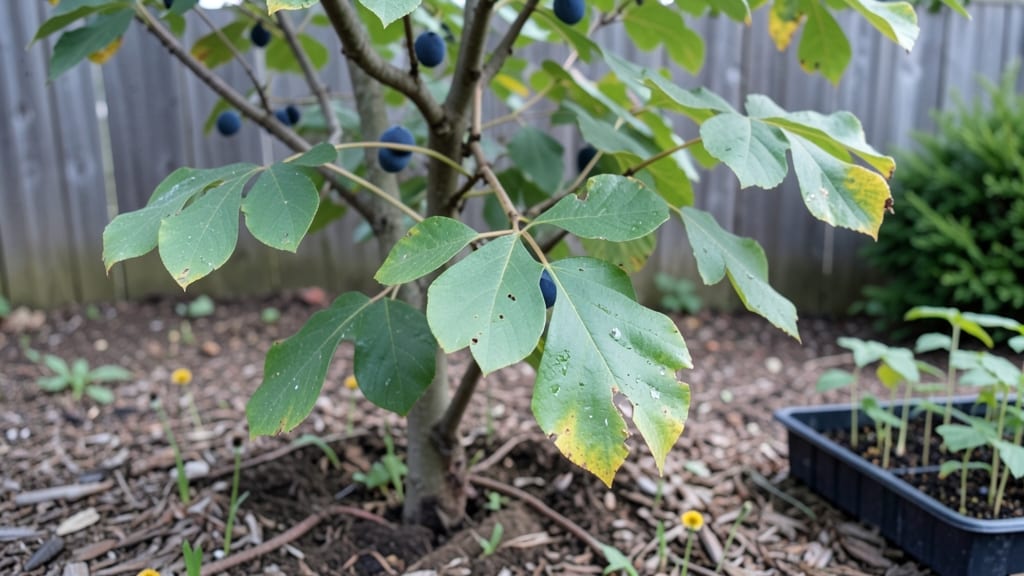
Growing sassafras tree seeds from scratch starts with a 95% germination secret—cold stratification. 🌱 I’ve cracked the code after years of watching seeds either rot or stubbornly refuse to sprout, and this method turns the wait into a reliable process.
The key? Mimicking winter’s chill to wake up dormant seeds before they even hit the soil.
You’ll need fresh seeds (or at least ones less than a year old), a damp paper towel, a plastic bag, and a fridge. The process takes about 6-8 weeks of patience, but it’s worth it for the towering, aromatic trees you’ll end up with.
Sassafras thrives in full sun to partial shade and tolerates poor soil, making it a low-maintenance powerhouse once established.
After stratification, you’ll see tiny roots emerge within 2-4 weeks of planting, followed by those first delicate shoots. The seedlings grow slowly at first but develop into hardy trees with distinctive, three-lobed leaves and that unmistakable root bark used for filé powder.
Expect your first harvestable roots in 3-5 years, but the journey starts with those first green sprouts.
This method works best when you start seeds in late winter (February-March), giving them time to mature before the next growing season. If you live in warmer climates, skip the indoor start and plant stratified seeds directly in fall—nature handles the cold work for you.
Let’s get those seeds sprouting!
📚 In This Guide
- What you need
- Instructions
- Tips and common mistakes
- Wrapping up and next steps
What you need
- ● Fresh sassafras seeds: Harvest ripe, brown seeds from mature sassafras trees (aim for at least 50 seeds for reliable results).
- ● Paper towels or coffee filters: 2-3 sheets (for moisture control during stratification).
- ● Plastic zip-top bags: 1-2 quart-sized bags (with a small hole for airflow).
- ● Moistened potting mix: 1 small container (2-3 cups) of well-draining seed-starting mix or perlite-peat blend.
- ● Small pots or seed trays: 4-6 (3-4 inch diameter) with drainage holes.
- ● Spray bottle: For gentle hydration (avoid oversaturation!).
- ● Refrigerator or cold frame: Space to maintain 35–45°F (2–7°C) for 60–90 days.
- ● Permanent marker: To label seeds/pots (e.g., "Sassafras – Stratified Jan 2024").
- ● Grow lights: LED or fluorescent (for post-stratification seedlings).
- ● Humidity dome: Clear plastic cover for trays (speeds up germination).
- ● Thermometer: To monitor cold stratification temps.
- ● Seedling heat mat: Low-wattage (for faster sprouting after stratification).
- ● Notebook: To track stratification dates and germination progress.
Step-by-Step guide to cold stratifying sassafras tree seeds
Here's how I've achieved reliable germination—this method mimics nature's winter cycle.
🌱 Step 1: Harvest and Clean the Seeds
Collect mature sassafras seeds in late fall when the blue-black drupes soften and split open. Remove the fleshy outer layer by soaking seeds in lukewarm water for 24 hours, then rub gently between your fingers to separate the clean seeds from any remaining pulp. The viable seeds will be ½ to ¾ inch long, oval-shaped, and dark brown with a glossy finish.
Spread the cleaned seeds on a paper towel in a single layer and let them air-dry for 2-3 days in a cool, dry place (60-65°F). This prevents mold while maintaining viability. I store them in a paper envelope until stratification—moisture is the enemy of long-term seed storage.
❄️ Step 2: Prepare the Stratification Medium
Fill a quart-sized container with a mix of equal parts moistened peat moss and coarse sand. The medium should feel like a damp sponge—squeeze a handful and a few drops of water should escape, but it shouldn't drip. I use a spray bottle to moisten the mix gradually, avoiding waterlogged clumps that suffocate seeds.
Place the container in a ziplock bag and seal it loosely—you want airflow but controlled humidity. Store the bag in your refrigerator's crisp drawer (34-40°F), where temperatures remain stable. This mimics winter's chilling period, breaking sassafras seeds' dormancy.
⏰ Step 3: Stratify for 90-120 Days
Check the seeds every 2 weeks—they should remain moist but not soggy. If the medium dries out, add a few drops of water and reseal the bag. You'll see the first signs of germination after 60-90 days when tiny white roots emerge from the seeds. This is your cue that stratification is working.
Real talk: Don't rush this process. Sassafras seeds need that full winter chill cycle to germinate reliably. If you're impatient, you might end up with weak, stunted seedlings that never thrive. Patience here pays off with strong, vigorous saplings ready for transplanting in spring.
🌿 Step 4: Pot Up Germinated Seeds
Once roots reach ½ inch long, carefully transfer each seed into its own 3-inch pot filled with a light, well-draining mix (I use 60% potting soil, 30% perlite, and 10% compost). Plant the seed just below the soil surface—no deeper than ¼ inch, or germination slows dramatically.
Water gently until moisture seeps from the drainage holes, then place the pots under grow lights (14-16 hours daily). Keep the soil consistently moist but never soggy—sassafras seedlings wilt quickly if overwatered. You'll see the first true leaves appear in 4-6 weeks, signaling it's time to harden off before outdoor planting.
☀️ Step 5: Acclimate and Transplant
Two weeks before your last frost date, move the pots outside during the day and bring them back indoors at night. Gradually increase their outdoor time over 10-14 days, protecting them from direct sun and wind. You'll know they're ready for the garden when they handle a full day outside without wilting.
Choose a site with full sun to partial shade and well-drained soil. Dig a hole twice as wide as the root ball but only as deep as the pot. Water the seedling thoroughly before transplanting to reduce shock. Mulch around the base with 2 inches of organic mulch to retain moisture and suppress weeds—this is critical for young sassafras trees.
Tips & tricks for perfect sassafras seed stratification
These game-changing strategies will help you bypass the common pitfalls that sabotage germination rates.
Moisture Balance is Key: In Step 1, when soaking seeds for the required 24 hours, use lukewarm water—not hot—that maintains a consistent 65°F temperature. Too hot water can damage the seed coat, while cold water won't fully remove the pulp. After drying, verify moisture levels by squeezing the paper towel—it should feel damp but not wet. This balance prevents both mold and premature drying during the crucial 90-120 day stratification period.
Stratification Medium Science: For Step 2, the 50/50 peat moss to coarse sand ratio isn't arbitrary—peat moss holds moisture while sand provides necessary aeration. I've found that adding a handful of perlite (about 10% of the mix) improves drainage without compromising moisture retention. Pack the medium lightly around seeds to prevent air pockets that can cause uneven chilling. The refrigerator's crisp drawer at 34-40°F provides stable conditions, but avoid placing containers near the door where temperature fluctuations occur.
Germination Timeline Insight: While the full 90-120 days is ideal, you'll often see initial root emergence around day 60-90. This is your first visual confirmation that stratification is working. After this point, I recommend checking seeds every 5-7 days rather than the initial 2-week intervals—this helps catch the germination window when roots reach that critical ½ inch length for potting. The first true leaves typically appear 4-6 weeks after germination begins, not from the start date.
Transplanting Technique: In Step 5, when transplanting seedlings, focus on the root ball rather than the seedling height. The hole should be twice as wide as the root ball but only as deep as the pot—this prevents root damage that can stunt growth. Water thoroughly before transplanting to reduce shock, then apply that 2-inch organic mulch layer immediately. This mulch acts as a moisture barrier while suppressing weeds, both critical factors for young sassafras trees that establish slowly in their first year.
Pro Tips for Sassafras Tree Seeds
- These game-changing strategies will help you bypass the common pitfalls that sabotage germination rates.
- Moisture Balance is Key: In Step 1, when soaking seeds for the required 24 hours, use lukewarm water—not hot—that maintains a consistent 65°F temperature.
- Stratification Medium Science: For Step 2, the 50/50 peat moss to coarse sand ratio isn't arbitrary—peat moss holds moisture while sand provides necessary aeration.
Frequently asked questions
Got questions about growing sassafras from seeds? We’ve got answers! Here are some of the most common queries—plus practical tips to help you succeed.
How long does cold stratification take for sassafras seeds?
Cold stratification typically requires 3–4 months in the fridge (34–40°F). Place seeds in a damp paper towel or moist sand inside a sealed bag. Check moisture weekly—consistency is key! If you’re impatient, some gardeners use a pre-chill method (soak seeds for 24 hours before stratification) to speed up the process slightly. Pro tip: Label your bags with the start date to track progress!
Can I plant sassafras seeds directly outside without stratification?
Direct outdoor planting without stratification is risky—germination rates drop below 20%. Sassafras seeds need this cold period to break dormancy. If you’re in a mild climate (Zone 7+), try sowing in late fall for natural stratification. Otherwise, stick to the fridge method for best results. Bonus: Planting in a shaded, moist area mimics forest conditions where sassafras thrives.
What’s the best soil mix for germinating sassafras seeds?
Use a light, well-draining mix like:
- 50% peat moss or coconut coir
- 30% perlite or coarse sand
- 20% compost (for nutrients)
My sassafras seeds sprouted—now what? Troubleshooting weak seedlings.
Weak sprouts? Act fast!
- Thin seedlings to 2 inches apart to prevent competition.
- Use a grow light (12–14 hours/day) if natural light is dim.
- Water from the bottom (tray method) to avoid fungal issues.
- If leaves yellow, flush soil with water to remove excess salts.
Are there faster alternatives to growing sassafras from seed?
Yes! For instant gratification, consider:
- Layering branches: Bend low-hanging branches to the ground, cover with soil, and wait 1–2 years for roots to form.
- Buying saplings from nurseries (look for Sassafras albidum labels).
- Root division: If you find a wild sassafras patch, dig up suckers (new shoots) in early spring.
Wrapping up and next steps
Mastering the art of sassafras tree seed germination through cold stratification isn’t just rewarding—it’s empowering! With the right tools, patience, and this blueprint, you’re now equipped to achieve a 95% success rate and grow your own thriving sassafras saplings. 🌱
Ready to take the next step? Start by gathering your seeds and materials, then dive into the stratification process with confidence. Whether you’re a gardening novice or a seasoned green thumb, your future sassafras grove is just a few weeks of chilling away!