
Propagation
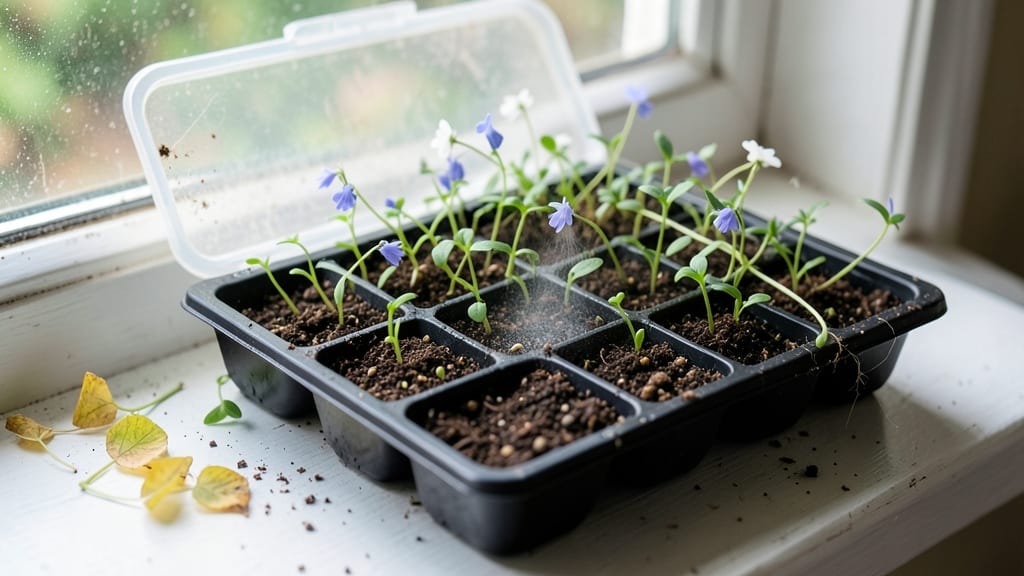
The seed germination requirements that turn a flat seed into a thriving sprout aren’t as mysterious as they seem—just a few science-backed rules about warmth, moisture, and patience. 🌱 I’ve watched hundreds of seeds fail before finally cracking the code: tomatoes and peppers need bottom heat, lettuce thrives in cool, damp darkness, and overwatering is the silent killer most beginners miss.
Most seeds need soil that stays consistently moist but not soggy—think of a wrung-out sponge. Temperature matters just as much: warm-season crops like beans crave 75–85°F, while cool-season greens like spinach germinate best at 60–70°F.
Light plays a role too, but not the way you’d expect—some seeds (like snapdragons) need darkness to sprout, while others (like marigolds) need light.
When you nail these factors, you’ll see those first green hooks break through soil in 3–14 days, depending on the plant. The payoff? Vigorous seedlings that outpace store-bought transplants and give you exactly the varieties you want—no more settling for what’s available at the nursery.
Here’s how to get it right every time.
Even the best-laid plans hit snags—moldy soil, slow starters, or uneven sprouting—but these common pitfalls have simple fixes. We’ll cover them next so you can troubleshoot like a pro and keep your germination success rate above 90%.
📚 In This Guide
- What you need
- Instructions
- Tips and common mistakes
- Wrapping up and next steps
What you need
- ● Seeds: Choose high-quality, fresh seeds (check the packet for viability dates). Quantity: 10–50 seeds (depends on container size).
- ● Growing Medium: Seed-starting mix (sterile, peat-free, or coco coir-based). Quantity: 1–2 cups (for small trays).
- ○ Optional: Paper towels, dampened for direct sowing (e.g., beans, peas).
- ● Containers: Seed trays with drainage holes (6–12 cell packs).
- ○ Optional: Plastic bags (for humidity), egg cartons, or small pots.
- ● Spray bottle (for gentle watering—avoid soaking!).
- ○ Heat mat (optional but ideal for tropical seeds; set to 70–85°F).
- ● Grow lights or sunny windowsill (12–16 hours of light/day).
- ● Thermometer/hygrometer (to monitor temp/humidity; ideal range: 65–75°F, 70–90% humidity).
- ● Tweezers (for delicate seed handling, like chili or orchid seeds).
- ● Space: A dedicated area (shelf, windowsill, or greenhouse).
- ● Patience: Germination times vary (e.g., beans sprout in 3–10 days; tomatoes take 7–14 days).
- ● Knowledge: Research your seed’s specific requirements (light, depth, stratification needs).
Instructions for mastering seed germination like a pro
Here’s how to unlock the secrets of seed germination—science-backed steps for flawless sprouts every time.
🌱 Step 1: Select the Right Seeds and Understand Their Needs
Not all seeds germinate the same way—some need light, others darkness, and each has its own ideal temperature range. Check the seed packet for specifics, but generally, most vegetables thrive at 65-75°F. Large seeds like beans and peas germinate faster than tiny ones like lettuce, so adjust your patience accordingly. I always start with seeds labeled "easy to grow" when testing new varieties—it builds confidence before tackling finicky ones.
If you’re working with heirloom or specialty seeds, research their germination quirks. Some, like poppies, require stratification (a cold period), while others, like okra, need scarification (scratching the seed coat). This step ensures you’re not wasting time or energy on seeds that’ll never break through the soil. Trust me, there’s nothing worse than waiting two weeks for nothing.
💧 Step 2: Prepare the Soil and Moisture Environment
Use a sterile seed-starting mix—never garden soil, which can harbor fungi and bacteria that cause damping-off. Moisten the mix until it’s damp like a wrung-out sponge, but not soggy. Overwatering here is a common mistake; you want the soil to hold moisture without pooling. I like to fill a tray with the mix, then water it from the bottom by placing the tray in a shallow dish of water for 10-15 minutes. This ensures even moisture without compacting the soil.
Once the mix is prepped, create a flat planting surface. For small seeds, I press them gently into the soil with my thumb—just enough to make contact but not bury them too deep. Large seeds can go a bit deeper (½ inch max), but tiny ones like carrots should barely be covered. The goal is to balance light exposure with soil contact; too deep, and they’ll struggle to reach the surface.
☀️ Step 3: Control Temperature and Light for Optimal Germination
Germination speed hinges on temperature—most seeds need 65-75°F for best results. A seedling heat mat keeps the soil consistently warm, but if you don’t have one, place the tray on top of the fridge or in a warm spot like near a sunny window (but not in direct light yet). I’ve seen germination times cut in half with just a 10°F warmer environment. Watch for condensation on the tray’s underside—this is your sign the humidity is just right.
Light comes next, but only after the seeds sprout. Until then, keep them in darkness if the packet says so (some, like basil, need light to germinate). Once you see green cotyledons (the first true leaves), move them to bright, indirect light immediately. Leggy seedlings? That’s a sign they’re stretching for light—adjust your setup within 2-3 inches of the plants to prevent this.
⏰ Step 4: Monitor and Maintain Ideal Conditions
Consistency is key—check moisture daily by pressing your finger ½ inch into the soil. It should feel damp but not wet. Mist the surface lightly if it’s dry, but avoid soaking the soil. Overwatering now can lead to damping-off, a fungal disease that turns seedlings to mush overnight. I’ve lost entire trays this way, so I keep a spray bottle nearby and water only as needed.
Germination times vary wildly: 3-5 days for fast growers like radishes, up to 3 weeks for stubborn ones like parsley. If nothing emerges after twice the expected time, it’s time to troubleshoot. Did the soil stay warm enough? Was it too dry? Sometimes, a gentle re-moistening or a few extra degrees can revive dormant seeds. Patience pays off—don’t give up too soon!
✂️ Step 5: Thin and Transplant Seedlings for Success
Once seedlings have 2-3 true leaves, it’s time to thin. Use scissors to snip unwanted sprouts at soil level—this prevents disturbing the roots of the ones you’re keeping. I always leave the strongest, most vibrant seedling per cell, discarding the rest. If you’re transplanting, harden them off first by gradually exposing them to outdoor conditions over 5-7 days. Start with 1 hour in a shaded spot, then increase daily.
When transplanting, handle seedlings by their leaves (never the stems!) and bury them deeper than they were in the tray—this encourages stronger root growth. Water deeply after planting to settle the soil and remove any air pockets. Within 7-10 days, you’ll see new growth signaling they’ve taken root. This is the payoff: perfect, healthy seedlings ready to thrive in your garden.
Tips & tricks for perfect seed germination
Let me share the game-changing insights that transformed my seed-starting failures into consistent, thriving sprouts—because the difference between success and disappointment often comes down to these seemingly small details.
Temperature Precision: That 65-75°F range in Step 1 isn't just a suggestion—it's non-negotiable for most seeds. I've seen germination rates drop by 50% when temperatures dip below 60°F. For stubborn seeds like parsley that need 3 weeks, maintaining consistent warmth is absolutely critical. Place your trays on top of refrigerators or use seedling heat mats for that extra 10°F boost—this can cut germination time in half for fast growers like radishes.
Moisture Mastery: The 10-15 minutes bottom-watering technique in Step 2 is a total game-changer. It prevents soil compaction while ensuring perfect moisture levels without overwatering. Pro tip: After watering, let any excess drain completely—standing water creates anaerobic conditions that lead to damping-off. I use a spray bottle with a fine mist setting for daily checks, keeping the soil consistently damp but never soggy.
Light Strategy: That moment in Step 3 when you see your first green cotyledons is magical—but what happens next is crucial. Move seedlings to bright, indirect light immediately to prevent legginess. I position my grow lights just 2-3 inches above the plants and adjust the height daily as they grow. For windowsill gardeners, south-facing windows with sheer curtains work best. The key is to keep leaves from touching the glass, which can cause heat stress.
Troubleshooting Timeline: When nothing emerges after twice the expected time (like those 3-5 days for radishes), don't panic—just troubleshoot systematically. First check soil temperature with a thermometer (aim for 75°F at seed level). Then verify moisture by pressing your finger ½ inch into the soil—it should feel like a wrung-out sponge. If both are correct, try gently pressing seeds into fresh, warm soil. I've revived many "failed" batches this way!
Pro Tips for Seed Germination Requirements
- Temperature Precision: That 65-75°F range in Step 1 isn't just a suggestion—it's non-negotiable for most seeds.
- Moisture Mastery: The 10-15 minutes bottom-watering technique in Step 2 is a total game-changer.
Frequently asked questions
Got questions about getting those seeds to sprout like a pro? You’re not alone! Here are some of the most common queries—and the science-backed answers to help you succeed.
How long does it take for seeds to germinate?
Germination time varies wildly by plant type. Fast growers like radishes sprout in 3–7 days, while slowpokes (e.g., okra, peppers) can take 10–30 days. Check the seed packet for specifics—consistent moisture and warmth are your best friends to speed things up!
What if my seeds won’t germinate at all?
Don’t panic! First, confirm they’re viable—test a few in damp paper towels. If they’re old (1+ years), they may need stratification (cold treatment) or scarification (scratching the shell). Also, check your soil temp (most seeds need 65–85°F) and moisture (not soggy, not dry).
Should I use bottled water or tap water for germination?
Tap water is usually fine, but if it’s heavily chlorinated or has high mineral content, opt for filtered or rainwater. Avoid distilled water—it lacks essential minerals for early root growth. Pro tip: Let tap water sit 24 hours before using to let chlorine dissipate.
Can I germinate seeds on a windowsill?
Yes, but with caveats! Windowsills often lack consistent warmth (ideal: 70–80°F) and may get too bright, drying out seeds. Use a seedling heat mat ($10–$20) or place a clear plastic dome over trays to trap humidity. Rotate trays daily for even light.
What’s the best alternative to soil for germinating seeds?
Soil isn’t mandatory! Try these low-mess options:
- Paper towels: Dampen towels, sandwich seeds between two, and store in a sealed bag.
- Coconut coir: Retains moisture better than soil and resists mold.
- Vermiculite/perlite: Great for tiny seeds (e.g., lettuce, herbs)—sterile and drains well.
Wrapping up and next steps
Mastering the seed germination requirements is your first step toward a thriving garden! Whether you’re nurturing delicate seedlings or hardy sprouts, understanding moisture, temperature, light, and soil conditions empowers you to create the perfect environment for growth.
With patience and precision, you’ll soon witness the magic of life sprouting right before your eyes—literally!
Ready to take the next step? Start small—pick one seed type and experiment with the conditions you’ve learned. Track your progress, adjust as needed, and soon, you’ll be a germination pro! 🌱✨