
Propagation
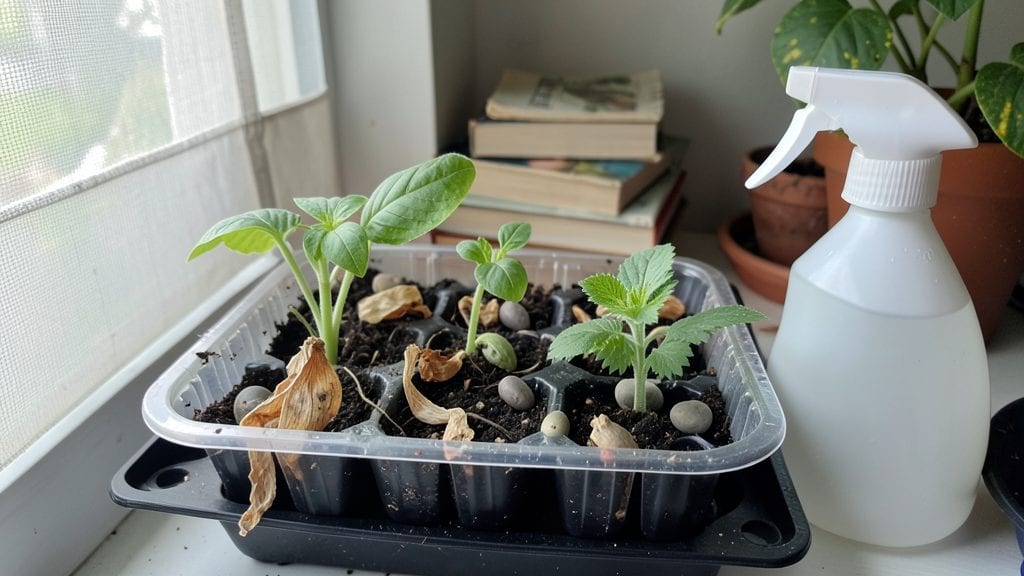
Sprouting old seeds in that dusty pantry jar might still hold life—if you know the right trick. 🌱 I’ve nursed back seeds from five years ago using a simple soak method that cuts through dormancy like a breath of fresh air. air.
The key isn’t guessing; it’s science-backed hydration that wakes up what’s left inside those dried-up packets.
Most people toss seeds after two years, but with the right approach, you can still coax them into sprouting. All you need is warm water, a damp paper towel, and patience—no fancy equipment.
The soak trick works best for vegetables like tomatoes, beans, and peppers, but even flower seeds sometimes surprise you. I’ve brought back seeds I thought were dead, and you can too.
What you’ll end up with is a tray of tiny green sprouts, proof that age isn’t the end of the line. The first signs appear within 24-48 hours—tiny roots peeking out, ready to grow into full plants.
It’s like giving your seeds a second chance at life, and your garden a second harvest for the cost of a packet.
This method works year-round, but spring and fall are the sweet spots for success. Even if your seeds are past their printed date, don’t let them go to waste—just follow the steps, and you’ll be amazed at what comes back to life. Let’s get those seeds sprouting!
📚 In This Guide
- What you need
- Instructions
- Tips and common mistakes
- Wrapping up and next steps
What you need
- ● Old seeds: Any non-hybrid, non-treated seeds (e.g., beans, peas, lentils, sunflower, or tomato). Aim for at least 5–10 seeds to test viability.
- ● Water: Room-temperature, filtered or tap water (chlorine-free if possible). Use about 1–2 cups per batch.
- ● Container: A clean glass jar (mason jars work great!) with a wide-mouth lid or a bowl with a damp cloth cover.
- ● Paper towels or sprouting lid: A single sheet of paper towel or a mesh sprouting lid to hold seeds in place.
- ○ Optional soak solution: 1 tsp hydrogen peroxide (3%) per cup of water (boosts germination).
- ● 1 tsp apple cider vinegar (mild acidity can stimulate seeds).
- ○ Fine-mesh strainer or colander: For rinsing seeds (optional but handy!).
- ● Small plate or tray: To drain excess water after soaking.
- ● Label & marker: To track seed types and soak dates.
- ● Grow light or sunny windowsill: For post-sprouting growth (10–12 hours of light/day).
- ● Patience! Some seeds take 24–72 hours to sprout—don’t rush it!
Step-by-Step instructions for sprouting old seeds
Here's the simple method I use to bring back life to seeds that've been sitting in your pantry for years.
🌱 Step 1: Gather Your Seeds and Prepare the Soak
Start by sorting through your seed collection and pick out the old packets—anything past its printed date is fair game. You'll want to use lukewarm water (around 80°F) for soaking, as cold water can shock the seeds while hot water might damage their delicate outer coatings. Fill a clean bowl or jar with enough water to fully submerge the seeds.
I like to use a glass jar because it lets me monitor the seeds easily. Place the seeds in a mesh bag or a piece of cheesecloth to keep them contained—this makes it easier to handle them later without losing any. The bag should float freely in the water, so don't weigh it down.
💧 Step 2: Soak the Seeds for 12-24 Hours
Let the seeds soak for at least 12 hours, but no longer than 24 hours. This gives them the moisture they need to kickstart their metabolism after years of dormancy. You'll notice some seeds swell up noticeably—this is a great sign! Others might stay the same size, but don't worry; they're still absorbing water.
Here's the thing—don't skip this step. The longer the seeds have been stored, the more they need that initial hydration to break dormancy. I've seen seeds that were five years old sprout just fine after a good soak, while fresh seeds left dry might not even germinate. Check on them occasionally to make sure they're still submerged, and give the water a gentle swirl if any seeds float to the top.
☀️ Step 3: Plant the Soaked Seeds Immediately
Once the soaking time is up, drain the seeds thoroughly but gently. You don't want them sitting in water, or they'll risk rotting before they even get a chance to sprout. I like to lay the mesh bag over a paper towel to drain for a few minutes. After they're dry to the touch, it's time to plant them.
Use a light, well-draining potting mix and plant the seeds at a depth of about twice their diameter. Since old seeds can be fragile, handle them with care—think of them like tiny, thirsty babies that just woke up from a long nap. Water the soil lightly after planting, just enough to keep it moist but not soggy. Place the container in a warm, bright spot, but avoid direct sunlight until you see signs of germination.
⏰ Step 4: Monitor and Provide Ideal Conditions
Keep the soil consistently moist but never waterlogged. You'll want to check it daily—stick your finger about ½ inch deep into the soil. If it feels dry, it's time to water. Old seeds often take longer to germinate, so be patient. Some might sprout in as little as 3-5 days, while others could take up to 2 weeks.
If you notice any mold or foul smells, that's a sign you're overwatering. Old seeds are more susceptible to rot, so it's better to err on the side of slightly drier soil. Once you see the first tiny sprouts, move the container to a spot with bright, indirect light to help them grow strong and sturdy. Avoid direct sun until the seedlings are a few inches tall—this prevents them from getting sunburned.
🌿 Step 5: Transplant and Care for Young Seedlings
When the seedlings have developed their first set of true leaves (not just the initial seed leaves), they're ready to be transplanted into individual pots or directly into the garden. Handle them gently to avoid damaging their delicate roots. If you're transplanting into the garden, wait until the soil is warm and the risk of frost has passed.
Old seeds might produce plants that aren't as vigorous as those from fresh seeds, but with proper care, they can still thrive. Keep the soil moist, provide plenty of light, and watch them grow! You might notice some variations in the plants—maybe they're a little smaller or slower to mature—but that's all part of the adventure of sprouting old seeds. Real talk: some of my best surprises have come from seeds I thought were past their prime.
Tips & tricks for perfect seed sprouting
Here's what I've learned from years of bringing back old seeds—these little tricks make all the difference between success and disappointment.
Water Temperature Matters: That 80°F lukewarm water in Step 1 is non-negotiable. Cold water shocks dormant seeds while hot water can crack their protective coatings. I keep a thermometer handy or test the water with my wrist—it should feel warm but not hot. If you don't have a thermometer, let tap water sit out for 30 minutes to reach this perfect temperature.
The Soak Time Secret: Don't rush the 12-24 hour soak in Step 2—this is when the magic happens. I've seen some seeds start swelling after just 6 hours, but they won't be fully revived until that full time. If you're short on time, 24 hours is better than 12, but don't exceed it or you risk rotting. Place your container in a dark cupboard to prevent algae growth during the soak.
Drainage is Critical: After soaking, drain seeds thoroughly but gently in Step 3. I use a colander lined with paper towels to catch any stragglers. Leftover moisture can cause mold, especially with old seeds. Pat the seeds dry with another paper towel before planting—they should feel just damp, not wet. This extra step prevents that foul smell we talked about in Step 4.
Planting Depth Matters: When planting at twice the seed's diameter in Step 3, remember this isn't exact science. For tiny seeds like lettuce, that might mean just pressing them into the soil. For larger seeds like beans, you'll need to make small holes. The goal is to cover them lightly while still allowing room for growth. I use a chopstick to make planting holes when working with delicate old seeds.
Pro Tips for Sprouting Old Seeds
- Here's what I've learned from years of bringing back old seeds—these little tricks make all the difference between success and disappointment.
- Water Temperature Matters: That 80°F lukewarm water in Step 1 is non-negotiable.
- The Soak Time Secret: Don't rush the 12-24 hour soak in Step 2—this is when the magic happens.
Frequently asked questions
Can you really sprout seeds that are 5+ years old?
Yes, but with caution! Older seeds (especially non-hybrid varieties like heirlooms) may have lower germination rates. Test a few first—soak them overnight, then plant in damp paper towels. If some sprout, you’ve got a winner!
How long should I soak old seeds before planting?
Most seeds need 8–12 hours in warm water (or a damp towel). Hard-coated seeds (like peas or beans) may need 24 hours or a quick rub with sandpaper to break dormancy. Never soak longer than 12 hours—it can damage the seed.
What if my soaked seeds still won’t sprout?
Try these fixes:
- Check viability: Cut open a seed—if it’s hard and unblemished, it may still work.
- Adjust moisture: Too dry? Mist seeds daily. Too wet? Use a damp (not soggy) paper towel.
- Warmth helps: Place seeds near a sunny window or use a heat mat (70–85°F is ideal).
Are sprouted seeds healthier than fresh ones?
Not necessarily! Sprouting revives old seeds but doesn’t restore lost nutrients. Fresh seeds (stored properly) will still outperform ancient ones. That said, sprouting old seeds is a great way to reduce waste and grow a few extra plants—just don’t expect miracles!
What’s the best alternative if my seeds won’t sprout?
No worries—try these:
- Seed swaps: Trade with gardeners for fresh, viable seeds.
- Grafting: Use cuttings from healthy plants (works for herbs, veggies, and flowers!).
- Buy organic seeds: Look for "non-GMO" or "heirloom" labels—they often last longer.
Wrapping up and next steps
Sprouting old seeds doesn’t have to be a gamble—with the right soak trick, you can breathe new life into forgotten packets and grow a thriving garden! 🌱 The key takeaway? A simple soak in water (or even apple cider vinegar) can boost germination rates and save you money.
Whether you’re reviving heirloom tomatoes or stubborn herbs, this method is your secret weapon for success.
Ready to turn those dormant seeds into lush plants? Start small: pick one variety to test, follow the soak method, and track your progress. Before you know it, you’ll be a sprouting pro—and maybe even inspiring your neighbors to do the same! 🌿