
Lawn
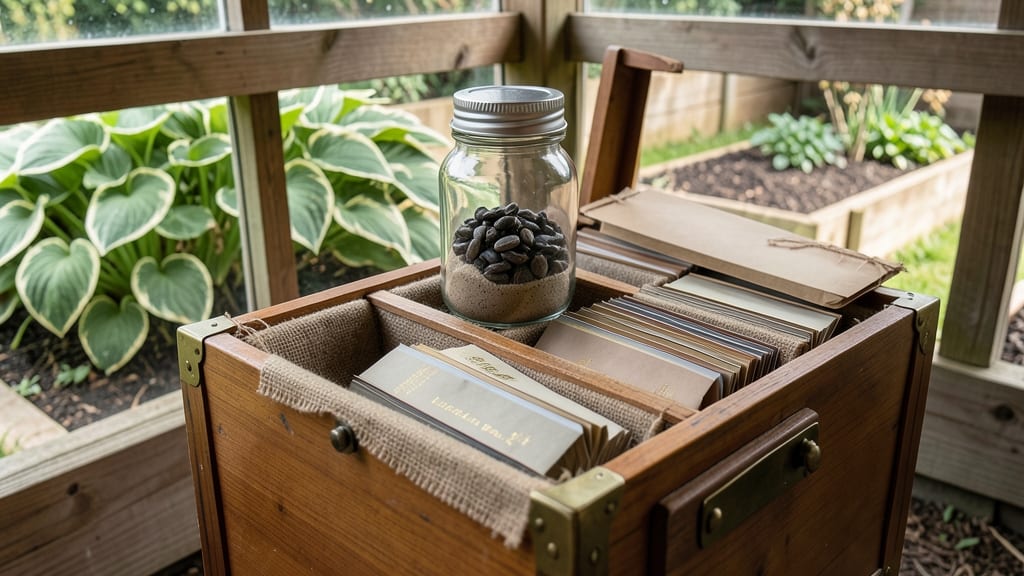
Proper seed pack storage saves money and ensures next year’s garden thrives from day one—until I learned the simple tricks that keep them fresh. 🌱 viable for years. The right storage prevents moisture damage, pest invasions, and temperature swings that turn good seeds into garden dust.
All you need are airtight containers, silica gel packets, and a cool, dark spot—no fancy equipment required. Label each packet with the variety and year so you don’t accidentally plant last season’s heirlooms.
For extra protection, vacuum-seal seeds or store them in the fridge, especially if you’re preserving them for more than two years.
When done right, your seeds stay fresh and ready to plant, giving you a head start on the growing season. You’ll avoid the frustration of weak germination or wasted money on new packets, and your garden will start strong every spring.
The best part? This system works for both heirlooms and hybrids, so nothing gets left behind.
Whether you’re a seasoned gardener or just starting, these methods cut down on waste and keep your seed collection organized. No more digging through drawers or guessing what’s still good—just reliable, ready-to-grow seeds whenever you need them.
📚 In This Guide
- What you need
- Instructions
- Tips and common mistakes
- Wrapping up and next steps
What you need
- ● Seed packets: Any remaining seed envelopes (check expiration dates—discard old or damaged ones!).
- ● Air-tight containers: 2–4 mason jars (8 oz–16 oz size) or
- ● 1–2 plastic or glass seed storage boxes (with tight-fitting lids).
- ● Desiccant packets: 3–5 silica gel packs (10–20g each) to absorb moisture.
- ● Permanent markers: 1–2 (for labeling containers).
- ● Small funnels or spoons: 1 (for easy seed transfer).
- ● Paper or cardstock: 1–2 sheets (for custom labels or seed lists).
- ● Label maker or printer: For reusable, professional-looking labels.
- ○ Vacuum-seal bags: 1–2 rolls (for extra-long-term storage, optional).
- ● Small ziplock bags: 5–10 (for grouping tiny seeds before storage).
- ● Humidity indicator cards: 1–2 (to monitor moisture levels in containers).
- ● Organizer trays or dividers: 1 (to sort seeds by type or planting season).
Instructions for organizing seed packs for long-term storage
Here’s my tested method to keep seeds viable and ready for planting year after year.
🪴 Step 1: Empty Seed Packs into Airtight Containers
Start by gently opening each seed packet and pouring the seeds into labeled, airtight containers. I use small glass jars with silicone seals or reusable plastic containers with tight-fitting lids. The key is to remove seeds from their original packaging—they’re not designed for long-term storage and can degrade over time.
Use a funnel to avoid spills, and tap the packet lightly to release every last seed. If seeds are small (like lettuce or carrots), I spread them on a clean sheet of paper first to count them—this helps track inventory later. Label each container immediately with the seed name, variety, and date. I also jot down germination rates if I know them.
📝 Step 2: Label and Organize by Planting Season
Group containers by when you’ll plant them next year. For example, cool-season crops (like spinach or peas) go in one section, while warm-season plants (tomatoes, peppers) get their own. I use a small whiteboard or sticky notes on the container lid to note the planting month—this saves time when planning next season’s garden.
If you’re storing a large collection, sort containers alphabetically or by plant family (e.g., brassicas, nightshades). I keep mine in a clear plastic bin with dividers so I can see everything at a glance. Avoid stacking containers too high—aim for 2-3 layers max to prevent crushing and make them easy to access.
❄️ Step 3: Store in a Cool, Dark, and Dry Place
The ideal storage spot is a cool, dark pantry or basement where temperatures stay between 32-41°F. A refrigerator’s crisper drawer works well, but avoid the main compartment where temperature fluctuations occur. Humidity is the enemy—moisture can cause seeds to clump or mold, so keep containers in a sealed bin with a silica gel packet or a small bag of rice to absorb excess moisture.
Check on your seeds once a year to ensure the containers are still sealed and labels are legible. If you notice any condensation inside, transfer the seeds to a fresh container immediately. I also rotate containers occasionally to prevent seeds from settling too tightly—just give them a gentle shake before storing again.
⏰ Step 4: Test Viability Before Planting Next Year
Before planting, test a few seeds from each container to confirm they’re still viable. I plant 5-10 seeds in a small pot with moist potting mix and cover it with plastic wrap. Place it in a warm spot (70-75°F) and check for sprouts in 7-14 days. If fewer than 50% germinate, it’s time to order replacements or collect fresh seeds.
If germination is strong, you’re good to go! I like to refresh my seed collection every few years by saving seeds from my best-performing plants. This keeps my garden stocked with varieties I love while reducing waste. Just be sure to dry seeds thoroughly before storing them again.
Tips & tricks for perfect seed pack storage
Here's what I've learned after years of perfecting my seed storage system—these little details make all the difference between viable seeds and wasted money.
Container Selection Matters: Glass jars with silicone seals create the best airtight environment, but reusable plastic containers work too. The key is ensuring they're completely airtight—even the tiniest gap can cause seeds to lose viability. I've ruined batches using containers with loose lids, so always double-check the seal. For extra protection, consider adding a small silica gel packet inside the storage container to absorb any residual moisture.
Labeling System: Don't just write the seed name—include the variety and planting month. I use a permanent marker on the lid and write the date on the side. This prevents mix-ups when you're in a hurry next spring. For large collections, try color-coding by plant family or season using different colored labels or tape on the container edges.
Storage Environment: The 32-41°F range is critical—any warmer and seeds lose viability faster. If your basement gets too cold (below freezing), consider a refrigerator's crisper drawer instead. I've found that placing containers in a sealed plastic bin with a small bag of rice creates an ideal microclimate. Just remember to check for condensation annually and refresh the rice if it absorbs too much moisture.
Viability Testing: The 7-14 day germination test is your best friend. I like to use small plastic clamshell containers for these tests—they're clear so you can see sprouts easily and create a mini greenhouse effect with the plastic wrap. If germination drops below 50%, it's time to order fresh seeds. This simple test saves me from planting hundreds of seeds that won't grow!
Pro Tips for Seed Pack Storage
- Here's what I've learned after years of perfecting my seed storage system—these little details make all the difference between viable seeds and wasted money.
- Container Selection Matters: Glass jars with silicone seals create the best airtight environment, but reusable plastic containers work too.
- Labeling System: Don't just write the seed name—include the variety and planting month.
Frequently asked questions
Got questions about storing seed packs for next year’s garden? You’re not alone!
Whether you’re a seasoned gardener or just starting out, proper seed storage can feel tricky. Here are answers to the most common questions to keep your seeds viable and ready for planting.
How long can I store seed packs before they go bad?
Most commercially packed seeds stay viable for 1–5 years if stored correctly—check the pack for an expiration date! Heirloom or organic seeds often last longer (up to 10 years for some varieties like peas or beans). Humidity and temperature are the real villains, so keep them cool and dry.
What’s the best temperature and humidity for seed pack storage?
Aim for 32–41°F (0–5°C) and 30–50% humidity—your fridge’s crisper drawer or a sealed container with silica gel packets works great. Avoid damp basements or attics, as moisture speeds up seed deterioration. Pro tip: Label packs with the storage date to track freshness!
Can I reuse seed packets for storage, or should I transfer seeds?
Reusing packets is totally fine if they’re dry and intact! Just add a label with the seed type and storage date. For long-term storage (beyond 2 years), transfer seeds to airtight containers (like mason jars or vacuum-sealed bags) to block moisture and pests. Bonus: Use egg cartons or small bags for tiny seeds!
How do I prevent mold or pests from ruining my seeds?
Seal seeds in airtight containers with desiccant packets or rice (a natural moisture absorber). Freeze seeds for short-term storage (up to 1 year) to kill pests, then thaw before planting. Avoid plastic bags—condensation causes mold. Need a quick fix? Sprinkle a pinch of diatomaceous earth inside containers as a natural pest deterrent.
What if my seeds lose viability? Can I still use them?
Test germination by planting a few seeds in damp paper towels—if 50%+ sprout within 7–14 days, the rest are likely good. If not, try scarification (lightly sanding hard seed coats) or soaking overnight. Some seeds (like tomatoes) may still grow, but expect lower yields. When in doubt, save your money and grab fresh seeds!
Wrapping up and next steps
Proper seed pack storage is your secret weapon for a thriving garden next season—no waste, no stress! By using airtight containers, moisture control, and cool, dark spaces, you’ll keep your seeds viable and ready to grow. Your future harvest starts with today’s organization!
Ready to take the next step? Grab a few seed packets, a storage container, and a dry-erase marker—then start labeling and storing now. Save this guide for quick reference, and you’ll be the neighborhood’s go-to gardening guru in no time! 🌱✨