
Propagation
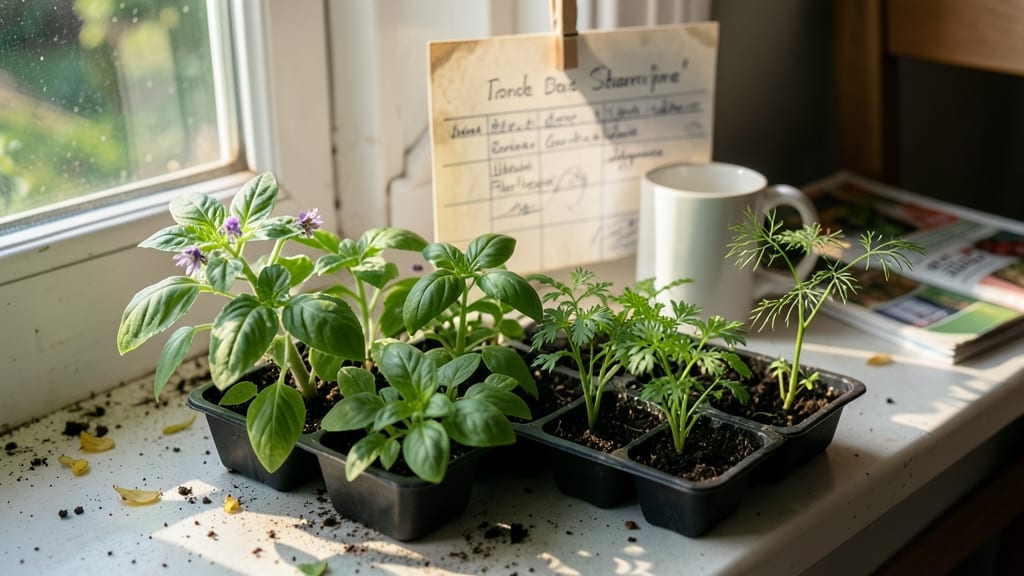
A seed starting chart turns guesswork into a foolproof schedule for your garden. I used mine last spring to plant tomatoes exactly 8 weeks before our last frost, and they outgrew the store-bought plants by summer. The key is matching each plant’s needs to your climate—not just the calendar.
This isn’t about memorizing dates; it’s about understanding how long each seed needs indoors before transplanting. Cool-season crops like lettuce and peas go in early, while warm-season tomatoes and peppers need 6-8 weeks of cozy indoor growing.
The chart even notes when to harden off seedlings so they survive the shock of outdoor life.
By following this timeline, you’ll avoid the heartbreak of bolting greens or leggy seedlings. Imagine snipping fresh basil in June instead of paying for wilted store herbs. The chart handles all the math—just plug in your frost date and go.
Works for balconies, greenhouses, or sunrooms—no yard required. Let’s get those seeds started on the right foot.
📚 In This Guide
- What you need
- Instructions
- Tips and common mistakes
- Wrapping up and next steps
What you need
- ● Seed starting trays or pots: 1–2 trays (1020-cell or 72-cell) or 4–6" pots (10–20 total). Opt for biodegradable pots if transplanting directly into the ground.
- ● Seed starting mix: 1–2 bags (2–4 cu. ft. total) of sterile, lightweight potting mix (avoid garden soil—it’s too dense!).
- ● Seeds: High-quality, fresh seeds (check seed packets for specific planting dates and depth requirements).
- ● Grow lights or sunny windowsill: A full-spectrum LED grow light (12–16 hours/day) or a south-facing window with consistent sunlight.
- ● Misting bottle or spray nozzle: For gentle watering (avoid soaking the mix!).
- ○ Heat mat (optional but helpful): For cold-starting seeds like peppers or tomatoes (70–80°F range).
- ● Humidity dome or plastic wrap: To retain moisture while seeds germinate.
- ● Labels and markers: To track seed varieties and planting dates (use toothpicks + masking tape for DIY labels!).
- ○ Fertilizer (optional): A balanced, water-soluble fertilizer (5-10-5 or 10-10-10) for seedlings after 2–3 weeks.
- ● Scissors or knife: For trimming plastic domes or pots if needed.
- ● ✅ Research your climate: Know your last frost date (use the Old Farmer’s Almanac as a guide).
- ● ✅ Plan your space: Measure your grow light setup or windowsill to ensure adequate room for trays.
- ● ✅ Sanitize tools: Wash trays, pots, and tools with a 10% bleach solution (1 part bleach to 9 parts water) to prevent mold.
- ● ✅ Check seed viability: Test old seeds by floating them in water (sinkers are good; floaters may be dormant).
Instructions: creating your custom seed starting chart
Turn seasonal timing into a foolproof system with this month-by-month framework.
Determine Your Last Frost Date
Your planting timeline hinges on this single number—check your local agricultural extension office for precise data. Most northern climates experience frost until mid-May, while southern zones may see frost as late as March. Write this date on your chart's top margin as your anchor point.
Here's the thing—if you're in a microclimate (like a valley or hillside), your frost date might differ by 2-3 weeks from the official zone average. I always verify by checking neighbors' gardens or local weather records for the past three years. This ensures your chart accounts for real-world conditions.
Calculate Backward from Transplant Dates
Work backward from your last frost date using each plant's days to maturity and weeks needed to transplant. For example, tomatoes need 80-90 days to fruit and 6-8 weeks to harden off—so start them 10-12 weeks before your last frost. Plot these dates on your chart's left margin.
I keep a reference sheet of common vegetables' growth requirements taped to my chart. Real talk: Some plants like peppers and eggplants need even longer starts—8-10 weeks indoors before transplanting. Don't skip this step, or you'll end up with half-grown plants when frost hits.
Organize by Plant Families and Groups
Group plants by their cold tolerance and light needs—cool-season crops (like lettuce and spinach) can handle 50-60°F nights, while warm-season plants (tomatoes, peppers) need 60°F+. Use colored pencils to mark each group's starting window on your chart.
This visual grouping prevents overwhelm. I draw a horizontal line for each family (brassicas, nightshades, greens) and shade their starting windows differently. You'll instantly see which plants need your attention each month—no more guessing whether to start broccoli or basil in March.
Add Local Adjustments for Microclimates
Note areas of your property that warm up faster (south-facing walls) or stay cooler (shady corners). Adjust transplant dates for these zones by 1-2 weeks earlier or later. For example, if your south side warms up 10 days before the official last frost, move tender plants there a week earlier.
I sketch a simple site map on my chart's bottom corner with arrows pointing to each microclimate zone. This helps me visualize where each seedling will ultimately land—critical for spacing and succession planning. Don't overlook this; it's how I've avoided transplant shock and extended my growing season by 3-4 weeks.
Schedule Seedling Care Milestones
Mark key care points like thinning, fertilizing, and hardening off for each plant group. For instance, basil seedlings need their first pinch when they reach 6 inches tall, while carrots should be thinned to 2 inches apart when they have 2 true leaves. Use symbols (like a small ✂️ for pruning) to flag these tasks.
This turns your chart into an action plan. I add a "Notes" column where I jot down seed packet details (like light requirements) or past successes. Last year, my chart reminded me to move peppers under grow lights when days shortened—saving me from leggy, weak plants. The devil's in the details, and this step captures them all.
Tips & tricks for perfect seed starting charts
Creating an effective seed starting chart isn't just about dates—it's about building a system that adapts to your unique growing conditions. Here's how to make your chart work harder for you.
Precision in Step 1: Don't rely solely on zone averages when determining your last frost date in Step 1. I've found that checking local weather records for the past three years reveals patterns your chart should account for. For example, if your area has experienced late frosts in early June during two of the last five years, adjust your chart to reflect this reality rather than the official mid-May average. This single adjustment can prevent losing your entire tomato crop to a surprise frost.
Visual Organization in Step 3: The color-coding system in Step 3 is where your chart transforms from a simple timeline to a powerful planning tool. I recommend using three distinct colors: blue for cool-season crops (50-60°F tolerance), red for warm-season plants (60°F+), and green for herbs. This visual distinction makes it immediately clear which plants need your attention each month. Pro tip: Use a highlighter for your current month's planting window—this prevents overwhelm when you're staring at a full year's worth of potential planting dates.
Microclimate Mapping in Step 4: The site map you sketch in Step 4 deserves more attention than most gardeners give it. I've extended my growing season by up to four weeks by strategically placing heat-loving plants in south-facing microclimates. Label your map with temperature variations—note areas that warm up 5-10°F faster than your average soil temperature. This allows you to transplant tender plants like peppers and eggplants earlier in those zones, giving them more time to mature before frost.
Care Milestone System in Step 5: The care milestones you schedule in Step 5 are where most gardeners fall short. I've found that marking pinch points (like basil's 6-inch height) and thinning requirements (carrots at 2 inches) prevents common mistakes. Create a legend for your symbols—use a small for pruning, a water droplet for fertilizing reminders, and a sun icon for hardening off. This visual system turns your chart into an active garden management tool rather than just a passive reference.
Pro Tips for Seed Starting Chart
- Creating an effective seed starting chart isn't just about dates—it's about building a system that adapts to your unique growing conditions.
- Precision in Step 1: Don't rely solely on zone averages when determining your last frost date in Step 1.
- Visual Organization in Step 3: The color-coding system in Step 3 is where your chart transforms from a simple timeline to a powerful planning tool.
Frequently asked questions
What’s the best time to start seeds indoors vs. outdoors?
Indoor seed starting depends on your last frost date—typically 6-8 weeks before for cool-season crops (like lettuce) and 4-6 weeks for warm-season plants (like tomatoes). Outdoors, sow directly when soil temps hit 50–60°F (10–15°C) for cool-season plants or after frost for warm-season varieties. Check your local seed-starting chart for specifics!
Can I start seeds too early?
Yes! Overcrowding and leggy seedlings are common if you start too soon. Use grow lights (12–16 hours/day) and transplant seedlings into larger pots if needed. For slow growers (like onions), err on the earlier side—but avoid starting more than 10–12 weeks ahead unless you’re overwintering seedlings.
What if my seedlings aren’t germinating?
Check these first:
- Moisture: Keep soil consistently damp (not soggy). Use a spray bottle for fine seeds.
- Temperature: Most seeds need 65–75°F (18–24°C). Use a heat mat if germination stalls.
- Depth: Plant shallow—2–3x seed width max. Tiny seeds (like basil) barely need covering.
- Light: Some seeds (e.g., parsley) need darkness to germinate—cover lightly with soil.
Do I need to adjust the chart for high-altitude or cold climates?
High-altitude areas (e.g., 5,000+ ft) often have shorter growing seasons, so start seeds 2–4 weeks earlier than the chart suggests. For cold climates, extend indoor growing time or use row covers outdoors. Always add 10–14 days to your last frost date for safety.
What’s a good alternative if I miss the indoor-starting window?
No stress! Try:
- Slow growers: Direct-sow cold-hardy crops (spinach, peas) 2–4 weeks before your last frost.
- Transplants: Buy starter plants (tomatoes, peppers) from nurseries 2–3 weeks before outdoor planting.
- Overwintering: Start seeds in late winter and grow under lights until spring.
- Succession planting: Sow fast growers (lettuce, radishes) every 2 weeks for continuous harvests.
Wrapping up and next steps
Mastering a seed starting chart transforms your gardening game—no more guesswork, just thriving plants and bountiful harvests! 🌱 Whether you're a beginner or a seasoned green thumb, timing is everything, and this month-by-month guide gives you the confidence to start strong.
Now that you’ve got your schedule locked in, it’s time to grab those seeds and get growing!
🚀 Your Next Step:
- Gather your supplies (you’ve already checked off the list!).
- Pick your first seeds—maybe leafy greens for quick wins or tomatoes for a summer showstopper?
- Set up your seed-starting station and dive in! Track your progress with your chart as your trusty guide.
You’ve got this—happy planting! 🌿✨