
Vegetables
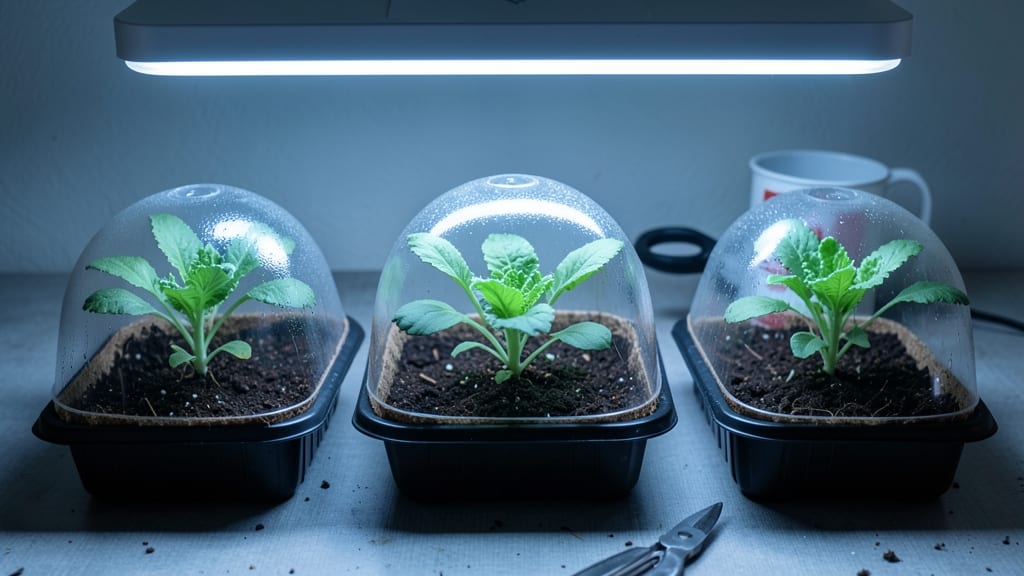
Seeding vegetables indoors lets you claim that two-month head start on the garden—my first tomatoes now ripen by July instead of August, and the difference in harvest size is shocking. The key isn’t fancy setups but matching light, warmth, and timing to what seeds actually need.
I’ve killed more seedlings than I’d like to admit, but these simple adjustments turn nervous beginners into confident growers.
You’ll need seed-starting trays, a grow light (or sunny window), sterile seed-starting mix, and a spray bottle—nothing more. Most garden centers sell these supplies, and you can reuse trays for years.
The biggest mistake? Using regular potting soil or skipping the light. Seedlings stretch toward any available light, even your lamp, and that’s how you get weak, leggy plants that flop when transplanted.
By the time you’re hardening off seedlings in late April or early May, they’ll be stocky, dark green, and ready to outpace store-bought plants.
The first true leaves appear in 7-14 days, and if you prune correctly, you’ll get two harvests—one from the main stem and one from side shoots. There’s nothing like the taste of homegrown tomatoes picked straight from the vine.
This method works for peppers, eggplants, lettuce, and herbs too—just adjust the timing based on your last frost date. The real secret? Starting early enough that you’re not scrambling when spring arrives. Let’s get those seeds going before the ground even thaws.
📚 In This Guide
- What you need
- Instructions
- Tips and common mistakes
- Wrapping up and next steps
What you need
- ● Seed starting trays (biodegradable or plastic, 10–20 cells per tray; 1–2 trays per 100 seeds)
- ● Seed starting mix (lightweight, sterile potting soil—avoid garden soil! 1–2 bags, ~1–2 cubic feet per tray)
- ● Seeds (choose fast-growing veggies like lettuce, herbs, or peppers; check seed packets for indoor-starting times)
- ● Grow lights or sunny windowsill (LED grow lights with 12–16 hours of light/day or a south-facing window)
- ● Spray bottle or watering can (with a fine mist nozzle to avoid disturbing seeds)
- ○ Heat mat (optional but helpful) (for cool climates; 70–75°F range for germination)
- ● Humidity dome or plastic wrap (to retain moisture while seeds germinate)
- ● Labels & markers (to track seed varieties and planting dates)
- ● Fertilizer (balanced, water-soluble) (diluted to half-strength; start after seedlings sprout true leaves)
- ● Tweezers or small spoon (for delicate seed handling, like tiny herbs or flowers)
- ● Thermometer & hygrometer (to monitor temperature and humidity for optimal growth)
Step-by-Step instructions for starting vegetable seeds indoors
Here’s how to kickstart your spring harvest with vigorous, healthy seedlings ready for transplanting.
Prepare Your Containers and Soil Mix
Begin by filling your seed-starting trays or small pots with the sterile seed-starting mix—never garden soil, as it’s too dense and may harbor pathogens. Moisten the mix until it’s damp like a wrung-out sponge, but not soggy. Press it down gently to remove air pockets, ensuring roots can establish without resistance. I like to tap the containers lightly on the table to settle the soil evenly before planting.
If using biodegradable pots, place them directly into the tray to avoid root disturbance later. For plastic trays, line them with a sheet of seedling heat mat (if available) to maintain consistent warmth. This step is critical—proper soil prep prevents damping-off and gives seedlings a strong foundation.
Sow Seeds at the Correct Depth
Check each seed packet for depth recommendations, but a general rule is to plant seeds twice as deep as their diameter. For tiny seeds like lettuce, press them just below the soil surface, while larger seeds like beans need ½ inch of coverage. I use a toothpick to create small holes for precision, especially with delicate seeds.
Space seeds ¼ inch apart in each cell—crowding leads to weak, leggy seedlings. After planting, cover them lightly with the remaining mix, then mist the surface with a spray bottle until evenly damp. Avoid overwatering; seedlings rot faster than they grow. Label each tray with the variety and date to track progress.
Provide Warmth and Humidity for Germination
Place your trays in a warm, dark spot (like a seedling heat mat set to 75–85°F) to encourage germination. Most vegetable seeds sprout within 5–14 days, depending on the type. I cover mine with plastic wrap or a humidity dome to retain moisture and warmth, checking daily for condensation.
Once 50% of seeds have sprouted, remove the cover immediately—excess humidity invites fungal diseases like damping-off. Keep the soil consistently moist (not wet) by bottom-watering: place trays in a shallow tray of water for 10–15 minutes to hydrate evenly. Watch for first true leaves (not the initial seed leaves) to appear before adjusting light.
Introduce Light and Monitor Growth
As soon as seedlings emerge, move them to a bright, indirect light source (like a south-facing window or grow light). Seedlings need 14–16 hours of light daily—a simple LED grow bulb on a timer solves this if natural light is insufficient. Position the light 2–4 inches above the plants and raise it as they grow to prevent burning.
Leggy seedlings (thin, stretched stems) signal insufficient light. If this happens, reduce the distance between the light and plants or extend photoperiod with supplemental lighting. Fertilize with half-strength liquid fertilizer when the first true leaves appear to avoid burning tender roots. Overcrowding? Thin seedlings to the strongest one per cell, using scissors to snip weak stems at soil level.
Harden Off Before Transplanting
Two weeks before your last frost date, begin hardening off seedlings by placing them outside in a sheltered, shaded spot for 1–2 hours the first day. Gradually increase exposure over 7–10 days, ending with a full day outdoors. This acclimates them to wind, sun, and temperature fluctuations, reducing transplant shock.
Check for wilting or yellowing leaves—a sign they’re not ready. Transplant on a cool, overcast afternoon to minimize stress. Bury seedlings deeper than they grew in pots (up to the first true leaves) to encourage strong root development. Water deeply at the base to settle soil and reduce air pockets.
Tips & tricks for perfect indoor vegetable seed starting
Mastering these essential techniques will transform your indoor seed starting from hit-or-miss to consistently robust, healthy seedlings.
The Soil Prep Secret: In Step 1, when preparing your sterile seed-starting mix, I recommend adding a thin layer of coarse sand or perlite to the bottom of your containers before adding the mix. This improves drainage dramatically and prevents the dreaded damping-off disease that can wipe out your seedlings before they even sprout. The key is to maintain that "wrung-out sponge" moisture level—never let it dry out completely, but never let it sit in standing water either.
Precision Planting Technique: For Step 2, when sowing seeds at the correct depth, I've found that using a clean, dry toothpick to create planting holes works wonders with delicate seeds. The depth rule of "twice the seed diameter" is perfect, but don't be afraid to adjust slightly—some seeds like carrots actually prefer shallower planting. After covering seeds, I always give the soil surface one final gentle press with my finger to ensure good seed-to-soil contact, which improves germination rates significantly.
Germination Environment Control: During Step 3's warmth and humidity phase, maintaining that 75–85°F temperature range is crucial, but don't overlook the importance of airflow. While plastic wrap helps retain humidity, I recommend removing it for 10–15 minutes daily to prevent fungal growth. The 10–15 minute bottom-watering technique is brilliant—it hydrates the soil evenly without disturbing the seeds, and I've found that using room-temperature water prevents shocking the seeds.
Light Management Strategy: When introducing light in Step 4, I've discovered that seedlings actually benefit from a gradual light increase. Start with 12 hours of light the first week, then increase by 2 hours weekly until reaching the full 14–16 hours. This gradual adaptation prevents the shock that can cause leggy growth. For those using grow lights, I position mine 3–4 inches above the seedlings initially, then raise them weekly as the plants grow—this mimics natural sunlight patterns perfectly.
Pro Tips for Seeding Vegetables Indoors
- Mastering these essential techniques will transform your indoor seed starting from hit-or-miss to consistently robust, healthy seedlings.
- The Soil Prep Secret: In Step 1, when preparing your sterile seed-starting mix, I recommend adding a thin layer of coarse sand or perlite to the bottom of your containers before adding the mix.
- Precision Planting Technique: For Step 2, when sowing seeds at the correct depth, I've found that using a clean, dry toothpick to create planting holes works wonders with delicate seeds.
Frequently asked questions
When is the best time to start seeding vegetables indoors?
Timing depends on your climate and the vegetable type. Generally, seed 4–8 weeks before the last frost date for cool-season crops (like lettuce or peas) and 6–8 weeks before for warm-season veggies (tomatoes, peppers). Check seed packets for specific guidance—it’s your best friend!
What if my indoor space is too cold for seedlings?
No problem! Use a seedling heat mat ($10–$20) to keep soil warm (70–75°F for most veggies). Place trays near a sunny window or under grow lights. Avoid drafts—seedlings hate sudden temperature swings. A simple thermometer helps monitor conditions.
Are there affordable alternatives to fancy seed-starting kits?
Repurpose clean yogurt cups, egg cartons, or recycled plastic containers with drainage holes. Use potting mix (or a mix of peat moss and perlite) and a spray bottle for watering. Even old toilet paper rolls work for tiny seeds like basil or carrots!
Why are my seedlings stretching tall and leggy?
Leggy seedlings = not enough light! Move them closer to a bright window (south-facing is ideal) or switch to grow lights (LED bulbs work great). Rotate trays daily for even growth. If it’s too late, bury them deeper when transplanting—they’ll root along the stem!
Can I reuse soil from last year’s seedlings?
Not recommended! Old soil may harbor diseases or pests. Sterilize it by baking at 200°F for 30 minutes or mix in fresh potting soil. Always use new, sterile soil for seeds to avoid damping-off (a fungal killer of tiny sprouts). Safety first!
Wrapping up and next steps
Starting your vegetable garden indoors with seeding vegetables indoors is a rewarding way to jumpstart your spring harvest—and trust us, those first homegrown bites are unbeatable! 🌱 With the right setup, patience, and a little green thumb love, you’ll be well on your way to a thriving garden before the last frost. Now’s the time to take action: grab those seeds, set up your grow lights, and watch your tiny sprouts grow into hearty plants ready for transplanting.
Ready to grow your confidence (and your veggies)? 🌟 Start with just one tray this week—you’ve got this!