
Pruning
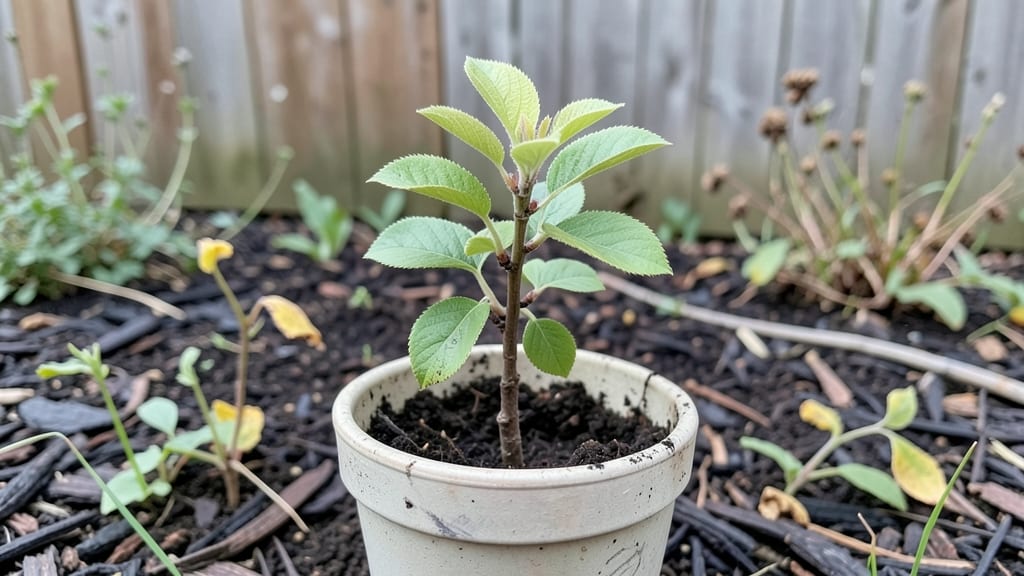
A seedling cherry tree's layered root system is the foundation for a tree that outgrows weak, top-heavy competitors—something I learned after my first sapling nearly toppled in a spring storm. The key isn't just planting deep; it's creating a wide, branching root structure from day one.
Most gardeners focus on the trunk, but the roots determine how well your tree handles drought, wind, and years of growth.
You'll need a 5-gallon container for the first year, well-draining soil mixed with compost, and a spot with full sun (6+ hours daily). Sweet cherries need cross-pollination, while sour varieties often self-pollinate—this matters when choosing neighbors.
The real secret? Pruning the roots at planting to encourage lateral spread, then watering deeply but infrequently to push roots outward instead of upward.
By year two, you'll see a tree with a sturdy base that resists gales and drought. The layered roots also mean faster fruit production, with branches heavy enough to support clusters without snapping.
Even in poor soil, this method creates a tree that thrives for decades—something my grandfather's neglected sour cherry still proves after 40 years.
Works for both sweet and sour varieties, though sweet cherries need more space between trees. The layered root technique adapts to containers or ground planting—just adjust the soil mix and watering schedule. Here's how to start right, so your cherry tree grows like it's been there for generations, not months.
📚 In This Guide
- What you need
- Instructions
- Tips and common mistakes
- Wrapping up and next steps
What you need
- ● Seedling cherry tree (1–3 plants, depending on spacing needs; choose disease-resistant varieties like Prunus avium or Prunus cerasus).
- ● Well-draining potting mix (5–10 gallons, depending on pot size). Pro tip: Mix in perlite or sand for aeration!
- ● Containers or pots (2–3 gallon size, with drainage holes).
- ○ Rooting hormone (optional but helpful for faster root development).
- ● Pruning shears (sterilized, sharp blades for clean cuts).
- ● Plastic wrap or clear plastic bag (to create a humid microclimate).
- ● Gloves (gardening gloves to protect hands from thorns and soil).
- ● Watering can or hose (with a gentle spray nozzle).
- ● Sunlight access (partial shade to full sun, 6+ hours daily).
- ● Fertilizer (balanced 10-10-10 or organic compost for nutrients).
- ● Spray bottle (for misting leaves to maintain humidity).
- ● Heating mat (for indoor propagation in cooler climates).
- ● Grow lights (if natural light is insufficient).
- ● Mulch (to retain moisture and regulate soil temperature).
- ● pH test kit (to ensure soil pH is between 6.0–7.0).
Instructions for cultivating a seedling cherry tree with a layered root system
Here’s how to establish a resilient cherry tree from a seedling by fostering a deep, layered root structure.
Prepare the Planting Site for Optimal Root Development
Select a location with well-draining soil and at least 6 hours of sunlight daily. Cherry trees thrive in slightly acidic soil with a pH between 6.0 and 7.0. If your soil is heavy clay or compacted, amend it with 2-3 inches of compost mixed into the top 12 inches of soil. This loosens the root zone and encourages deeper penetration.
Dig a hole twice as wide as the seedling’s root ball but only as deep as the container it came in. The goal is to avoid burying the graft union (if present) or the root flare—this ensures the tree’s stability and prevents rot. Gently loosen the sides of the hole with a shovel to reduce compaction.
Create a Layered Root System Through Strategic Planting
Place the seedling in the hole and position it so the root flare sits 1-2 inches above the surrounding soil line. This slight elevation prevents water from pooling around the trunk. Backfill the hole in three layers, tamping down each 4-inch layer lightly with your hands to eliminate air pockets. This gradual approach mimics natural soil settling and encourages roots to spread horizontally before growing deep.
After planting, water deeply to settle the soil and eliminate air gaps. The top 2 inches of soil should remain slightly moist but not soggy. Mulch around the base with 2-3 inches of organic mulch, keeping it 6 inches away from the trunk to prevent moisture buildup. This mulch layer retains soil moisture, regulates temperature, and discourages weeds—all critical for root development.
Implement Deep Watering Techniques for Root Expansion
Water the seedling once a week for the first 3 months, delivering 1-2 gallons directly to the root zone. Avoid shallow watering, which encourages surface roots. Instead, use a soaker hose or drip irrigation to deliver water slowly over 20-30 minutes. This method penetrates deeply, promoting a robust root system that can access moisture and nutrients from lower soil layers.
Monitor soil moisture by checking 2 inches below the surface—it should feel damp but not waterlogged. Overwatering suffocates roots, while underwatering stresses the tree. If the soil dries out between waterings, increase frequency slightly, but always prioritize deep, infrequent watering over frequent shallow sessions.
Prune and Train for Structural Integrity
In the first 2 years, focus on removing suckers (shoots growing from the base or roots) and water sprouts (vertical shoots from branches). These compete with the main structure for nutrients. Use clean, sharp pruners to make cuts at a 45-degree angle just above a bud or lateral branch. Prune in early spring, just as new growth begins, to minimize stress.
Train the main branches to spread outward by tying them to stakes or a spreader at a 45-degree angle. This encourages a wide canopy and prevents the tree from growing too tall too quickly. Avoid heavy pruning—remove no more than 20% of the tree’s foliage in a single session. The goal is to shape the tree while allowing the root system to establish fully.
Monitor and Adjust for Long-Term Health
Inspect the tree monthly for signs of stress, such as yellowing leaves, wilting, or stunted growth. These can indicate overwatering, underwatering, or nutrient deficiencies. If leaves yellow, test the soil pH and amend with lime (to raise pH) or sulfur (to lower pH) as needed. Fertilize lightly in early spring with a balanced, slow-release fertilizer (10-10-10) to support root and shoot growth.
As the tree matures, gradually reduce watering frequency but increase volume. A mature cherry tree may need 3-5 gallons per week during dry spells. Mulch annually to maintain moisture and suppress weeds. With consistent care, your layered root system will yield a sturdy, productive cherry tree capable of withstanding drought and disease.
Tips & tricks for perfect seedling cherry tree cultivation
A few strategic adjustments can transform your seedling cherry tree from a fragile sapling into a resilient, thriving specimen. The key lies in understanding how to nurture that critical root system during those first critical months.
Soil Preparation Insight: When amending your soil with 2-3 inches of compost in Step 1, focus on incorporating it into the top 12 inches of soil—not just the surface. This creates a loose, well-aerated zone where roots can penetrate deeply. I've seen firsthand how compacted soil can strangle root development, even when all other conditions seem ideal. Consider adding coarse sand or perlite if your native soil is particularly dense.
Layered Planting Technique: The three-layer backfilling method in Step 2 is where the magic happens for root development. As you tamp down each 4-inch layer, imagine you're creating a series of horizontal growth zones. This mimics how roots naturally spread in nature, establishing a wide base before growing deep. Don't rush this process—each layer should be compacted just enough to eliminate air pockets but still allow roots to push through easily.
Watering Strategy: Those 20-30 minutes of deep watering in Step 3 aren't just about volume—they're about method. Use a soaker hose placed at the outer edge of the root zone, not at the trunk. This encourages roots to grow outward in search of moisture, creating that vital layered structure. I've noticed trees watered at the trunk often develop shallow root systems that struggle during drought. The key is to water until you see moisture appear 6-8 inches from the trunk.
Pruning Precision: When removing suckers and water sprouts in Step 4, make your cuts at a precise 45-degree angle just above a bud. This technique promotes faster healing and prevents disease entry points. I learned this the hard way by making jagged cuts that left exposed wood vulnerable to infection. Also, remember that early spring is the optimal time for pruning because the tree's energy is focused on new growth rather than healing wounds.
Pro Tips for Seedling Cherry Tree
- A few strategic adjustments can transform your seedling cherry tree from a fragile sapling into a resilient, thriving specimen.
- Soil Preparation Insight: When amending your soil with 2-3 inches of compost in Step 1, focus on incorporating it into the top 12 inches of soil—not just the surface.
- Layered Planting Technique: The three-layer backfilling method in Step 2 is where the magic happens for root development.
Frequently asked questions
Got questions about nurturing your seedling cherry tree? You’re not alone! Here are some of the most common queries—and their practical answers—to help you grow a thriving tree with confidence.
How do I know if my seedling cherry tree is healthy?
A healthy seedling cherry tree has vibrant green leaves, firm stems, and no signs of wilting or yellowing. Check for strong root growth (white or light tan roots) and avoid overwatering—soggy soil or moldy bark are red flags. If leaves drop suddenly, it may signal stress from over/under-watering or pests.
When is the best time to plant a seedling cherry tree?
Plant your seedling in early spring or fall when temperatures are mild (50–70°F). Avoid extreme heat or frost, as young roots are sensitive. If planting in summer, water deeply daily to prevent shock. Pro tip: Amend soil with compost to boost nutrient uptake during the critical first month.
Can I layer the roots of a seedling cherry tree for faster growth?
Root layering
encourages stronger root systems. Bury a low branch (with leaves) in moist soil, securing it with a U-shaped wire. Once roots form (3–6 months), sever the branch and replant. This method works best in spring or early summer—just keep the soil consistently damp.
What pests should I watch for in young cherry seedlings?
Common pests include aphids, borers, and spider mites. Inspect leaves for sticky residue (aphids) or sawdust-like frass (borers). Use neem oil or insecticidal soap for mild infestations. For borers, prune affected branches immediately and treat cuts with pruning sealant. Prevention tip: Keep trees healthy with balanced watering!
Is there an alternative to planting a seedling if I want a cherry tree?
Yes! Grafted cherry trees (available at nurseries) offer faster fruit production and disease resistance. However, seedlings provide unique varieties and adaptability. If space is limited, consider dwarf cultivars—they grow well in containers too! Just ensure they get 6+ hours of sunlight daily.
Still stumped? Drop your question below—we’re happy to help your seedling cherry tree thrive!
Wrapping up and next steps
Growing a seedling cherry tree with a layered root system is a rewarding way to ensure stronger, healthier growth—whether you're a seasoned gardener or just starting out. 🌱 By following the right techniques, you’ll set your tree up for long-term success, from proper pruning to soil prep.
Now that you’re equipped with the knowledge, it’s time to roll up your sleeves and get planting! Start by selecting the right seedling, prepare your tools, and watch your cherry tree thrive with confidence.
Next step: Mark your calendar for seasonal pruning and root checks to keep your tree flourishing year after year.