
Propagation
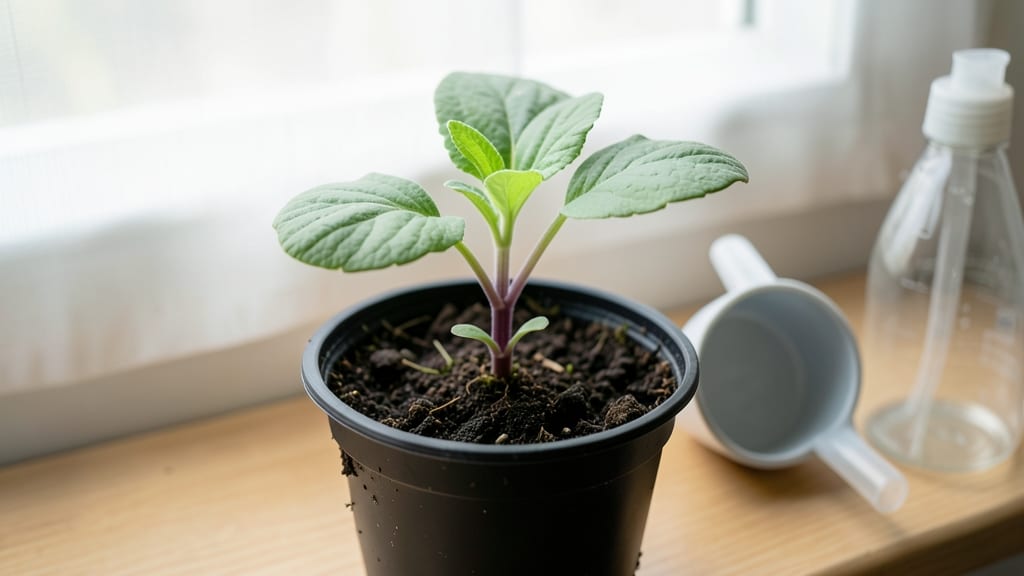
Those first tiny leaves popping up are the most exciting part of growing from seed—seedling first leaves mean your tiny plants are officially on their way to becoming something amazing. ✨ I still remember the thrill of watching my first batch of basil cotyledons unfurl, knowing real growth was just around the corner.
This stage is where you set the foundation for strong, healthy plants, so getting it right makes all the difference.
The moment you see those first leaves, you’re looking at cotyledons—not true leaves—though they’re just as important. They store energy for the seedling and help it establish roots before the real growth begins.
Now’s the time to focus on bright, indirect light (no harsh sun yet) and keep the soil lightly moist, not soggy. Leggy seedlings? That’s usually a sign they need more light or less space between plants.
📚 In This Guide
- What you need
- Instructions
- Tips and common mistakes
- Wrapping up and next steps
What you need
- ● Seedlings (1-10): Choose healthy, 1-2 week-old seedlings with cotyledons (first leaves) but no true leaves yet. Opt for varieties like tomatoes, peppers, or herbs for best results.
- ● Growing Medium (1-2 gallons): Soilless mix (e.g., 50% peat moss, 30% perlite, 20% vermiculite) OR
- ● Cocopeat-based mix (for organic preferences). Avoid garden soil—it’s too dense!
- ● Containers (1 per seedling): 4-6 inch pots with drainage holes OR
- ● Seedling trays (with individual cells, 2-3 inches deep).
- ● Watering Can or Spray Bottle: A gentle spray nozzle prevents overwatering.
- ● Grow Lights or Sunny Window: LED grow lights (12-16 hrs/day, 6-12 inches above seedlings) OR
- ● A south-facing window (6+ hours of direct sunlight daily).
- ○ Fertilizer (Optional but Recommended): Balanced liquid fertilizer (5-5-5 or 10-10-10 NPK ratio, diluted to ½ strength).
- ● Fish emulsion or seaweed extract (for organic options).
- ● Small Hand Trowel or Spoon: For transplanting delicate seedlings.
- ● Humidity Dome or Plastic Wrap: Creates a mini greenhouse to retain moisture (remove once true leaves appear!).
- ● pH Test Kit: Ensures your growing medium is 5.8-6.2 pH (ideal for most seedlings).
- ● Label Tags & Marker: Track seedling varieties if growing multiple types.
- ○ Thermometer/Hygrometer (optional): Monitors ideal temps (65-75°F) and humidity (40-60%).
How to recognize and care for seedling first leaves
Here’s how to spot those crucial first leaves—and keep your seedlings thriving once they arrive.
🌱 Step 1: Identify True Leaves vs. Cotyledons
Those first tiny leaves you see aren’t the real deal—they’re called cotyledons, and they’re just the seedling’s baby food supply. True leaves look different: they’re smaller, more complex (with serrated edges or distinct shapes), and packed with chlorophyll to start photosynthesis for real. For example, basil’s first true leaves have a rounded, toothy edge, while tomato seedlings show jagged, lobed leaves.
Don’t rush to thin seedlings based on cotyledons—wait until you see these true leaves. That’s when you know the plant is ready to grow into its full potential. I always mark my calendar when I spot the first true leaves on my trays, because that’s when I start adjusting light and watering routines.
💧 Step 2: Adjust Watering After First Leaves Emerge
Once those first true leaves appear, your seedlings need more consistent moisture—but not too much. Water when the top ½ inch of soil feels dry to the touch, using a gentle spray bottle to avoid disturbing delicate stems. Overwatering now can cause damping-off, a fungal disease that turns stems mushy and collapses seedlings overnight.
I like to water in the morning so excess moisture evaporates during the day. If you notice leaves wilting slightly in the afternoon, that’s normal—just give them a light misting. The key is keeping the soil evenly damp, not soggy. You’ll see strong, upright growth when you get the balance right.
☀️ Step 3: Optimize Light for Healthy Leaf Development
Seedlings with first true leaves need 12-16 hours of light daily to prevent leggy growth. If your seedlings are stretching toward the light with pale stems, they’re not getting enough. Move them within 2-4 inches of a grow light or south-facing window. Strong light encourages compact, sturdy growth and prevents weak stems that snap easily.
Rotate trays a quarter turn daily so all seedlings grow evenly toward the light. You’ll notice leaves on one side of the tray growing larger than the others—that’s a sign they’re leaning too much. Healthy seedlings have leaves that face all directions, not just toward the light source.
🌿 Step 4: Fertilize Lightly for Leaf Strength
After the first true leaves appear, seedlings can start using up their own nutrients, so a very diluted fertilizer (half-strength) gives them a boost. I use a water-soluble, balanced fertilizer (like 5-5-5) and apply it every 2-3 weeks to avoid burning tender roots. Fertilizer helps leaves grow thicker and darker green, a sign the plant is building strength.
Watch for signs of over-fertilizing: crispy leaf edges or yellowing between veins. If you see that, flush the soil with plain water and wait a week before reapplying. The goal is to support growth, not shock the seedlings. You’ll see the difference in just a few days—leaves will look fuller and more vibrant.
✂️ Step 5: Thin or Transplant When Leaves Fill the Tray
Once seedlings have 2-3 sets of true leaves and are crowded, it’s time to thin or transplant. Use clean scissors to snip unwanted seedlings at soil level—never pull them, or you’ll disturb the roots of the ones you’re keeping. If transplanting, handle seedlings by their leaves, not the stems, to avoid damaging the delicate growth.
This is the moment that matters: thinning ensures your remaining seedlings have enough space and nutrients to grow strong. You’ll see them perk up almost immediately after getting more room. If you’re transplanting, bury them just slightly deeper than before—the extra soil supports the stem and encourages root growth.
Tips & tricks for perfect seedling first leaves
Here's what nobody tells you about nurturing those first true leaves—these tricks will turn fragile sprouts into sturdy, vibrant plants.
True Leaf Identification: I learned this the hard way after thinning seedlings too early—cotyledons (those first baby leaves) look simple but true leaves have distinct shapes. For example, look for basil's rounded, toothy edges or tomato's jagged lobes. Use a magnifying glass if needed; those tiny details make all the difference.
Light Management: Those 12-16 hours of daily light in Step 3 are non-negotiable for preventing leggy growth. If your seedlings stretch toward the light, they're begging for more. I keep my grow lights just 2-3 inches above the seedlings and set a phone reminder to rotate trays every 24 hours—this ensures even growth all around.
Watering Wisdom: The ½-inch soil check in Step 2 is your best friend, but timing matters too. Water in the morning so excess moisture evaporates during the day. I've found that using a spray bottle with a fine mist setting prevents disturbing delicate stems while keeping roots happy. Overwatering here causes damping-off, which can wipe out your seedlings overnight.
Fertilizer Strategy: That half-strength fertilizer application every 2-3 weeks in Step 4 works wonders, but watch for signs of overdoing it. If you notice crispy edges or yellowing between veins, flush the soil immediately. I keep a small spray bottle of plain water handy just for this purpose—it's saved my seedlings more times than I can count.
Pro Tips for Seedling First Leaves
- Here's what nobody tells you about nurturing those first true leaves—these tricks will turn fragile sprouts into sturdy, vibrant plants.
- True Leaf Identification: I learned this the hard way after thinning seedlings too early—cotyledons (those first baby leaves) look simple but true leaves have distinct shapes.
- Light Management: Those 12-16 hours of daily light in Step 3 are non-negotiable for preventing leggy growth.
Frequently asked questions
Got questions about those first precious leaves? You’re not alone—growing seedlings can feel like a mystery! Here are answers to the most common concerns to keep your sprouts thriving from the start.
What do healthy first leaves on a seedling look like?
Healthy first leaves (called cotyledons) are usually firm, vibrant, and free of spots or yellowing. They should stand upright or slightly angled, not wilted or curled. If they’re pale or mushy, it may signal overwatering or poor light. Pro tip: Compare them to reference images for your specific plant type!
How long does it take for seedlings to grow their first leaves?
Timing varies by plant—fast growers like radishes pop up in 3–7 days, while slower ones (e.g., tomatoes) may take 7–14 days. Keep soil warm (70–80°F) and moist but not soggy. Patience is key! Fun fact: Some seeds (like beans) sprout faster in darkness—cover them lightly until they break soil.
Why are my seedling’s first leaves turning yellow?
Yellowing (chlorosis) often means overwatering, nutrient deficiency (like nitrogen), or poor drainage. Check the soil—it should feel like a damp sponge, not a swamp. If roots are mushy, repot in fresh, well-draining mix. For nutrient issues, use a balanced fertilizer (like 10-10-10) at half strength.
Can I transplant seedlings with just their first leaves?
Yes! Many seedlings (e.g., herbs, lettuce) can handle transplanting with just cotyledons, but avoid disturbing roots. Harden them off first by placing outside for 1–2 hours daily over 5–7 days. Wait until true leaves (the second set) appear for delicate plants like peppers or eggplants to reduce shock.
What if my seedlings only have one leaf and stop growing?
Don’t panic—some plants (like beans) grow slowly at first. Ensure they get 12–16 hours of light daily (use grow lights if natural light is weak). If the soil is cold or compacted, roots may struggle. Gently loosen soil around the stem or add a worm castings boost to encourage growth.
Do seedlings need special light for their first leaves?
Bright, indirect light is ideal, but avoid harsh midday sun, which can scorch tender leaves. A south-facing window or LED grow light 2–4 inches above seedlings works best. If leaves stretch toward light (etiolation), they’re light-starved—adjust the setup immediately!
Wrapping up and next steps
Watching those first seedling leaves unfurl is pure magic—proof that your patience and care are paying off! 🌱 Whether you’re growing veggies, flowers, or herbs, mastering this stage sets the foundation for healthy, thriving plants.
Now that you’re armed with the right materials, troubleshooting tips, and confidence, it’s time to roll up your sleeves and nurture your little green miracles.
Your next step? Transplant or continue nurturing those seedlings with the same love and attention. Keep monitoring their progress, and soon, you’ll be harvesting (or admiring!) the fruits of your labor. Happy growing! 🌿