
Leaf Blower
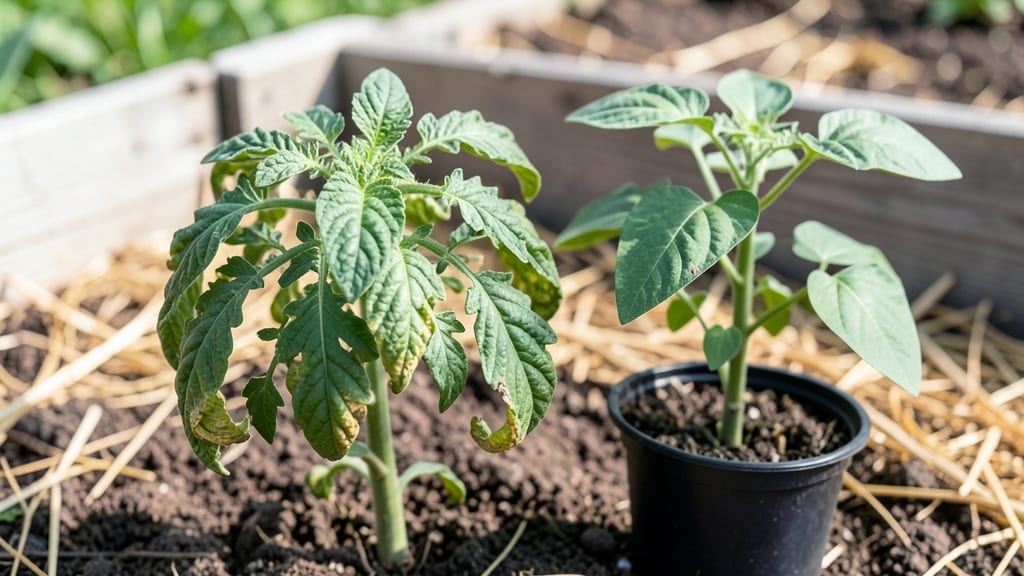
Seedling leaf curl can turn your hopeful starts into crumpled messes in days—unless you act fast. 🌱 I’ve watched this problem wipe out entire trays of seedlings, but the key is catching it early and knowing exactly what’s causing it.
The good news? Most cases have simple, organic fixes that work within a week.
Leaf curl usually comes from one of three culprits: tiny pests like spider mites or aphids, environmental stress from temperature swings or poor airflow, or even fungal infections hiding in damp soil.
The fast fix starts with a close look—check the undersides of leaves for webs or sticky residue, and feel for dryness or mushiness. Once you spot the issue, you can target the solution.
With the right approach, you’ll see straight, healthy leaves within 7-10 days. I’ve saved seedlings from total collapse using just a spray bottle of soapy water, neem oil, or a quick move to a shadier spot.
The secret is speed—don’t wait for the problem to spread. Here’s how to diagnose and treat it before it’s too late.
This works for both indoor starts and outdoor seedlings, whether you’re dealing with mites, wilting, or mysterious yellowing. The methods are simple but effective—no guesswork, just results. Let’s get those seedlings back on track.
Root Causes Behind Leaf Curling
When your seedlings start showing signs of leaf curl, it’s often a cry for help from the plant itself. Understanding the underlying causes—whether biological, environmental, or mechanical—is the first step toward restoring your seedlings to healthy growth.
Below, we break down the most common reasons why leaves curl in seedlings, along with the science behind each issue.
Seedlings are delicate, and extreme temperatures—whether scorching heat or chilling cold—can disrupt their cellular functions, leading to curled leaves. Here’s how it works:
- Heat Stress: High temperatures (above 85°F or 29°C) cause water to evaporate too quickly from leaves, a condition called transpirational stress. Cells lose turgor pressure (the internal water pressure that keeps leaves firm), causing them to curl inward to reduce surface area and limit water loss. 💡 Pro Tip: If your seedlings are under grow lights or in a greenhouse, ensure proper ventilation and avoid placing them near heat sources like radiators.
- Cold Stress: Temperatures below 50°F (10°C) can damage cell membranes, disrupting nutrient and water uptake. Curling is the plant’s way of conserving energy while protecting vital tissues. ❄️ Watch Out: Cold drafts from windows or doors can also trigger curling, even if the overall environment seems warm.
For both issues, maintaining a consistent temperature range of 65–75°F (18–24°C) during the day and slightly cooler at night (55–65°F or 13–18°C) is ideal for most seedlings.
Water is the lifeblood of seedlings, and imbalances—whether too much or too little—can cause leaves to curl as a distress signal.
- Overwatering: Excess water saturates the soil, cutting off oxygen to the roots. Without oxygen, roots can’t absorb nutrients efficiently, leading to anaerobic stress. Curling occurs as the plant tries to minimize water loss while struggling to process excess moisture. 🌱 Fix: Ensure pots have drainage holes and use a well-draining soil mix (like a 50/50 blend of peat moss and perlite).
- Underwatering: When soil dries out, roots can’t supply enough water to the leaves. Cells lose turgor pressure, causing them to curl upward in an attempt to reduce water loss. 💧 Quick Check: Stick your finger 1 inch into the soil—if it’s dry, it’s time to water. For seedlings, bottom-watering (placing the pot in a tray of water) encourages even moisture absorption.
🔥 Key Insight: Curling from water stress is often accompanied by wilting or yellowing. If the soil is soggy but leaves are curling, it’s likely overwatering. If the soil is bone-dry, underwatering is the culprit.
Pests like aphids, spider mites, and thrips don’t just nibble on leaves—they inject toxins or suck out sap, causing leaves to curl as a defensive response. Here’s how each pest contributes:
| Pest | How It Causes Curling | Signs to Look For |
|---|---|---|
| Aphids | These sap-sucking insects inject saliva that disrupts plant hormones, causing leaves to curl and pucker. They also excrete honeydew, a sticky residue that attracts mold. | Sticky leaves, tiny green/black clusters on undersides, and distorted new growth. |
| Spider Mites | They pierce cells to feed on sap, leading to chlorosis (yellowing) and curling as the plant tries to protect damaged tissues. Severe infestations cause leaves to dry out and crisp. | Fine webbing on undersides, speckled leaves, and a "bronzing" effect. |
| Thrips | These slender insects scrape cells while feeding, triggering curling and silvering on the leaf surface. They also spread viruses that exacerbate symptoms. | Scattered white or black specks, distorted flowers (if present), and silvery streaks. |
🕷️ Organic Defense: Spray seedlings with a mix of water + insecticidal soap (1 tsp per quart) or introduce beneficial predators like ladybugs or lacewings. For severe cases, isolate affected seedlings and treat with neem oil (1 tsp per liter of water).
Seedlings with curled leaves might be screaming for nutrients. Deficiencies in key elements like nitrogen, magnesium, or boron can disrupt cellular processes, leading to curling.
- Nitrogen (N) Deficiency: Leaves may curl downward and turn yellow (chlorosis) due to poor protein synthesis. Nitrogen is critical for leaf expansion and chlorophyll production.
- Magnesium (Mg) Deficiency: Curling often starts at the leaf edges and progresses inward, paired with interveinal yellowing. Magnesium is central to chlorophyll and helps regulate plant enzymes.
- Boron (B) Deficiency: New leaves may curl upward and become thickened or brittle. Boron is essential for cell wall formation and membrane stability.
📊 Soil Test Tip: If you suspect a deficiency, conduct a soil test to identify imbalances. For organic fixes, use compost tea (for general nutrients) or Epsom salt (magnesium sulfate) (1 tbsp per gallon of water, applied foliarly). For boron, use borax (sodium borate) sparingly (1/4 tsp per gallon).
While less common, physical stressors like strong winds or even rough handling can cause leaves to curl as a protective response.
- Wind Burn: High-velocity air strips moisture from leaves faster than they can absorb it, leading to curling and browning edges. This is common in outdoor seedlings or those near fans.
- Mechanical Damage: Rough handling (e.g., brushing against leaves during transplantation) can bruise cells, causing them to curl temporarily as they repair.
🛡️ Prevention: Use shade cloth (30–50%) to protect seedlings from harsh winds, and handle them gently by the stem, not the leaves. If curling occurs after repotting, it’s likely a temporary shock response—keep the environment stable to aid recovery.
How to Fix Wrinkled Seedling Leaves
Once you’ve identified the cause behind your seedlings’ curled leaves, the next step is action! Whether it’s a pest invasion, environmental stress, or fungal infection, these practical, organic solutions will help your seedlings bounce back—and keep them thriving.
Below, we’ve mapped fixes directly to the most common culprits, plus prevention tips to stop future flare-ups.
If tiny bugs like aphids, spider mites, or thrips are the culprits, act quickly to prevent further damage.
🔥 Step 1: Isolate the Problem
- Move affected seedlings to a quarantine area (like a separate tray or greenhouse) to prevent pests from spreading to healthy plants.
- Check nearby plants—one infestation can turn into a full-blown outbreak if left unchecked.
🍳 Step 2: Blast Them Off with Natural Sprays
Mix one of these DIY organic sprays and apply in the early morning or evening (when bees aren’t active):
| Pest | Recipe | How to Apply |
|---|---|---|
| Aphids | 1 tsp neem oil + 1 tsp castile soap + 1 quart water + few drops dish soap | Spray directly on leaves (undersides too!) until fully coated. Repeat every 5–7 days. |
| Spider Mites | 2 tbsp horticultural oil + 1 tsp garlic juice + 1 quart water | Spray all leaf surfaces, focusing on webbing. Reapply weekly if dry conditions persist. |
| Thrips | 1 tbsp rubbing alcohol + 1 tsp dish soap + 1 quart water | Dab infested areas with a cotton swab (alcohol kills on contact) or spray lightly. |
👨🍳 Step 3: Introduce Beneficial Predators
- Ladybugs (for aphids) or lacewings (for thrips) can be ordered online and released near seedlings.
- Pro tip: 🌡️ Increase humidity (via a humidifier or pebble tray) to encourage beneficial insects to stick around.
✨ Prevention: Keep Pests Away
- Inspect new plants before bringing them indoors or into your garden.
- Use reflective mulch (like aluminum foil) around seedlings to deter flying pests.
- Rotate crops if growing in the same spot yearly—pests build up in soil!
If heat, wind, or poor airflow caused the curling, tweak your growing setup to create ideal conditions.
🌡️ Fix Overheating or Sunburn
- Move seedlings to a shadier spot (use lightweight shade cloth if full sun is unavoidable).
- Water deeply in the morning to cool roots and prevent stress.
- Pro tip: 💡 Use a fan on low speed (5–10 mins/day) to strengthen stems and improve airflow.
💨 Combat Wind or Drafts
- Group seedlings together to break wind and reduce flapping.
- Add a windbreak (like a bamboo screen or cardboard barrier) if outdoors.
- Increase humidity with a spray bottle (mist leaves lightly 2x daily).
🌱 Fix Poor Airflow (Fungal Risk!)
- Space seedlings at least 2–3 inches apart (crowding traps moisture).
- Use a small oscillating fan on low to circulate air without damaging delicate leaves.
- Avoid overhead watering—use a drip irrigation system or water at soil level.
If powdery mildew or downy mildew is to blame, act fast—fungi spread like wildfire in damp conditions.
🔪 Step 1: Remove Infected Parts
- Snip off severely curled or spotted leaves with sterilized scissors (wipe with rubbing alcohol between cuts).
- Dispose of clippings in the trash (not compost)—fungal spores can survive!
🥘 Step 2: Apply Fungicidal Sprays
Mix one of these organic fungicides and spray both sides of leaves:
| Fungus | Recipe | Frequency |
|---|---|---|
| Powdery Mildew | 1 tbsp baking soda + 1 tsp neem oil + 1 quart water + 1 tsp soap | Spray every 7–10 days until cured. |
| Downy Mildew | 2 tbsp hydrogen peroxide (3%) + 1 quart water | Spray every 3–4 days for 2 weeks. |
| General Fungus | 1 tbsp copper fungicide (organic) + 1 quart water | Apply weekly as preventative. |
🌿 Step 3: Improve Growing Conditions
- Water at the base (never overhead) to keep leaves dry.
- Space plants wider to reduce humidity in the canopy.
- Use a fan to dry leaves faster after watering.
🎯 Prevention: Break the Fungal Cycle
- Sterilize tools before and after use (soak in 1:10 bleach-water solution for 10 mins, then rinse).
- Rotate crops if growing in containers or garden beds.
- Add compost or mycorrhizal fungi to boost plant immunity.
If curling stems from over- or under-fertilization, adjust your feeding routine.
📊 Fix Over-Fertilization (Burned Roots)
- Flush the soil with plain water (3x the pot’s volume) to leach out excess salts.
- Hold off on fertilizer for 2–3 weeks to let roots recover.
- Use rainwater or distilled water if your tap water is hard (high in minerals).
💪 Fix Under-Fertilization (Weak Growth)
- Test your soil with a DIY kit (or send to a lab) to check pH and nutrient levels.
- Add a balanced organic fertilizer like:
- Fish emulsion (for nitrogen)
- Kelp meal (for micronutrients)
- Worm castings (for slow-release nutrients)
- Pro tip: 🍎 Side-dress with compost (sprinkle around roots, then water) for a gentle boost.
If seedlings are beyond saving (e.g., severe pest damage, root rot, or irreversible curling), don’t waste time—cut your losses and propagate new ones.
- Take healthy cuttings from unaffected parts of the plant (if possible).
- Sow fresh seeds in sterilized soil and monitor conditions closely.
- Learn from the failure—adjust your growing setup to prevent repeats!
- 💡 Rotate trays weekly to even out light exposure.
- 🌡️ Monitor temperature—keep seedlings in 65–75°F (18–24°C) range.
- ✨ Use reflective surfaces (like white pebbles in trays) to bounce light and reduce stress.
- 🕰️ Harden off seedlings gradually before transplanting to prevent shock.
With these targeted fixes, your seedlings should uncurl and grow strong in no time. 🌱 Keep an eye on them, and don’t hesitate to adjust as needed—every plant is different!
Frequently asked questions about seedling leaf issues
Why do my seedlings' leaves curl upward instead of downward?
Upward curling often signals underwatering or nutrient deficiencies like boron or magnesium. Check soil moisture—if dry, water thoroughly. For deficiencies, use Epsom salt (magnesium) or borax (boron) sparingly. Downward curling usually means overwatering or aphid infestations.
Can I save seedlings with severely curled leaves from spider mites?
Early action works! Isolate affected seedlings and spray with a mix of horticultural oil (2 tbsp) + garlic juice (1 tsp) + 1 quart water. Reapply weekly. For bad cases, prune damaged leaves and introduce lacewings as natural predators. Severe infestations may require repotting in fresh, sterilized soil.
How do I tell if leaf curl is from heat stress vs. fungal disease?
Heat stress causes uniform curling with no spots, often paired with dry soil and crispy edges. Fungal issues (like powdery mildew) show white powdery patches or yellow spots on curled leaves. Move seedlings to shade for heat stress; remove infected leaves and apply baking soda spray for fungus.
Will pruning curled leaves help my seedlings recover?
Yes, but only if you remove no more than 25% of the leaf at a time. Prune only damaged areas with sterilized scissors to avoid spreading pests/disease. Avoid pruning healthy leaves—this stresses the plant. Focus on improving conditions (water, light, airflow) to encourage new growth.
Can I reuse soil from seedlings that had leaf curl?
Only if the curl was from environmental stress (like heat/wind) with no visible pests or disease. For pest/disease issues, discard soil and sterilize containers with bleach (1:10 ratio) or baking soda solution. Mix fresh, well-draining soil with compost for next time to boost immunity.