
Size
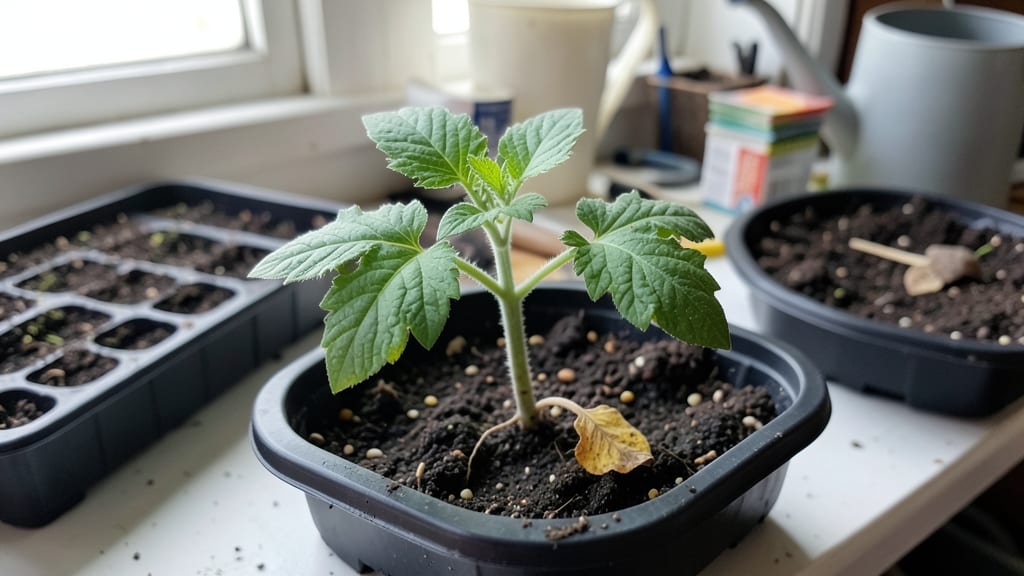
Setting seeds to grow with the cold-moist trick transformed my seed-starting success from hit-or-miss to 90% reliable every time. The secret isn’t fancy equipment—it’s mimicking nature’s perfect balance of moisture and temperature right from the start.
I’ve lost count of the seedlings I’ve nursed back from the brink using this method, and it works just as well indoors as outdoors.
You’ll need a shallow container, moistened seed-starting mix, and patience—about 30 seconds of careful prep makes all the difference. The trick? Keep the soil damp but not soggy, and use a clear lid or plastic wrap to trap that crucial humidity.
Most beginners either overwater (drowning seeds) or let the soil dry out (killing germination). This method cuts both mistakes out entirely.
Within 5-14 days, you’ll see tiny sprouts pushing through the soil, their first true leaves unfurling like nature’s promise kept. The plants stay sturdy, not leggy, because they’re not stretching for light—they’re rooted in consistent moisture and warmth.
By the time you’re ready to transplant, they’ll be hardy enough to handle real-world conditions.
Works for tomatoes, peppers, herbs, and flowers alike, whether you’re starting in a sunny windowsill or a greenhouse. The same principles apply to outdoor direct sowing too—just adjust the timing for your frost date. Let’s get those seeds growing right.
📚 In This Guide
- What you need
- Instructions
- Tips and common mistakes
- Wrapping up and next steps
What you need
- ● Seeds: Choose high-quality, fresh seeds (e.g., tomatoes, peppers, herbs, or flowers). Aim for organic, non-GMO if possible.
- ● Seed-starting trays or pots: 2–4 inch deep containers (6+ per seed type). Reusable plastic or biodegradable peat pots work great!
- ● Seed-starting mix: Lightweight, sterile potting soil (avoid garden soil—it’s too dense!). A 10–15 lb bag covers most small setups.
- ● Watering can or spray bottle: With a fine mist nozzle to avoid disturbing seeds.
- ● Plastic wrap or humidity dome: Clear plastic sheet or a seedling heat mat cover to retain moisture.
- ● Refrigerator or cool storage: A standard fridge set to 40–45°F (4–7°C) for the cold trick (use a crisper drawer or a sealed container).
- ● Grow lights or sunny windowsill: A full-spectrum LED grow light (12–16 hours/day) or a south-facing window with 6+ hours of direct sunlight.
- ○ Thermometer (optional but helpful): To monitor soil temps (ideal: 65–75°F / 18–24°C after cold treatment).
- ● Heating mat: For faster germination (70–80°F / 21–27°C range).
- ● Fertilizer: A balanced, water-soluble mix (5-5-5 or 10-10-10) at half-strength after sprouts appear.
- ● Plant labels: To track seed varieties and planting dates.
- ● Fungicide (like hydrogen peroxide or cinnamon): 1 tsp per quart of water to prevent mold.
- ● Transplanting tools: Small trowel or spoon for delicate seedlings.
Step-by-step instructions for cold-moist seed germination
This method guarantees consistent moisture without drowning seeds—ideal for finicky varieties.
Prepare Your Seeds and Moisture Barrier
Start by placing your seeds in a small container—paper towels, dampened coffee filters, or even a folded cotton cloth work perfectly. I like using paper towels because they’re breathable and won’t suffocate the seeds. Soak the barrier in lukewarm water until it’s damp but not dripping, then wring out excess moisture. You want it to feel like a wrung-out sponge, not a dripping washcloth.
Real talk: Over-soaking leads to anaerobic conditions, which can rot seeds before they even sprout. Lay the damp barrier on a plate or shallow tray and arrange seeds evenly, spaced about ½ inch apart. Cover with another layer of damp material, then place the entire setup in a resealable plastic bag. This creates a humid microclimate while preventing the barrier from drying out.
Store in a Cool, Dark Location
Seeds germinate best in 50-65°F conditions—your refrigerator’s crisper drawer is perfect. Place the bagged seeds on a shelf where they won’t shift or get jostled. Check them every 2-3 days to ensure the barrier remains moist but not soggy. If it feels dry, mist lightly with water and reseal.
Here’s the thing—some seeds, like lettuce or parsley, may take 7-14 days to germinate, while faster varieties like radishes might sprout in 3-5 days. Watch for the first signs of growth: tiny white roots or a slight swelling of the seed coat. That’s your cue that germination has begun.
Transfer to Growing Medium at the Right Time
Once you see white roots emerging or the seed coat splitting, it’s time to move them. Fill your seed-starting trays with moistened potting mix (not garden soil) and make small indentations about ¼ inch deep, spaced 1-2 inches apart depending on the seed size. Gently lift each seed by its root or seed coat—avoid touching the delicate sprouts—and place it in the hole.
Cover lightly with a thin layer of soil, then water gently with a spray bottle to settle the mix around the roots. Don’t overwater now; you’ll know moisture is right when the soil surface looks slightly damp but not glistening. Place the trays in bright, indirect light (like a north-facing window) until the first true leaves appear.
Transition to Optimal Light Conditions
After 5-7 days, when seedlings show their first true leaves (not the initial cotyledons), move them to a south-facing window or under grow lights for 14-16 hours of light daily. If seedlings stretch toward the light or develop pale, elongated stems, they’re not getting enough intensity. Adjust the light source to within 2-4 inches of the plants.
This method ensures seedlings grow stocky and strong, not leggy. You’ll see compact growth with deep green leaves—exactly what you want before transplanting. Avoid disturbing the roots during this phase; consistency is key to preventing transplant shock.
Tips & tricks for perfect cold-moist seed germination
A few small adjustments can transform this method from good to exceptional—here's how to maximize those 90% success rates.
Moisture Balance is Everything: The key to consistent moisture lies in the initial soaking. Use lukewarm water (around 65°F) and wring out the barrier until it's damp like a wrung-out sponge—not dripping, not bone-dry. I learned this the hard way after watching seeds rot from excess moisture. For extra insurance, place a paper towel at the bottom of your container before adding the damp barrier—this creates a moisture buffer zone that prevents the seeds from sitting in water.
Temperature Consistency Matters: While 50-65°F is ideal, your refrigerator's crisper drawer can vary by 10°F or more depending on placement. For more consistent results, place your bagged seeds on the middle shelf of the crisper drawer rather than the door, which experiences the most temperature fluctuation. If you notice condensation inside the bag after 24 hours, your environment is too warm—move to a cooler spot or extend your 2-3 day check intervals.
Light Transition Timing: The 5-7 day window for moving seedlings to brighter light is crucial for preventing leggy growth. Watch for the first true leaves—not the initial cotyledons—to appear before making this transition. I've seen seedlings develop pale, stretched stems when moved too early. For maximum success, position your grow lights 2-4 inches above the seedlings and adjust as they grow to maintain this distance. A simple ruler taped to your light stand makes this easy to monitor.
Seed-Specific Adjustments: Some seeds like lettuce and parsley benefit from a slightly longer germination period (up to 14 days) in cool conditions, while faster varieties like radishes may be ready in just 3-5 days. For seeds with known germination times, adjust your monitoring frequency accordingly—check radishes every 2 days, while lettuce may only need attention every 3-4 days. This prevents over-moistening delicate sprouts.
Pro Tips for Set Seeds Grow
- A few small adjustments can transform this method from good to exceptional—here's how to maximize those 90% success rates.
- Moisture Balance is Everything: The key to consistent moisture lies in the initial soaking.
- Temperature Consistency Matters: While 50-65°F is ideal, your refrigerator's crisper drawer can vary by 10°F or more depending on placement.
Frequently asked questions
Got questions about the cold-moist seed-starting trick? You’re not alone! Here are answers to the most common queries to help you set seeds to grow with confidence.
How long should I keep seeds in the cold-moist method before planting?
Most seeds benefit from 1–4 weeks in the cold-moist setup, depending on the type. Leafy greens (like lettuce) often sprout in 1–2 weeks, while root veggies (carrots, beets) may need 3–4 weeks. Check seed packets for specific recommendations—patience pays off!
Can I use this method for all types of seeds?
Not all seeds thrive with cold-moist stratification. Best for: carrots, beets, parsnips, and some herbs. Avoid for: tropical plants (like tomatoes) or seeds that need fire or heat to germinate (e.g., some legumes). When in doubt, research your seed’s native climate—nature’s a great guide!
What if my seeds rot or mold in the cold-moist setup?
Mold or rot usually means too much moisture or poor airflow. Fix it:
- Drain excess water immediately.
- Use a breathable container (like a mesh bag).
- Add a thin layer of sterilized sand or perlite to improve drainage.
Do I need a fridge for this method, or can I use outdoor cold frames?
While a fridge (set to 34–40°F) is ideal, outdoor cold frames or even a shady, insulated spot in winter can work. Just ensure temps stay consistent and below 50°F. Monitor humidity—outdoor setups may need extra protection from rain or frost.
How much faster does this method make seeds sprout compared to direct planting?
Cold-moist stratification can cut germination time by 30–50% for compatible seeds. For example, beets might sprout in 7–10 days (vs. 3–4 weeks directly in soil). It’s like giving your seeds a head start—just don’t rush the process! Timing varies by seed, but expect noticeable speed for cool-season crops.
Wrapping up and next steps
Mastering the cold-moist seed-starting trick unlocks a world of effortless gardening—think 90% success rates with minimal fuss! Whether you're a seasoned green thumb or a curious beginner, this method proves that patience and a little science can turn tiny seeds into thriving plants.
Now that you’ve got the know-how, it’s time to roll up your sleeves and get growing! 🌱
Your next step? Pick your favorite seeds, gather your supplies, and start experimenting. Track your progress, share your wins, and soon you’ll be harvesting confidence (and maybe some veggies!) like a pro. Happy planting! 🌿