
Pruning
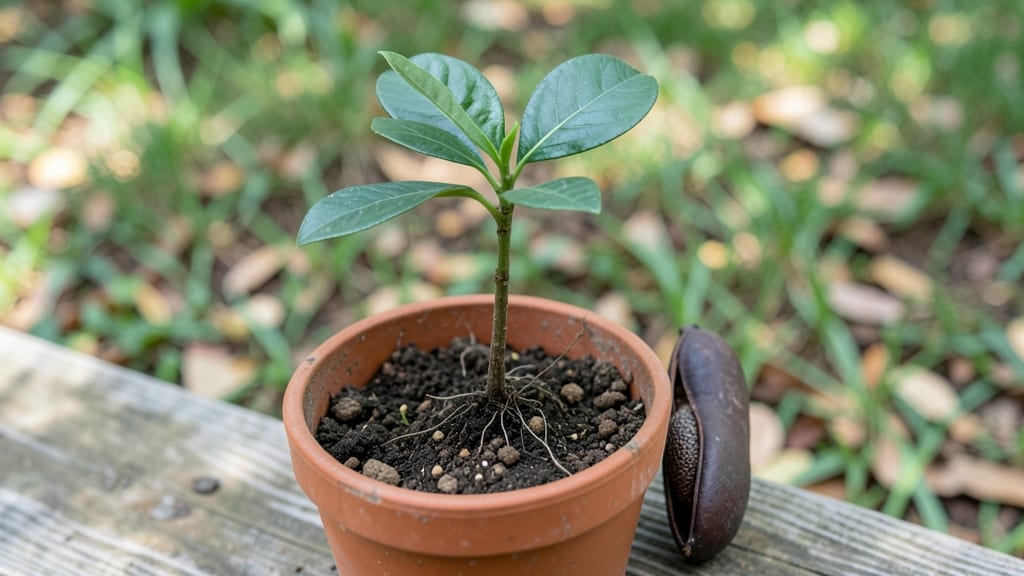
Growing shea butter tree seeds into high-yielding trees starts with patience and precision—these tropical giants take years to produce nuts, but the process begins with the right pruning approach. 🌱 I’ve learned that early pruning shapes not just the tree’s structure, but its future harvest potential, and the difference between a scraggly bush and a sturdy producer often comes down to the first few cuts.
The key is timing: wait until the seedling reaches 12–18 inches tall before making your first pruning cut, always targeting weak or crossing branches.
Shea trees thrive in USDA zones 10–11, so if you’re outside that range, you’ll need a greenhouse or container setup to mimic their native West African climate. The soil must drain well—think sandy loam mixed with compost—to prevent root rot, which is the #1 killer of young trees.
By the time your tree reaches 5–7 years old, strategic pruning opens the canopy to sunlight, boosting nut production. You’ll see the first harvestable fruits around 10–15 years, but the real payoff comes when you train the tree to focus energy on nut-bearing branches.
The secret? Prune in late winter or early spring, right before the growing season kicks in—this gives the tree time to heal and grow before the heat sets in.
Here’s the catch: shea trees grow slowly, and dormancy periods can be confusing. Don’t rush it—over-pruning or aggressive shaping will set you back years. Instead, think of each cut as an investment in the future harvest.
With the right approach, you’ll end up with a tree that not only survives but thrives, turning your patience into a steady supply of shea nuts for years to come.
📚 In This Guide
- What you need
- Instructions
- Tips and common mistakes
- Wrapping up and next steps
What you need
- ● Shea butter tree seeds (or saplings) – Ensure they’re healthy, disease-free, and ideally 3–5 years old for pruning.
- ● Pruning shears – Sharp, sterilized shears (bypass or anvil type) for clean cuts (avoid dull blades that tear bark).
- ● Hand pruners or loppers – For thicker branches (up to 2 inches in diameter).
- ● Disinfectant (70% isopropyl alcohol or bleach solution) – To sterilize tools between cuts and prevent disease spread.
- ● Gloves (heavy-duty, cut-resistant) – Protects hands from thorns and sap irritation.
- ● Safety glasses – Shields eyes from debris during pruning.
- ○ Pruning saw (optional but helpful) – For branches thicker than 2 inches.
- ● Rope or twine – To secure heavy branches post-pruning (if needed).
- ● Tree wound dressing – Speeds up healing of larger cuts (e.g., pruning sealant).
- ● Ladder or step stool – For reaching higher branches safely.
- ● Marking spray or tape – To tag branches for removal (useful for large trees).
- ● Compost bin or mulch – For disposing of pruned branches (nutrient recycling!).
- ● First-aid kit – Just in case of sap burns or minor cuts.
Step-by-step pruning guide for shea butter tree seedlings
Here's how to shape young shea butter trees for maximum fruit production—without stunting growth.
🌱 Step 1: Identify and Remove Weak Growth
Start by examining your seedling for any stems that are thinner than a pencil or growing at sharp angles. These are called "water sprouts" and they compete with your main trunk for nutrients. Use clean, sharp pruning shears to cut them off at the base—never leave stubs, as they invite disease. I always prune on a dry, sunny morning when the tree's sap is flowing downward, making cuts cleaner.
Look for any branches growing toward the center of the tree. These will rub against each other as they grow and create wounds where pests can enter. Remove these immediately. You'll know you've done this right when the seedling's main stem stands straight with only outward-growing branches remaining.
✂️ Step 2: Shape the Central Leader
Shea butter trees thrive with a single, dominant central leader—the main vertical stem. If your seedling has developed multiple leaders, select the strongest one (the one growing straightest and thickest) and remove the others at their base. This prevents a weak, multi-headed tree that produces fewer nuts. I like to make these cuts just above a leaf node where a side branch naturally emerges.
Once you've established your central leader, focus on keeping it unobstructed. Remove any side branches growing within 12 inches of the top of the central leader. These compete with the main stem and weaken the tree's structure. You'll see the central leader grow taller and stronger with each pruning session.
☀️ Step 3: Thin Out Lower Branches for Airflow
Shea butter trees need excellent airflow to prevent fungal diseases. Start thinning lower branches when your seedling reaches 3-4 feet tall. Remove every third or fourth branch, starting from the bottom and working upward. This creates an open canopy that lets sunlight reach all parts of the tree. I always step back after each cut to visualize how much light will penetrate.
Never remove more than 25% of the tree's foliage in one session. Shea butter trees are sensitive to heavy pruning. If you see new shoots emerging from old cuts, leave them—they'll help fill in any gaps. The goal is a tree that looks naturally balanced, not one that's been aggressively trimmed.
🌿 Step 4: Encourage Fruit-Bearing Branches
Once your tree reaches 5-6 feet tall, focus on developing the lower scaffold branches—the horizontal branches that will bear most of your fruit. Select 4-6 strong branches growing outward from the main trunk and prune any competing branches on these limbs. You want these scaffold branches to spread out like the spokes of a wheel, creating a sturdy framework.
Make your cuts just above a leaf bud that faces outward. This encourages new growth in the right direction. Shea butter trees produce fruit on 2-3 year old wood, so avoid heavy pruning on branches that already have fruit. You'll know you're doing it right when you see new growth emerging from the pruned areas within 4-6 weeks.
⏰ Step 5: Schedule Seasonal Maintenance
Prune shea butter trees in late winter or early spring, just before new growth begins. This gives the tree time to heal before the growing season. Avoid pruning during wet seasons, as open wounds take longer to heal in damp conditions. I always sterilize my tools with rubbing alcohol between cuts to prevent spreading disease.
After your initial shaping, maintain the tree with light pruning each year. Remove any dead, diseased, or crossing branches immediately. Thin out crowded areas to maintain airflow. With proper pruning, your shea butter tree will develop a strong structure that supports heavy fruit production for decades. You'll see the first harvest-ready nuts appear when the tree reaches 8-10 years old.
Tips & tricks for pruning shea butter tree seedlings
These essential techniques will help you shape your shea butter tree for maximum fruit production while keeping it healthy and strong.
Tool Preparation: Sterilizing your pruning shears between cuts is more important than you might think. I've seen too many trees develop infections from contaminated tools. Use rubbing alcohol to wipe down blades after each cut, especially when working with multiple branches. This simple step prevents disease from entering through fresh wounds, which is critical for young trees still developing their defenses.
Visualizing the Tree's Structure: In Step 3, when you're thinning lower branches, step back every few cuts to visualize the tree's shape. Imagine sunlight filtering through the canopy—you want it to reach all parts of the tree. If you notice shadows or crowded areas, those are your clues to make additional cuts. This technique helps create that open, airy structure shea butter trees need to thrive.
Timing is Everything: The late winter or early spring timing in Step 5 isn't just arbitrary—it's when the tree's energy is focused on new growth rather than healing. Pruning at this time gives your tree the full growing season to recover. In warmer climates, you might need to adjust slightly, but never prune during wet seasons when wounds take longer to heal and fungal infections are more likely.
Encouraging New Growth: When you see those new shoots emerging from old cuts within 4-6 weeks (as mentioned in Step 4), leave them! These are your tree's way of filling in gaps and strengthening its structure. I've found that these new shoots often become some of the strongest branches for future fruit production. It's a sign your pruning is working exactly as it should.
Pro Tips for Shea Butter Tree Seeds
- These essential techniques will help you shape your shea butter tree for maximum fruit production while keeping it healthy and strong.
- Tool Preparation: Sterilizing your pruning shears between cuts is more important than you might think.
- Visualizing the Tree's Structure: In Step 3, when you're thinning lower branches, step back every few cuts to visualize the tree's shape.
Frequently asked questions
Got questions about growing shea butter tree seeds or maximizing your harvest?
Here are answers to the most common queries to help you prune like a pro!
How long does it take for shea butter tree seeds to germinate?
Shea butter tree seeds typically take 4–12 weeks to germinate, depending on soil temperature and moisture. Keep them in a warm (70–80°F), humid environment with consistent moisture. Patience is key—some seeds may take longer, especially in cooler climates. Pro tip: Soak seeds for 24 hours before planting to speed up germination.
When is the best time to prune a shea butter tree for optimal fruit yield?
Prune your shea butter tree during its dormant season (late fall to early spring) to avoid stressing the tree. Focus on removing dead, diseased, or crossing branches first. For fruit-bearing trees, light pruning in late winter encourages new growth and better fruit production. Avoid heavy pruning in fruiting season—this can reduce yield.
Can I grow a shea butter tree from seeds indoors before transplanting outdoors?
Yes! Start seeds indoors in well-draining pots 6–8 weeks before the last frost. Use a mix of potting soil and perlite, and place them near a sunny window or under grow lights. Once seedlings are 4–6 inches tall and the weather is warm, transplant them outdoors. Harden them off gradually to prevent shock.
What should I do if my shea butter tree isn’t producing fruit?
Low fruit production could stem from poor pruning, nutrient deficiencies, or lack of sunlight. Ensure your tree gets at least 6–8 hours of sunlight daily and prune to improve airflow. Fertilize with a balanced, organic fertilizer (like compost or manure) in early spring. If the tree is young (<5 years), give it more time—shea trees mature slowly! Pro tip: Hand-pollinate flowers if bees are scarce in your area.
Are there alternatives to shea butter tree seeds for pruning practice?
If you’re new to pruning, practice on fast-growing, non-invasive trees like willow, apple, or peach trees. These respond well to pruning and regrow quickly, making them great for beginners. Avoid pruning trees with invasive roots (e.g., Bradford pear) unless you’re experienced. Once confident, transition to shea butter trees—or other fruit-bearing species like mango or avocado!
Wrapping up and next steps
Pruning your shea butter tree seeds is a rewarding way to boost productivity and ensure a bountiful harvest!
By mastering the right techniques—like selective cutting, timing, and tool care—you’ll create an environment where your trees thrive. Now’s the time to roll up your sleeves and get growing! Ready to take the next step? Start by planting your first seeds or joining a local gardening community for hands-on support.
Your future harvests will thank you! 🌱✨