
Propagation
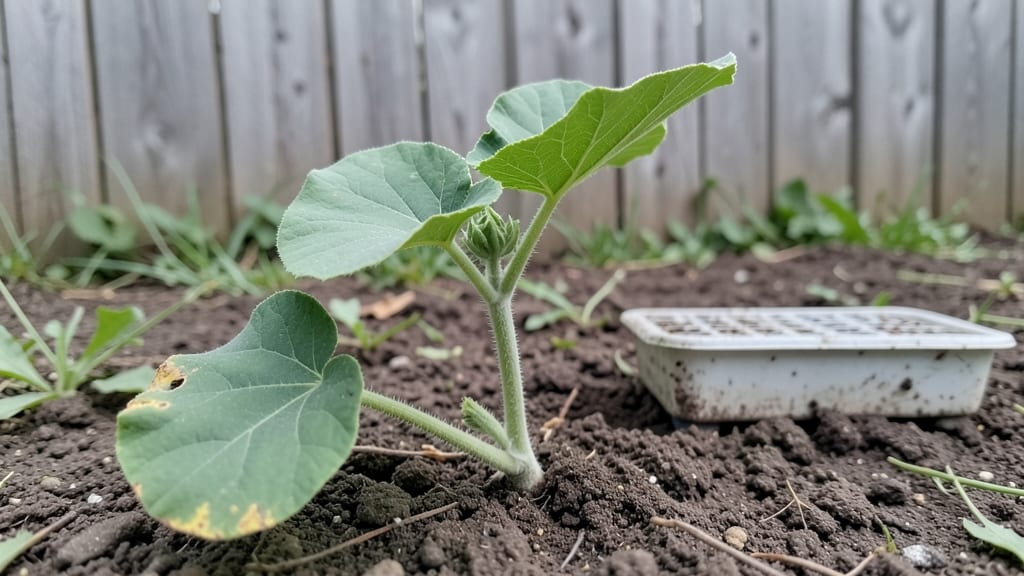
The secret to squash seeds germination lies in balancing moisture and warmth—get it wrong, and you’ll wait weeks for sprouts to appear. 🌱 I’ve watched seeds rot in soggy soil or shrivel in dry heat, but once I... dialed in the perfect balance, germination went from hit-or-miss to reliable within 5-7 days.
The secret isn’t fancy equipment—it’s understanding how squash seeds naturally wake up.
Start with soil that’s damp like a wrung-out sponge, not swimming in water, and keep it wrapped in plastic to trap heat. A 75–90°F bottom heat mat (or sunny windowsill) mimics the warmth squash seeds crave in their native tropics.
Too cool? They’ll sulk. Too hot? They’ll rot. The goal is steady moisture without drowning—think of it like a cozy blanket, not a swamp.
When done right, you’ll see tiny radish-shaped seedlings push through the soil in 3–10 days, with the first true leaves unfurling in another week. The plants grow fast once they start, but those first few days are make-or-break.
Skip the guesswork: here’s exactly how to set it up for success, whether you’re starting in flats or straight in the garden.
We’ll cover troubleshooting moldy soil, speeding up slow starters, and the best containers for different squash types—because even the hardiest seeds need a little help getting going. Let’s get those sprouts popping.
📚 In This Guide
- What you need
- Instructions
- Tips and common mistakes
- Wrapping up and next steps
What you need
- ● Squash seeds: Fresh, high-quality seeds (10–20 per batch, depending on your container size). Opt for heirloom or organic seeds for best results.
- ● Germination containers: Seed trays with drainage holes (or small pots, 2–3 inches deep).
- ○ Optional: Biodegradable peat pots (great for transplanting later!).
- ● Growing medium: Seed-starting mix (sterilized, lightweight, and well-draining). Avoid garden soil—it’s too dense!
- ○ Optional: Coco coir or vermiculite for extra moisture retention.
- ● Watering tools: Spray bottle (for gentle moisture control).
- ○ Optional: Watering can with a fine rose attachment.
- ● Heat source: Heat mat (70–90°F range) or a warm spot like a sunny windowsill or under grow lights.
- ● Humidity dome or plastic wrap: To create a mini greenhouse effect and retain moisture.
- ○ pH testing kit (optional): Ensures your growing medium is slightly acidic (pH 6.0–7.0) for optimal germination.
- ● Temperature control: Maintain a consistent range of 75–90°F (24–32°C) for germination. Use a thermometer to monitor!
- ● Moisture balance: Keep the growing medium consistently damp (not soggy). Overwatering = seed rot!
- ● Light (post-germination): Once sprouts emerge, provide 12–16 hours of light daily (grow lights or sunny window).
- ● Patience: Squash seeds typically germinate in 7–14 days, depending on variety and conditions.
Step-by-Step instructions for germinating squash seeds
Here's how to coax those stubborn squash seeds into reliable, speedy sprouts every time.
🌱 Step 1: Prepare Seeds for Maximum Moisture
Squash seeds have tough outer shells that need help soaking up water. Place them in a bowl and cover with warm water—about 75°F—for 8-12 hours. This softens the seed coat and kickstarts germination. I like to use a small plate to keep them submerged without overcrowding.
After soaking, drain the water and wrap the seeds in a damp paper towel. Fold the towel so the seeds are snug but not crushed, then place it in a sealed plastic bag. This traps moisture while allowing airflow—critical for preventing rot. Check daily and mist with water if the towel feels dry.
💧 Step 2: Plant in Warm, Moist Soil
Fill your seed-starting containers with the moistened potting mix—it should feel like a wrung-out sponge, not soggy. Press the soil down gently to remove air pockets but avoid compacting it. Squash seeds need warmth to germinate, so place the containers in a spot where the soil stays between 75-90°F.
Plant seeds 1 inch deep, spacing them 2 inches apart in rows. Use a pencil to make small holes—this ensures consistent depth. Cover lightly with soil and pat the surface smooth. Water gently with a spray bottle until the soil looks evenly damp but not wet.
☀️ Step 3: Maintain Consistent Warmth and Humidity
Cover the containers with clear plastic wrap or a humidity dome to lock in moisture and warmth. Place them in a warm spot—like on top of the fridge or near a sunny window—but avoid direct sunlight until sprouts appear. Squash seeds germinate fastest at 80-85°F.
Check daily for condensation on the plastic. If it looks heavy, lift the cover for 10 minutes to prevent mold. You’ll see tiny sprouts in 3-7 days, depending on temperature. Once they emerge, remove the cover immediately to prevent damping-off—a fungal disease that turns seedlings to mush.
⏰ Step 4: Provide Light and Airflow
Move the seedlings to a bright location with 6-8 hours of indirect light daily. If using a grow light, position it 4-6 inches above the plants. You’ll know they’re getting enough light when the stems stay sturdy and leaves are dark green, not pale or stretched.
Thin seedlings to 1 per cell if overcrowded, using scissors to snip at soil level. This prevents competition for nutrients. Water the soil when the top ½ inch feels dry, but avoid wetting the leaves to reduce disease risk.
Tips & tricks for perfect squash seed germination
Between us, squash seeds can be stubborn—but these tricks will help you bypass their natural resistance and get reliable sprouts every time.
The Warm Water Secret: That 75°F warm water in Step 1 isn't just warm—it should feel like bathwater to your wrist. If it's too hot, you'll shock the seeds; too cold, and they won't absorb moisture properly. I use a thermometer to check, but if you don't have one, fill a cup with the water and let it sit for 5 minutes—if it's still warm to the touch, it's ready. This step is non-negotiable for breaking through those tough seed coats.
Paper Towel Technique: When wrapping seeds in a damp paper towel in Step 1, don't just wad it up—fold it like a burrito so the seeds are snug but not compressed. Too much pressure prevents airflow, which leads to mold. Place the wrapped towel in a sealed plastic bag, but leave a tiny gap for air circulation. I poke a few small holes with a toothpick if I forget this step—it makes all the difference.
Temperature Troubleshooting: Maintaining that 75-90°F range in Step 2 can be tricky if your home runs cold. Place containers on top of your fridge or near a sunny window (but not in direct light yet). For extra warmth, I've even used a seedling heat mat set to 85°F—it's worth the investment if you're struggling with slow germination. Just don't let the soil get hotter than 90°F, or you'll cook the seeds.
Light Transition: The move from humidity dome to light in Step 4 is critical. When you see those first sprouts, remove the cover immediately—even a day longer can trigger damping-off. For light, I use a simple LED grow bulb on a timer for 6-8 hours daily. If using natural light, rotate containers daily so all seedlings get even exposure. Pale, leggy seedlings mean they're stretching for light—time to move them closer.
Pro Tips for Squash Seeds Germination
- Between us, squash seeds can be stubborn—but these tricks will help you bypass their natural resistance and get reliable sprouts every time.
- The Warm Water Secret: That 75°F warm water in Step 1 isn't just warm—it should feel like bathwater to your wrist.
- Paper Towel Technique: When wrapping seeds in a damp paper towel in Step 1, don't just wad it up—fold it like a burrito so the seeds are snug but not compressed.
Frequently asked questions
Got questions about getting those squash seeds to sprout like a pro? Here are some of the most common ones—plus quick, actionable answers to save you time and frustration!
How long does it take for squash seeds to germinate?
Most squash seeds sprout within 5 to 10 days under ideal conditions (warmth, moisture, and darkness). If you’re using fresh seeds, expect faster results—sometimes even in 3 to 5 days. Patience is key, but if nothing happens after 14 days, check moisture levels or seed viability.
What’s the best temperature for squash seed germination?
Squash seeds thrive in warmth—aim for 70–90°F (21–32°C). If your soil or indoor setup is cooler, try a seedling heat mat or place them near a sunny window. Avoid cold drafts or sudden temperature swings, which can stall germination.
Do squash seeds need light to germinate?
Nope! Darkness is best during germination—light comes later. Keep seeds covered with soil (about 1 inch deep) or a damp paper towel until sprouts appear. Once they break the surface, move them to bright, indirect light to prevent leggy seedlings.
Can I use old squash seeds for germination?
Older seeds (2+ years) may germinate poorly, but don’t toss them yet! Test viability by soaking a few in warm water for 24 hours—if they sink and look plump, they’re worth trying. For best results, store seeds in a cool, dry place and use them within 1–2 years.
Why aren’t my squash seeds sprouting? Troubleshooting tips
Check these common culprits:
- Moisture issues: Soil should stay consistently damp (not soggy). Use a spray bottle if needed.
- Temperature: Too cold? Try a seedling heat mat or warm spot.
- Old/seeds: Test a few in water—if they float, they’re likely dead.
- Depth: Plant seeds too deep? Squash seeds need light to sprout—keep them ½ inch deep max.
Wrapping up and next steps
Germinating squash seeds successfully is all about understanding their moisture and temperature needs—simple tweaks can make a world of difference! Whether you’re a seasoned gardener or just starting, these triggers ensure strong, reliable sprouts.
Now that you’re armed with the right knowledge, it’s time to get hands-on—plant those seeds and watch your garden thrive! 🌱 For extra confidence, keep a seed journal to track progress and refine your technique over time.