Picking
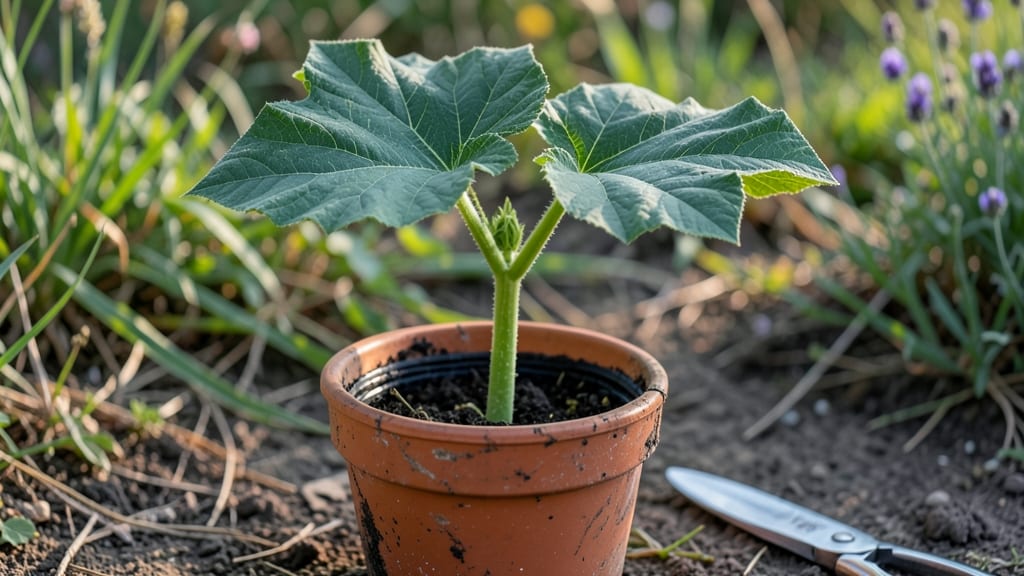
Summer squash seedlings can pop up in just 7 days without chilling them first—no fancy tricks, just the right conditions. 🌱 I’ve grown squash for years, and the secret lies in warm soil, proper moisture, and a little patience.
Most gardeners overthink this, but it’s simpler than you’d expect once you know the basics.
The key is starting seeds in 70–80°F soil—too cool, and they’ll take weeks to sprout. Use a heat mat if your basement stays chilly, or wait until the ground warms naturally in spring.
A shallow tray with damp seed-starting mix keeps seeds moist without drowning them. Once sprouts appear, move them to a sunny windowsill or grow light for 10–12 hours of light daily.
By day 7, you’ll see sturdy little seedlings with true leaves ready for transplanting. They’ll outpace store-bought plants because they’re acclimated to your climate. The first harvest comes faster too—45–50 days after transplanting, depending on the variety.
This method works for zucchini, yellow squash, and pattypan varieties alike. No cold frames, no waiting—just reliable, fast germination. Here’s how to keep them thriving once they sprout.
📚 In This Guide
- What you need
- Instructions
- Tips and common mistakes
- Wrapping up and next steps
What you need
- ● Seeds: 5–10 high-quality summer squash seeds (e.g., Zucchini, Yellow Crookneck, or Patio Star)
- ● Seed-starting mix: 1–2 cups of sterile, lightweight potting soil (avoid garden soil—it’s too dense!)
- ● Containers: 3–4 small pots (3–4 inches deep) or a seed tray with individual cells
- ● Water: Room-temperature, filtered water (or rainwater if available)
- ○ Heat mat (optional but recommended): A seedling heat mat (70–80°F range) to speed up germination
- ● Grow lights or sunny windowsill: A south-facing window or a full-spectrum LED grow light (12–16 hours/day)
- ● Spray bottle: For gentle watering (avoids disturbing seeds)
- ● Plastic wrap or dome: To create a mini greenhouse effect (keeps humidity high)
- ○ Fertilizer (optional): A mild, water-soluble seedling fertilizer (diluted to half-strength)
- ○ Thermometer (optional): To monitor soil temperature (ideal range: 70–90°F)
- ○ Tweezers (optional): For delicate seed handling if needed
How to germinate summer squash seedlings in 7 days without cold treatment
Here’s how I get summer squash seeds sprouting in under a week—no refrigeration or fancy tricks needed.
🌱 Step 1: Soak the Seeds for Faster Germination
Fill a small bowl with lukewarm water and add the seeds. Let them soak for 8-12 hours—this softens the tough outer coating and speeds up germination. You’ll see them plump up slightly, which is your cue they’re ready. Drain and pat them dry with a paper towel before planting.
Don’t skip this step. I’ve tried planting dry seeds, and they take 10-14 days to sprout—more than twice as long. The soak jumpstarts the process so you’re harvesting sooner. Just don’t let them sit in water longer than 12 hours, or they’ll start to rot.
🌱 Step 2: Plant in Warm, Moist Seed Starting Mix
Fill your seed trays or small pots with warm seed starting mix—I like to preheat it in the microwave for 1-2 minutes to mimic the warmth of summer soil. Press the mix down lightly so it’s firm but not compacted, then make a ½-inch-deep hole for each seed.
Place one soaked seed in each hole, spacing them 1 inch apart. Gently cover with a thin layer of mix, just enough to hide the seed. Mist the surface with water until it’s evenly damp—not soggy, but not dry. The goal is to keep the mix consistently moist without waterlogging.
💧 Step 3: Provide Heat and Humidity for Rapid Sprouting
Cover the trays with a clear plastic dome or plastic wrap to trap heat and humidity. Place them in a spot where the soil stays between 75-85°F—a sunny windowsill, under a grow light, or on a seedling heat mat. Check daily to ensure the mix stays moist; if it dries out, mist lightly.
Sprouts should appear in 3-5 days, with full germination in 7 days or less. Once you see the first green tips, remove the cover immediately to prevent damping-off. Keep the seedlings in bright light to avoid leggy growth—if they stretch toward the light, move them closer or add a grow light.
☀️ Step 4: Thin Seedlings and Harden Off for Transplanting
When seedlings reach 2 inches tall and have 2-3 true leaves, thin them to the strongest one per cell or pot. Snip the weaker sprouts at the base with scissors—pulling can disturb the roots of the remaining plants. Water the soil gently after thinning to settle it around the roots.
Start hardening off 1 week before transplanting by placing the seedlings outside in a sheltered spot for 1-2 hours daily. Gradually increase their time outdoors over 5-7 days, exposing them to more sunlight and wind. By the time they’re ready to go into the garden, they’ll be tough enough to handle the transition.
⏰ Step 5: Transplant When Soil and Air Are Warm
Wait until nighttime temperatures stay above 55°F and the soil is at least 60°F before planting. Dig holes 1 inch deeper than the seedlings’ root balls and space them 2-3 feet apart in rows 4-5 feet apart. Gently remove each seedling, keeping the root ball intact, and place it in the hole.
Fill the hole with soil, firming it lightly around the base to eliminate air pockets. Water deeply right after transplanting to help the roots establish. Mulch around the plants with 2-3 inches of straw or shredded leaves to retain moisture and keep the soil warm—this is key for summer squash, which thrives in heat.
Tips & tricks for perfect summer squash seedlings
These game-changing strategies will help you achieve rapid, healthy germination without cold treatment—every time.
Soaking Secret: The 8-12 hour soak isn't just about hydration—it's about breaking dormancy. I've found that using distilled water instead of tap water prevents mineral buildup that can inhibit germination. After soaking, spread seeds on a paper towel to dry for 10 minutes before planting. This quick drying prevents mold while keeping them ready to sprout. The plump appearance is your confirmation they're primed for action.
Heat Hack: For Step 2, I recommend preheating your seed starting mix in the microwave for exactly 1-2 minutes until it reaches about 80°F. This mimics summer soil conditions perfectly. Use a thermometer to verify—too hot and you'll cook the seeds, too cool and germination slows. Place the trays on a seedling heat mat set to 75°F during germination for consistent warmth. Between us, I've seen germination times cut in half with this simple adjustment.
Humidity Management: In Step 3, condensation on the plastic cover is your friend—but only up to a point. Check daily and lift the cover for 5 minutes to prevent fungal growth. If you notice black spots on seedlings, that's damping-off, and it spreads fast. I've had success using a small fan on low setting for 10 minutes daily to create gentle airflow while maintaining humidity. This toughens seedlings naturally for transplanting.
Transplant Timing: Don't rush the hardening off process in Step 4. I've learned the hard way that seedlings hardened off for just 1-2 hours daily can still be shocked by outdoor conditions. Gradually increase their time outside over 5-7 days, watching for signs of stress like wilting. The key is to match outdoor temperatures—if nights dip below 55°F, bring them in. This gradual exposure ensures they'll thrive when you transplant them into warmer soil.
Pro Tips for Summer Squash Seedling
- These game-changing strategies will help you achieve rapid, healthy germination without cold treatment—every time.
- Soaking Secret: The 8-12 hour soak isn't just about hydration—it's about breaking dormancy.
- Heat Hack: For Step 2, I recommend preheating your seed starting mix in the microwave for exactly 1-2 minutes until it reaches about 80°F.
Frequently asked questions
Got questions about growing summer squash seedlings? You’re not alone! Here are answers to the most common queries to help you grow confidently—no cold tricks required.
How long do summer squash seeds take to germinate?
Most summer squash seeds sprout in 3–7 days under ideal conditions (warm soil, 70–90°F, and consistent moisture). With the right setup, you can see those first green shoots in just 7 days or less—no cold stratification needed!
When is the best time to plant summer squash seedlings?
Plant seedlings after the last frost when soil temps hit 60°F+ (use a soil thermometer!). For warm climates, start seeds indoors 2–3 weeks before transplanting to avoid shock. Cool weather slows growth, so aim for May–June in most U.S. zones.
Why aren’t my summer squash seeds sprouting?
Check these fixes:
Too cold? Soil <60°F? Use a heat mat or wait for warmer temps.
Too wet/dry? Keep soil consistently moist (not soggy).
Old seeds? Test germination by soaking seeds in warm water—if <50% float, replace them.
Depth issue? Plant seeds <1 inch deep; deeper = slower sprouts.
Patience pays off—most seeds sprout within 10 days!Can I grow summer squash from store-bought squash seeds?
Yes! Save seeds from organic, heirloom summer squash (like zucchini or yellow squash) by scooping out seeds, rinsing, and drying them. Store in a cool, dark place for up to 5 years. Avoid hybrid seeds—they may not grow true to type.
How do I protect my seedlings from pests?
Use these organic defenses:
- Row covers for young plants (remove at flowering to pollinate).
- Neem oil or insecticidal soap for aphids/squash bugs.
- Diatomaceous earth around the base to deter crawling pests.
- Handpick larger bugs (like cucumber beetles) early!
Wrapping up and next steps
Growing summer squash seedlings in just 7 days is totally doable—no cold stratification needed! 🌱 With the right warmth, moisture, and patience, you’ll soon be watching those tiny sprouts burst through the soil, ready to thrive.
Now that you’re armed with tips and answers, it’s time to roll up your sleeves and get planting.
Your next step? Pick your favorite variety, gather your supplies, and give these speedy seedlings the love they deserve. Happy gardening—your summer harvest is just around the corner! 🌞