
Propagation
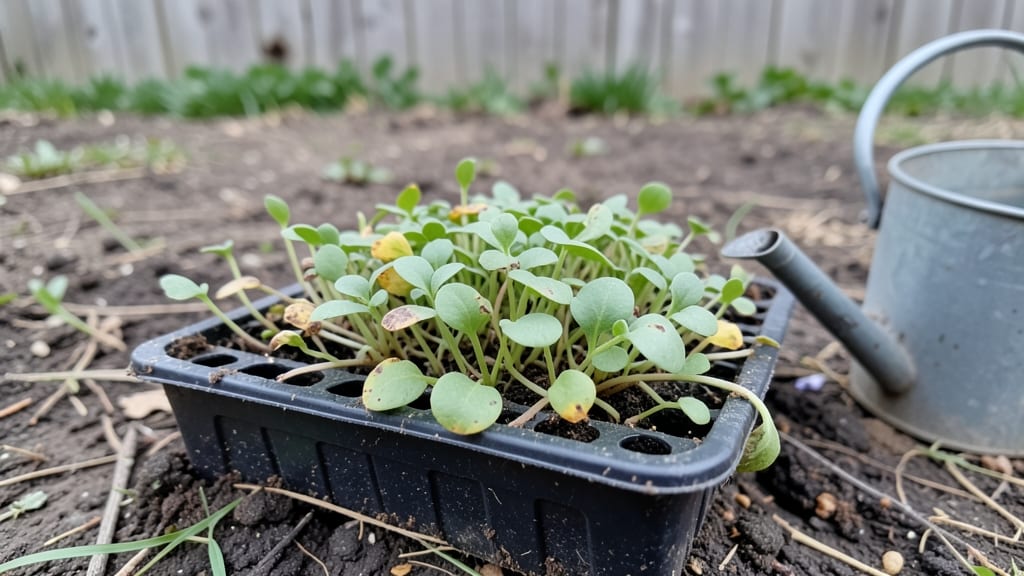
Sweet alyssum seedlings thrive when you mimic their natural cold-moist environment—here’s how to get them off to a fast start with vibrant results. 🌱 I’ve learned the hard way that skipping this prep leads to leggy, weak seedlings that struggle to bloom.
The secret isn’t complicated: it’s about keeping them cool, consistently moist, and protected until they’re strong enough to handle the elements.
You’ll need a shallow tray, well-draining seed-starting mix, and a spray bottle for gentle watering—no fancy equipment required. Place the tray in a spot with bright, indirect light (a north-facing window works great), and keep the soil moist but never soggy.
Sweet alyssum germinates best at 55–65°F, so if your home runs warmer, a seedling mat or cool basement spot helps.
Within 10–14 days, you’ll see tiny green sprouts pushing through the soil, and by week 3, they’ll be ready for their first true leaves. The key is patience—rushing the process by moving them too soon leads to shock.
Once they’re sturdy enough to handle, they’ll reward you with fragrant, snow-white blooms that last all season.
This method works for both indoor starts and outdoor sowing in early spring. The same cold-moist prep applies whether you’re growing them in a sunny window or under grow lights. Let’s get those seedlings thriving!
📚 In This Guide
- What you need
- Instructions
- Tips and common mistakes
- Wrapping up and next steps
What you need
- ● Sweet Alyssum Seeds: 1 packet (approx. 1,000–2,000 seeds, Lobularia maritima variety). Opt for organic or untreated seeds for best results.
- ● Seed Trays or Biodegradable Pots: 1–2 trays (100+ cells) or 50+ small pots (2–3 inches deep). Ensure drainage holes are present!
- ● Seed Starting Mix: 1–2 bags (5–10 quarts) of high-quality, sterile seedling mix (avoid garden soil—it’s too dense!).
- ● Spray Bottle: 1 (8–16 oz) with a fine mist nozzle for gentle watering.
- ● Clear Plastic Dome or Plastic Wrap: 1 (to retain moisture during germination).
- ● Grow Lights or Sunny Windowsill: Access to 6–8 hours of cool (60–65°F) light daily. Grow lights are ideal for consistency.
- ● Fine-Grit Sandpaper or Knife: 1 (to lightly scratch seed coats if pre-treatment is needed).
- ● Thermometer: 1 (to monitor soil temp—keep it 50–60°F for cold-moist prep).
- ○ Fertilizer (Optional): 1 bottle of balanced liquid fertilizer (5-5-5 or 10-10-10, diluted to half-strength) for post-germination feeding.
- ● Tweezers or Plant Labels: 1 pair (for delicate seed placement) + labels to track varieties.
- ○ Heat Mat (Optional): 1 (if your space runs colder than 50°F—set to 55–60°F for faster germination).
Step-by-step instructions for growing sweet alyssum seedlings
Here's how to get your sweet alyssum seedlings off to a fast, lush start with minimal fuss.
🌱 Step 1: Prepare Your Containers and Soil Mix
Sweet alyssum thrives in well-draining, moisture-retentive soil, so I use a mix of 50% peat moss and 50% perlite for that perfect balance. Fill your 4-inch seedling trays with the mix, leaving about ½ inch of space at the top. Gently press the soil down to remove air pockets—this ensures even moisture distribution later.
Don't skip the drainage layer. Place a thin layer of small pebbles at the bottom of each tray before adding soil. This prevents waterlogging, which can rot delicate alyssum roots. Moisten the mix lightly with room-temperature water until it feels like a damp sponge—not soggy, just consistently moist.
💧 Step 2: Sow Seeds and Create Ideal Germination Conditions
Sweet alyssum seeds are tiny, so I use a toothpick to place them ⅛ inch deep in the soil. Space them ¼ inch apart—they germinate quickly, and crowding leads to weak, leggy seedlings. After sowing, mist the surface with a spray bottle until the soil looks uniformly damp.
Cover the tray with clear plastic wrap to trap moisture and warmth. Place it in a cool location (around 60-65°F)—sweet alyssum germinates best in cooler temps. Check daily for condensation; if the plastic fogs up, lift it briefly to let excess moisture escape. Germination should happen in 7-14 days—watch for tiny green sprouts breaking through the soil.
☀️ Step 3: Provide Gentle Light and Prevent Overwatering
Once seedlings emerge, remove the plastic wrap immediately to avoid damping-off disease. Move the tray to a bright, indirect light spot—direct sun at this stage can scorch tender leaves. You'll see healthy growth when seedlings develop first true leaves (not just the initial cotyledons).
Water from the bottom by placing the tray in ½ inch of water for 10 minutes, then drain excess. This keeps roots moist without disturbing seedlings. Avoid overhead watering—it can spread disease. After 2-3 weeks, when seedlings are 1-2 inches tall, you can gradually introduce 2-3 hours of morning sun to harden them off.
✂️ Step 4: Thin and Transplant for Bushier Growth
When seedlings reach 1 inch tall, thin them to ½ inch apart using small scissors to snip excess plants at soil level. This may seem harsh, but it prevents competition and encourages stronger stems. After thinning, water lightly to settle the soil around remaining seedlings.
Transplant into individual 3-inch pots when they have 3-4 true leaves (about 4-6 weeks after sowing). Use the same soil mix and keep them in partial shade for a week to reduce transplant shock. You'll know they're thriving when they develop compact, bushy growth and vibrant green leaves.
Tips & tricks for fast, vibrant sweet alyssum seedlings
Sweet alyssum thrives when you nail these key details—it’s all about creating the perfect cold-moist environment from day one.
Soil Mix Secret: The 50% peat moss and 50% perlite blend is non-negotiable for sweet alyssum. Peat moss retains moisture while perlite prevents compaction, which is crucial for those delicate roots. I like to add a pinch of perlite to the mix as I fill the trays—it keeps the soil light and airy, preventing waterlogging that can drown seedlings before they even sprout.
Germination Temperature Matters: Keeping your tray at 60-65°F is critical—this is the sweet spot for sweet alyssum seeds to germinate without stress. If your home runs warmer, place the tray on a cooling rack over a shallow tray of ice cubes (not touching!) to maintain that perfect temperature. I’ve seen germination rates drop by half when temps creep above 70°F—don’t let that happen to your seedlings!
Light Transition Hack: Those first 2-3 weeks are all about gentle light. Start with bright, indirect light, then gradually introduce 2-3 hours of morning sun to harden them off. I use a sheer curtain to diffuse harsh afternoon light—it’s like giving your seedlings a gentle sunbath instead of a scorching one. Watch for leaves that look slightly paler than normal; that’s your cue to reduce light exposure immediately.
Thinning Without Trauma: When you thin seedlings to ½ inch apart, use clean scissors and cut at soil level—never pull. The roots of the plants you’re removing can release chemicals that inhibit growth in nearby seedlings. After thinning, give the soil a light mist with room-temperature water to help the remaining plants settle into their new space without shock.
Pro Tips for Sweet Alyssum Seedling
- Sweet alyssum thrives when you nail these key details—it’s all about creating the perfect cold-moist environment from day one.
- Soil Mix Secret: The 50% peat moss and 50% perlite blend is non-negotiable for sweet alyssum.
- Germination Temperature Matters: Keeping your tray at 60-65°F is critical—this is the sweet spot for sweet alyssum seeds to germinate without stress.
Frequently asked questions
Got questions about growing sweet alyssum seedlings?
You’re not alone! Here are answers to the most common concerns—from timing to troubleshooting—to help you get those vibrant blooms off to a flying start.
How long does it take for sweet alyssum seedlings to germinate?
Sweet alyssum seeds typically sprout in 7–14 days when kept in consistent moisture and warmth (around 60–70°F). For faster results, soak seeds in warm water for 24 hours before planting. Patience is key—don’t disturb the soil while waiting!
Why aren’t my sweet alyssum seedlings sprouting?
If your seeds aren’t germinating, check these fixes:
- Cold shock: Sweet alyssum needs stratification (chilling). Place seeds in the fridge for 1–2 weeks before planting.
- Depth: Seeds should be just barely covered (¼ inch max)—they need light to sprout!
- Moisture: Keep soil damp (not soggy) with a spray bottle. Overwatering can suffocate seeds.
- Age: Older seeds may lose viability. Use fresh seeds for best results.
When is the best time to plant sweet alyssum seedlings outdoors?
Plant seedlings 4–6 weeks before your last frost date (early spring or late summer for fall blooms). Sweet alyssum thrives in cool weather—avoid transplanting when temps exceed 80°F. Harden off seedlings gradually by exposing them to outdoor conditions for 1–2 hours daily before planting.
Can I grow sweet alyssum from cuttings instead of seeds?
Yes! Sweet alyssum can be propagated from stem cuttings in water or soil. Snip 2–3 inch stems just below a leaf node, remove lower leaves, and place in water or moist potting mix. Roots should appear in 2–3 weeks. This method is great for preserving specific varieties or speeding up growth.
How do I protect sweet alyssum seedlings from pests?
Young seedlings are vulnerable to aphids, slugs, and flea beetles. Try these organic solutions:
- Aphids: Spray with soapy water (1 tsp mild soap + 1 quart water) or introduce ladybugs.
- Slugs/snails: Set up beer traps or use diatomaceous earth around the base.
- Flea beetles: Cover seedlings with floating row covers until established.
- Prevention: Space seedlings 6–8 inches apart for airflow and healthy growth.
Will sweet alyssum seedlings bloom faster if I fertilize them?
Use a light, balanced fertilizer (like 5-5-5) only after seedlings develop their first true leaves. Over-fertilizing can burn tender roots. For organic options, try compost tea or fish emulsion. Less is more! Sweet alyssum prefers lean soil—too much nitrogen = lush leaves, fewer flowers.
Wrapping up and next steps
Growing sweet alyssum seedlings with cold-moist prep is your ticket to a burst of fragrant, vibrant blooms that’ll steal the show in your garden! 🌸 By mastering this simple technique—chilling seeds, keeping them damp, and providing the right light—you’re setting yourself up for effortless success.
Whether you’re a green-thumb newbie or a seasoned gardener, these little seeds pack a big punch of beauty and ease.
Ready to turn your garden into a sweet-scented paradise? Start by gathering your supplies and give these tips a try this season—your future blooms will thank you!
For extra confidence, share your progress with fellow gardeners or tag us in your first harvest for some well-deserved bragging rights. Happy planting! 🌱