Vegetables
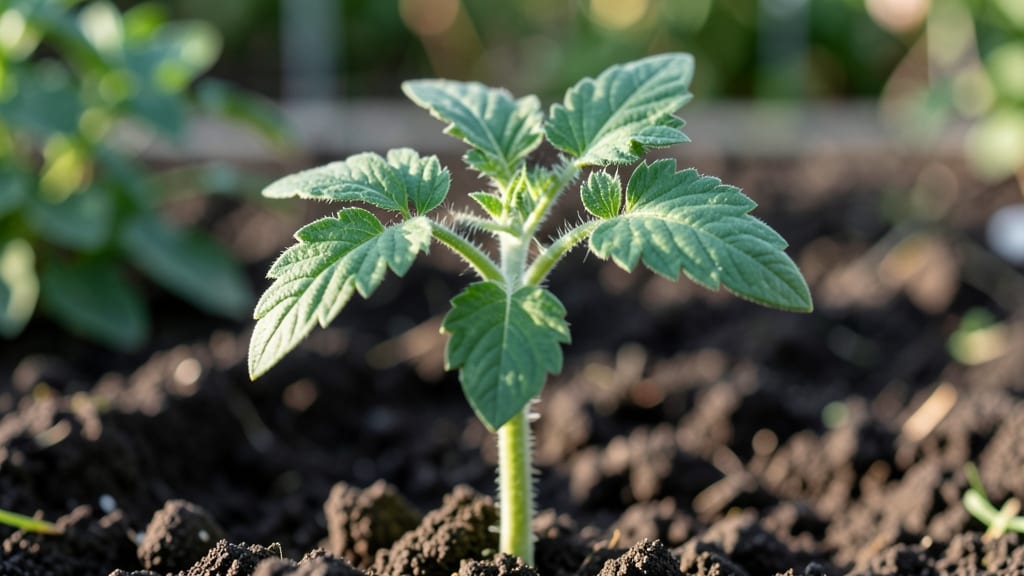
Caring for tomato seedlings transforms flimsy sprouts into sturdy plants ready for your garden. 🌱 I’ve nursed dozens of seedlings through the leggy, wilting stages—here’s how to skip the guesswork and get plants that thrive from the start.
The difference between strong seedlings and sad ones often comes down to light, water, and timing, not fancy equipment.
Seedlings need 12-16 hours of bright light daily, whether from a sunny window or a grow light. Overwatering is the #1 killer—keep soil lightly moist, not soggy, and use small pots with drainage.
When they’re 2-3 inches tall, it’s time to harden off them for outdoor life by gradually moving them outside for a few hours each day.
You’ll know you’re doing it right when seedlings stand tall with dark green leaves and no yellowing. Leggy seedlings? Move them closer to light. Damping-off (black stems)?
Improve airflow and reduce moisture. With these basics, your seedlings will be ready to transplant in 6-8 weeks—stocky, vibrant, and eager to grow.
Works for all tomato varieties, from cherry to heirloom, and adapts to any space—indoor windowsills or greenhouse setups. Let’s get those seedlings growing strong!
📚 In This Guide
- What you need
- Instructions
- Tips and common mistakes
- Wrapping up and next steps
What you need
- ● Tomato seeds: Choose heirloom or hybrid varieties suited to your climate (e.g., Early Girl, Cherry Roma, or Brandywine). Start with 3–5 seeds per pot (you’ll thin later).
- ● Seed-starting mix: A lightweight, sterile seedling mix (avoid garden soil—it’s too dense!). A 10–12 quart bag covers ~10–12 small pots.
- ● Containers: Biodegradable pots (4–6 inches deep) or plastic cell trays (100–200 cell count).
- ○ Optional: Egg cartons or yogurt cups (for temporary starts).
- ● Grow lights or sunny windowsill: A LED grow light (12–16 hours/day) or a south-facing window (6+ hours of sunlight).
- ● Watering can or spray bottle: With a fine rose nozzle for gentle watering.
- ○ Heat mat (optional but helpful): Keeps soil at 70–80°F for faster germination (12"x24" mat covers ~20 pots).
- ● Small hand trowel or spoon for transplanting.
- ● Scissors or pruners (sterilized with rubbing alcohol) for thinning seedlings.
- ○ pH test kit (optional) to check soil pH (ideal: 6.0–6.8).
- ● Fertilizer: A balanced liquid fertilizer (5-5-5 or 10-10-10) or fish emulsion (diluted to half-strength).
- ● Labels & markers to track seed varieties and planting dates.
- ● Patience! Germination takes 5–14 days (depending on variety and conditions).
- ● Consistent care: Seedlings need daily attention (water, light, and warmth).
- ● Space planning: Tomato seedlings will need 18–24 inches apart when transplanted outdoors.
Step-by-step instructions for thriving tomato seedlings
Here’s how to nurture robust tomato seedlings—no guesswork, just proven techniques.
🌱 Step 1: Provide Optimal Light Immediately After Germination
The moment your seedlings crack through the soil, they need 14-16 hours of bright light daily. A south-facing window rarely delivers enough intensity, so I position a full-spectrum LED grow light just 2-4 inches above the seedlings. You’ll see leggy, pale stems if the light’s too far away—those plants never recover proper strength.
Rotate the trays a quarter turn daily so seedlings grow straight instead of bending toward the light. Watch for deep green leaves and compact spacing between nodes—that’s your signal they’re thriving. If leaves yellow at the edges, you’re overwatering; if they curl upward, it’s too dry.
💧 Step 2: Water Gently and Maintain Consistent Moisture
Water only when the top inch of soil feels dry—stick your finger in to check. I use a spray bottle with fine mist to avoid disturbing seedlings, directing water at the soil base, not the leaves. Overhead watering spreads disease spores and weakens stems.
Keep the soil evenly moist but not soggy—tomato roots rot in waterlogged conditions. If condensation forms on the tray, lift it to improve airflow. You’ll notice seedlings perk up after watering: leaves firm up and stems stand taller.
✂️ Step 3: Thin and Fertilize for Strong Growth
When seedlings develop 2-3 true leaves, thin to the strongest plant per cell by snipping weaker stems at the base with clean scissors. I save the thinned seedlings for snacks—no waste here! After thinning, apply a balanced liquid fertilizer (like 10-10-10) at half-strength to avoid burning tender roots.
Watch for purple stems—that’s a sign of phosphorus deficiency. If you see it, increase fertilizer slightly or add a bone meal side-dressing. Strong seedlings have thick stems and dark green leaves with no yellowing.
☀️ Step 4: Harden Off Before Transplanting
Two weeks before your last frost date, start hardening off by placing seedlings outside in partial shade for 1-2 hours the first day. Gradually increase exposure by 1 hour daily, moving them to morning sun by day 5. You’ll see them adjust as leaves stop wilting and stems firm up.
By day 10, they should tolerate full sun for a few hours. Transplant on an overcast afternoon to reduce shock. Water deeply at the base—this encourages roots to dive downward instead of circling.
🪴 Step 5: Support and Monitor for Pests/Diseases
After transplanting, install cages or stakes immediately—tomatoes grow fast, and unsupported plants flop. I use 5-foot bamboo stakes for determinate varieties and tall cages for indeterminates. Prune suckers (the shoots in the leaf axils) when they’re 2-3 inches long to direct energy to fruit production.
Check undersides of leaves weekly for aphids or whiteflies—spray with neem oil at the first sign. Yellowing lower leaves are normal, but spotted or curled leaves mean fungal issues. Remove affected foliage immediately to prevent spread.
Tips & tricks for thriving tomato seedlings
Real talk: The difference between puny seedlings and robust plants often comes down to these small but critical details—trust me on this.
The Light Factor: Those 14-16 hours of daily light are non-negotiable, especially in early spring when days are short. I've seen seedlings stretch toward windows like they're reaching for salvation—don't let that happen. If natural light isn't enough, supplement with a full-spectrum LED grow light positioned just 2-4 inches above the seedlings. The light should be so close you could almost touch it without disturbing the plants.
Watering Wisdom: Here's what nobody tells you—tomato seedlings hate wet feet. That top inch of dry soil check might seem obvious, but I've caught myself watering on schedule rather than checking moisture. Use the finger test religiously, and always water at the base with a fine mist spray bottle. The goal is to keep soil evenly moist, not soggy—think damp sponge, not dripping washcloth.
Thinning Strategy: When you're thinning to the strongest plant per cell, don't just yank them out. Use clean scissors to snip at the base—this prevents disturbing the roots of your keepers. I've learned this the hard way after ruining three batches by pulling seedlings too hard. Also, save those thinned seedlings! They make perfect tiny salads or garnishes for soups.
Harden Off Gradually: That 1-2 hour start outside might seem insignificant, but it's the difference between shock-resistant plants and ones that wilt dramatically after transplanting. I increase exposure by just 1 hour daily because tomatoes are sensitive to sudden changes. By day 10, when they're ready for full sun, they'll have already adjusted to the outdoor environment—no more sad, droopy plants!
Pro Tips for Tomato Seedling Care
- Real talk: The difference between puny seedlings and robust plants often comes down to these small but critical detai...
- The Light Factor: Those 14-16 hours of daily light are non-negotiable, especially in early spring when days are short...
- Watering Wisdom: Here's what nobody tells you—tomato seedlings hate wet feet. That top inch of dry soil check might s...
Frequently asked questions
Got questions about keeping your tomato seedlings healthy and strong?
You’re not alone! Here are some of the most common concerns—and their practical solutions—to help you grow confident gardeners (or gardeners-to-be).
How long do tomato seedlings need before transplanting?
Tomato seedlings typically need 6–8 weeks of indoor care before transplanting, but timing depends on your climate. Aim for 2–3 inches tall with 3–5 true leaves—and harden them off for 1–2 weeks before moving them outside. Pro tip: If nights are still chilly (<50°F), wait a few more weeks to avoid shock!
What if my seedlings look leggy or weak?
Leggy seedlings (tall, thin stems) happen from too little light or overcrowding. Fix it by:
- Moving them to a sunny window or under grow lights (12–16 hours/day).
- Thinning seedlings to 2 inches apart to reduce competition.
- Buried deeper when transplanting—up to the first true leaves to encourage roots.
How do I prevent pests like aphids or fungus gnats?
Start with clean containers and sterilized soil to avoid pests. For fungus gnats:
- Let the top inch of soil dry between waterings.
- Add a thin layer of sand or perlite to deter larvae.
Can I transplant seedlings on a cloudy day?
Yes! Cloudy days are ideal for transplanting because they reduce stress from sunburn and wind damage. Choose early morning or late afternoon for the gentlest conditions. Water seedlings 1–2 days before to help roots slide easily into the soil.
What if my seedlings develop yellow leaves?
Yellow leaves usually signal overwatering, nutrient deficiency, or root rot. Check the soil—it should be moist but not soggy. If roots look mushy, repot in fresh, well-draining soil. For nutrients, use a balanced fertilizer (10-10-10) diluted to half-strength. Watch for: Lower leaves yellowing (normal) vs. upper leaves (overwatering or pests).
Wrapping up and next steps
Caring for tomato seedlings is all about patience, consistency, and a little love—and you’ve got this! 🌱 With the right balance of light, water, nutrients, and space, your tiny sprouts will soon transform into thriving plants ready to reward you with juicy, homegrown tomatoes.
Remember, every gardener starts somewhere, so don’t stress over the occasional setback; learning is part of the journey!
Now that you’re armed with the know-how, roll up your sleeves and get planting! Start with just a few seedlings, experiment with varieties, and enjoy the process. Before you know it, you’ll be harvesting your first homegrown tomatoes—and that’s when the real fun begins.