
Propagation
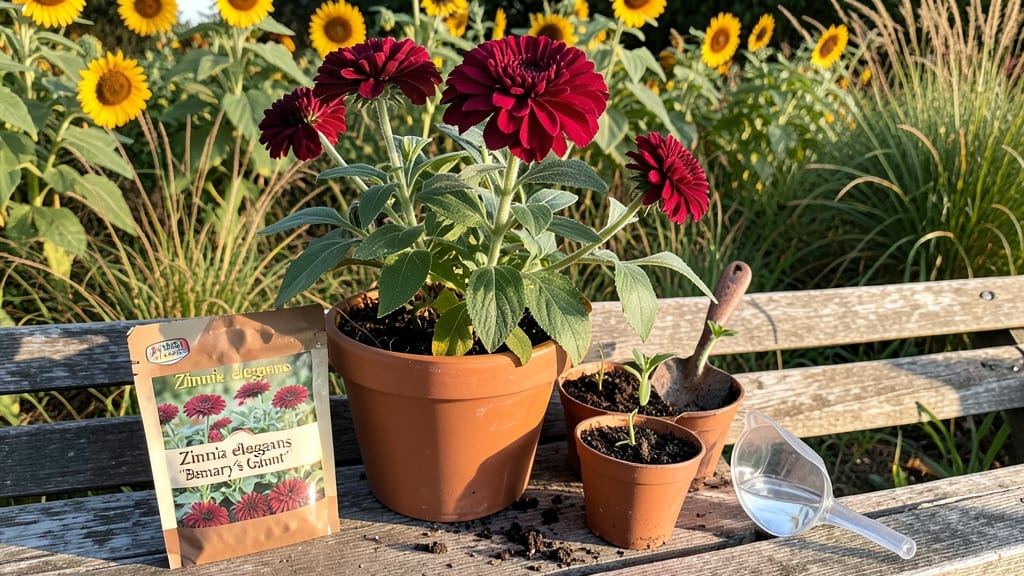
Unusual zinnia seeds bring a whole new game to your garden beds—think tiny pom-poms instead of towering stalks, or velvety blooms in colors that make your neighbors do a double-take. 🌻 I’ve grown everything from chocolate-calico ‘Benary’s Giant’ to the barely-thumb-sized ‘Thumbelina’ series, and these dwarf varieties pack just as much punch in a fraction of the space.
The secret isn’t just their size; it’s how they bloom nonstop from summer until frost, turning even the smallest patch into a pollinator magnet.
Start with seeds from specialty suppliers like Baker Creek Heirloom Seeds or Rancho Gordo, where dwarf zinnias often hide in the back of catalogs—worth the hunt.
You’ll need well-draining soil (mix in compost to avoid leggy stems) and a sunny spot with at least 6 hours of direct light daily.
Unlike their tall cousins, these stay compact even without staking, making them perfect for containers, window boxes, or tucked between other plants where space is tight.
Watering’s the real trick: keep soil consistently moist but never soggy—these zinnias hate wet feet. Once established, they’re tough as nails, shrugging off deer, rabbits, and even most pests.
Pinch back the first set of blooms to encourage bushier growth, and you’ll get a second wave of flowers that lasts until first frost. The payoff? A garden that stays vibrant when most annuals are fading.
Pro tip: mix dwarf zinnias with sweet alyssum or calibrachoa for a spiller-thriller-filler combo that never looks crowded. They’re also great for cutting—just snip the stems for tiny, long-lasting bouquets. Ready to swap out your standard zinnias for these showstoppers?
📚 In This Guide
- What you need
- Instructions
- Tips and common mistakes
- Wrapping up and next steps
What you need
- ● Unusual zinnia seeds (dwarf variety) – 1–2 packets (e.g., 'Thumbelina,' 'Crystal,' or 'Profusion'). Choose heirloom or organic seeds for unique colors and compact growth.
- ● Seed-starting mix or potting soil – 1–2 bags (10–15 lbs). Opt for a sterile, well-draining blend (e.g., Pro-Mix or FoxFarm).
- ● Containers for seed starting – Option 1: Seed trays or cell packs (72–200 cells) with drainage holes.
- ● Option 2: Biodegradable pots (2–3 inches deep) for transplanting ease.
- ● Grow lights or sunny windowsill – A full-spectrum LED grow light (e.g., Spectrum 9000) or a south-facing window with 6+ hours of sunlight daily.
- ● Misting bottle or spray nozzle – For gentle watering to avoid disturbing seeds.
- ● Fertilizer (balanced or low-nitrogen) – 1–2 tbsp of fish emulsion or 10-10-10 diluted to half-strength (after sprouting).
- ● Twine or plant labels – To track varieties and watering schedules.
- ● Gloves – Protect your hands from soil and prickly stems.
- ○ Heat mat (optional) – Speeds up germination (70–75°F is ideal).
- ● Humidity dome or plastic wrap – Retains moisture until seeds sprout.
- ● Pruning shears – For deadheading spent blooms to encourage regrowth.
- ● Compost or worm castings – Boosts soil fertility for long-lasting blooms.
- ● Pest control (neem oil or insecticidal soap) – Preemptive measure against aphids or spider mites.
Step-by-Step guide to growing dwarf zinnia varieties
Here’s how to coax those tiny, vibrant zinnia blooms into full, long-lasting glory—no fuss, just stunning results.
🌱 Step 1: Start Seeds Indoors at the Right Time
Sow your dwarf zinnia seeds 6-8 weeks before your last frost date, using the sterile seed-starting mix. These little seeds need warmth to germinate, so place them on a seedling heat mat set to 75°F. Fill your biodegradable seedling pots with the mix, pressing it down gently to eliminate air pockets.
Drop 2-3 seeds per pot just below the soil surface—about ¼ inch deep—since dwarf varieties are delicate and won’t tolerate deep planting. Mist the soil lightly with lukewarm water until it’s evenly damp, but avoid soaking. Cover the pots with clear plastic wrap to retain moisture and warmth, then place them in a bright, indirect light area.
Germination should happen in 7-14 days, but don’t rush to remove the plastic wrap until you see first true leaves (the second set after the initial cotyledons). This prevents damping-off, a fungal disease that can wipe out seedlings overnight.
☀️ Step 2: Harden Off and Transplant for Compact Growth
Once seedlings have 3-4 true leaves, it’s time to harden them off. Start by moving them to a shaded outdoor spot for 1-2 hours the first day, gradually increasing exposure over 7-10 days. This slow adjustment prevents shock and ensures sturdy stems—critical for dwarf varieties, which can flop if transplanted too abruptly.
Choose a sunny location with at least 6 hours of direct light daily, but protect them from hot afternoon sun in your region’s peak summer months. Space your 4 dwarf zinnia plants 8-12 inches apart in the well-draining garden soil, planting them at the same depth they were in their pots. Water deeply right after transplanting to settle the soil around the roots.
Here’s the thing—dwarf zinnias thrive in well-amended soil with a balanced fertilizer (like the 10-10-10) applied at planting. This ensures they don’t stretch for nutrients, which can make them leggy. Mulch lightly with 1 inch of organic mulch to retain moisture and keep roots cool.
💧 Step 3: Water and Feed for Long-Lasting Blooms
Water your dwarf zinnias deeply once a week, aiming for 1 inch of water per week. These compact varieties hate soggy roots, so always check the top 2 inches of soil—if it’s dry, it’s time to water. Water at the base of the plant in the morning to reduce fungal risks and encourage strong stems.
Feed them every 3-4 weeks with the balanced fertilizer to keep blooms abundant. Stop fertilizing 6 weeks before your first frost, as new growth won’t harden off in time. Deadhead spent blooms regularly—this isn’t just for looks. Pinching off faded flowers encourages more buds and prevents the plant from redirecting energy into seed production, which can shorten its blooming season.
Real talk: If you notice leaves yellowing, it’s often a sign of overwatering or nutrient burn. Adjust your watering schedule or dilute the fertilizer next time to avoid stressing the plants.
✂️ Step 4: Prune and Extend the Blooming Season
Lightly prune your dwarf zinnias every 2-3 weeks to encourage bushier growth. Snip back the longest stems by ⅓ to promote branching. This keeps the plants compact and prevents them from becoming top-heavy, which can cause them to flop—especially in hot, humid weather.
To extend blooming, watch for buds forming along the stems. If you see a stem with multiple buds, leave it alone. But if a stem produces only one or two blooms, prune it back to encourage more lateral growth. This technique ensures your dwarf zinnias keep flowering until the first hard frost, sometimes even into early winter in mild climates.
Here’s where it gets fun—if you live in a region with warm winters, you can cut back the plants by half in late fall, mulch heavily, and they’ll often rebound in spring with even more vigor. Just don’t expect the same burst of blooms as the first season.
Tips & tricks for perfect dwarf zinnia cultivation
These game-changing insights will help you transform your dwarf zinnias from delicate seedlings into a riot of compact, long-lasting color—without the common pitfalls that derail most gardeners.
Seed Starting Precision: The 75°F heat mat temperature is non-negotiable for germination. I learned this the hard way after struggling with slow sprouts in cooler conditions—these tiny seeds need consistent warmth to break dormancy. Place your biodegradable pots on the heat mat only after filling them with sterile mix, as condensation from cold pots can cause damping-off before seeds even sprout.
Hardening Off Strategy: That gradual 7-10 day hardening process in Step 2 is where most dwarf zinnias fail. Start with just 1-2 hours of shade on day one, then increase by 30 minutes daily. I've seen seedlings collapse when moved too quickly—think of it as a sunburn prevention program for your plants. The goal is to toughen stems enough to support those heavy blooms without flopping.
Soil Preparation Secret: The well-draining garden soil requirement can't be overstated. Dwarf zinnias despise soggy roots, so if your native soil is heavy clay, amend it with 30% perlite or coarse sand before planting. I've had better luck with raised beds for these compact varieties—they stay drier and warmer, which translates to more consistent blooms throughout the season.
Pruning Technique: When you're pruning every 2-3 weeks in Step 4, always use clean, sharp scissors to make cuts just above a leaf node. This prevents disease entry and encourages faster regrowth. For stubborn stems that refuse to bloom, snip them back to the first set of true leaves—it sounds drastic, but it forces the plant to redirect energy into lateral branches that will produce more flowers.
Pro Tips for Unusual Zinnia Seeds
- These game-changing insights will help you transform your dwarf zinnias from delicate seedlings into a riot of compact, long-lasting color—without the common pitfalls that derail most gardeners.
- Seed Starting Precision: The 75°F heat mat temperature is non-negotiable for germination.
- Hardening Off Strategy: That gradual 7-10 day hardening process in Step 2 is where most dwarf zinnias fail.
Frequently asked questions
about unusual zinnia seeds—especially the dwarf varieties—can help you grow stunning, compact blooms with ease! Here are answers to the most common queries:What makes dwarf zinnia seeds different from regular zinnias?
Dwarf zinnia seeds produce much smaller plants (typically 12–18 inches tall) with the same vibrant blooms but in a space-saving, bushier form. They’re perfect for containers, borders, or small gardens. Plus, their compact size makes them less prone to wind damage than taller varieties!
How long does it take for dwarf zinnia seeds to germinate?
Germination usually takes 7–14 days in warm soil (70–75°F). Keep seeds moist but not soggy, and place them in bright, indirect light until sprouts appear. Pro tip: Use a seed heat mat if your climate is cool—it speeds up germination!
Can I grow dwarf zinnias from seeds in cold weather?
No—dwarf zinnias hate cold! Start seeds indoors 6–8 weeks before your last frost or wait until soil is at least 60°F before direct sowing. If you’re in a short-season area, opt for fast-maturing varieties (like ‘Thumbelina’ or ‘Crystal’) for quicker blooms.
Where can I buy unusual or heirloom dwarf zinnia seeds?
Check specialty seed companies like Baker Creek Heirloom Seeds, Seed Savers Exchange, or Burpee. Local nurseries or garden clubs may also carry unique varieties. Pro tip: Look for terms like “non-GMO,” “open-pollinated,” or “heirloom” for the most unusual options!
Why aren’t my dwarf zinnia seedlings growing, or they look leggy?
Leggy seedlings usually mean too little light or overcrowding. Move them to a sunny window or under grow lights immediately. Thin seedlings to 2 inches apart once they sprout their first true leaves. If growth stalls, check for pests (like aphids) or fungus (damping-off)—remove affected plants and improve airflow.
Can I save seeds from dwarf zinnias for next year?
Yes! Let some blooms naturally fade and form seed heads. Harvest the seeds once the heads turn brown and dry, then store them in a cool, dry place (like a paper envelope). Note: Some dwarf varieties may revert to taller types if cross-pollinated, so isolate plants if you want pure traits.
Wrapping up and next steps
Growing unusual zinnia seeds—especially dwarf varieties—is a rewarding way to add vibrant, long-lasting blooms to your garden without taking up much space. 🌸 Whether you're a seasoned gardener or just starting out, these compact beauties thrive with minimal effort and deliver maximum impact.
Now that you’re armed with the right materials, tips, and answers to common questions, it’s time to roll up your sleeves and plant those seeds!
Ready to transform your garden? Start small with a few dwarf zinnias—you’ll be amazed at how quickly they grow and brighten up your space. Happy planting! 🌱