
Propagation
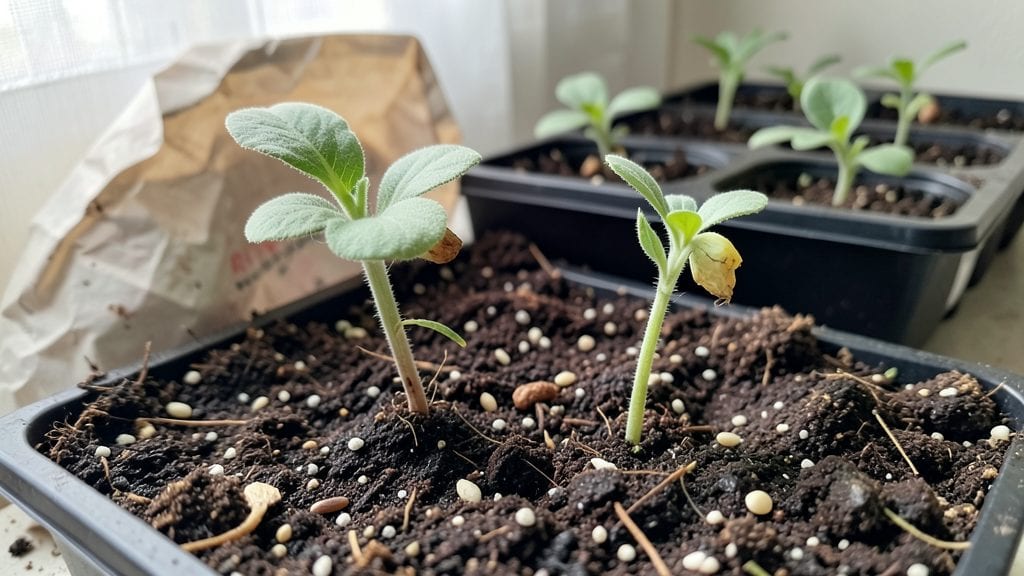
The right seed starting dirt can turn weak seedlings into sturdy, fast-growing plants in just three weeks. I learned this the hard way after my first batch of tomatoes grew leggy and top-heavy—until I swapped out the heavy garden soil for a lightweight, airy mix.
The difference was night and day: compact roots, strong stems, and no damping-off disease.
This specialized blend isn’t just fluffy—it’s sterilized, well-draining, and packed with nutrients that young roots crave. You can buy pre-mixed options or create your own by combining 50% peat moss or coco coir, 30% perlite or vermiculite, and 20% compost or worm castings.
The key is avoiding garden soil, which compacts and harbors pathogens that choke seedlings before they even sprout.
With the right mix, you’ll see faster germination, stronger seedlings, and plants that transplant with minimal shock. Delicate greens like lettuce and herbs benefit just as much as heavy feeders like tomatoes and peppers.
The secret lies in the texture—fine enough to hold moisture but loose enough to let air reach those tiny roots.
Whether you’re starting a windowsill garden or a greenhouse tray, this recipe works for both organic and commercial setups. Here’s how to get it right the first time—no more weak, wilting sprouts in your future.
Common Causes Of Poor Seedling Mix Performance
Even the best seed starting mix can fail if key factors aren’t balanced. Understanding why your mix underperforms helps you troubleshoot and create an environment where seedlings thrive. Here’s a breakdown of the most common culprits—and how they sabotage your tiny green friends.
A mix that’s too heavy or packed down suffocates roots and blocks airflow, leading to stunted growth, rot, or seedling collapse. This happens when:
- Too much clay or silt: These particles pack tightly, reducing pore space for oxygen and water drainage. Clay soils can hold 20-30% more water than ideal seed-starting mixes, drowning delicate roots.
- Lack of organic matter: Peat moss, coco coir, or compost break up dense soil, but if your mix relies too heavily on mineral-based components (like perlite alone), it can compress over time.
- Improper watering technique: Pouring water directly into containers or using heavy-handed pressure compacts the surface, creating a crust that blocks germination.
Actionable fix: Aim for a light, fluffy texture with a ratio of 50% organic matter (peat/coco) to 30% perlite/pumice to 20% compost. Gently fluff the mix with a fork or your fingers before planting to maintain aeration.
Seedlings need a delicate balance of nutrients, but mix imbalances can cause yellowing leaves, weak stems, or even death. Common nutrient-related issues include:
| Symptom | Likely Cause | Why It Happens |
|---|---|---|
| Pale yellow leaves (chlorosis) | Nitrogen deficiency | Nitrogen fuels leaf growth, but fresh mixes often lack it. Over time, microbes deplete available forms like ammonium or nitrate. |
| Purple or reddish stems/leaves | Phosphorus deficiency | Phosphorus aids root and cell development. Sterile mixes (like pure peat) lack organic phosphorus, and synthetic fertilizers may not release it quickly enough. |
| Stunted growth, dark green leaves | Potassium or micronutrient lack | Potassium regulates water uptake, while micronutrients (zinc, iron, manganese) act as catalysts for enzymes. Over-sterilized or leached mixes deplete these. |
Actionable fix:
- Add a balanced starter fertilizer (e.g., 5-10-5 or fish emulsion) at planting time.
- Use compost tea or worm castings (10% of mix volume) for slow-release nutrients.
- Avoid over-sterilizing your mix—pasteurization (180°F for 30 mins) kills beneficial microbes but preserves some organic nutrients.
Moisture is critical, but too much or too little water in your seed-starting mix creates a hostile environment. Here’s how it backfires:
- Excessive moisture:
- Lack of drainage holes + high peat/coco content = anaerobic conditions (no oxygen), leading to fungal diseases like damping-off.
- Waterlogged soil leaches nutrients faster, starving seedlings of essential minerals.
- Poor water retention:
- Mixes with too much perlite/sand dry out quickly, causing desiccation stress and cracked soil surfaces.
- Seeds may not stay hydrated long enough to germinate, especially in arid climates.
Actionable fix: Test your mix’s moisture balance with the “squeeze test”:
- Grab a handful—it should feel damp like a wrung-out sponge, not soggy or bone-dry.
- Adjust with 10% more perlite if it holds water too long; add 5% coconut coir if it dries out fast.
A sterile mix is ideal, but unwanted microbes, bacteria, or fungi can hijack your seedlings’ growth. Common offenders include:
- Damping-off fungi (Pythium, Rhizoctonia): Thrives in moist, warm, low-light conditions, causing seedlings to wilt and collapse at the soil line.
- Bacterial soft rot (Erwinia): Spreads through contaminated water or tools, creating mushy, foul-smelling stems.
- Weed seeds or spores: Hitchhike in unsterilized compost or garden soil, competing with your seedlings for nutrients.
Actionable fix:
- Sterilize your mix with steam (212°F for 30+ mins) or a microwave (70% power, 2 mins per cup).
- Add 1 tbsp cinnamon or hydrogen peroxide (3%) per gallon to inhibit fungal growth.
- Use clean tools and trays—bleach or rubbing alcohol between uses prevents cross-contamination.
Pro tip: 🔥 Rotate your seed-starting mixes yearly to avoid pathogen buildup in reused soil. Store unused mix in a cool, dry place (not the fridge—it encourages mold!).
Quick fixes for seed starting mix problems
Tired of soggy seed trays, crusty surfaces, or stunted seedlings? The right mix of ingredients and adjustments can turn your seed-starting struggles into thriving greenhouses in a tray. Here’s how to diagnose and fix common issues with your seed-starting mix—plus tips to keep your little sprouts happy and healthy.
Cause: Overwatering, compacted mix, or lack of organic matter. Fix:
- 🍳 Loosen the Mix: Gently fluff the top layer with a fork or your fingers to break up the crust. Avoid pressing down—this makes drainage worse.
- 👨🍳 Add Perlite or Vermiculite: Mix in 10–20% perlite or vermiculite to improve aeration and prevent compaction. These lightweight additives create air pockets for roots to breathe.
- 🥘 Water Lightly but Often: Use a spray bottle or watering can with a fine rose to avoid oversaturating the surface. Let the top inch dry out slightly between waterings.
Prevention Tips: ✨ Use a well-draining mix from the start (50% peat or coco coir, 30% compost, 20% perlite/vermiculite). ✨ Avoid walking on trays—step on them, and you’ll compact the soil. ✨ Pre-moisten your mix before planting to reduce crusting during the initial watering phase.
Cause: Poor drainage, heavy-handed watering, or no drainage holes in containers. Fix:
- ⏰ Drainage First: If your containers lack drainage holes, poke them with a nail or drill. Elevate trays on saucers or racks to let excess water escape.
- 🔪 Replace the Mix: If the mix is perpetually soggy, discard it and start fresh with a 50/50 blend of peat/coco coir and perlite. This ensures water drains while retaining moisture.
- 💡 Water Only When Needed: Stick your finger 1 inch into the mix—if it’s damp, wait. If it’s dry, water until it’s moist but not drenched.
Prevention Tips: 📊 Test your mix’s moisture-holding capacity by squeezing a handful. It should feel like a damp sponge, not a wrung-out washcloth. 🌱 Group trays in a humid environment (like a greenhouse or under a plastic dome) to reduce how often you need to water. 🎯 Use terracotta pots—they wick moisture away from roots, reducing rot risk.
Cause: Too much clay or heavy soil, lack of air pockets, or over-packing. Fix:
- 🍳 Fluff and Amend: Mix in chopped coconut coir, composted bark, or worm castings to lighten the texture. Aim for a 30% organic amendment in your recipe.
- 🔥 Use a Seed-Starting Booster: Add 1 part horticultural charcoal (10%) to absorb excess salts and improve structure.
- 👨🍳 Avoid Pressing Seeds In: Plant seeds just below the surface—press lightly but don’t compact the mix around them.
Prevention Tips: ✨ Sift your mix before use to remove clumps and ensure even consistency. ✨ Store mix in a dry place—moisture over time can cause it to clump. ✨ Rotate your mix if reusing: Add fresh perlite or compost to revive old batches.
Cause: Overused or sterile mix lacking micronutrients, or leached-out fertilizer. Fix:
- 💪 Fertilize Lightly: Once seedlings have 2–3 true leaves, apply a diluted liquid fertilizer (half-strength, every 2–3 weeks). Fish emulsion or seaweed extract are gentle options.
- 🥗 Boost with Compost Tea: Brew a weak compost tea (1 part compost to 5 parts water, steeped for 24 hours) and use it to water seedlings. This adds natural microbes and nutrients.
- 🌱 Repot if Needed: If seedlings are leggy or pale, transplant them into a richer mix with added compost or worm castings.
Prevention Tips: 📊 Rotate crops if reusing containers—don’t plant the same family (like tomatoes or peppers) in the same mix year after year. 🌱 Pre-mix nutrients into your seed-starting dirt: Add 1–2 tablespoons of balanced fertilizer (10-10-10) per gallon of mix before planting. 🎯 Monitor pH levels—seedlings thrive in slightly acidic soil (6.0–6.8). Test your mix with a simple pH kit and amend with lime (to raise pH) or sulfur (to lower it) if needed.
Final Pro Tip: 🔥 Label your mixes! Keep a log of what works (and what doesn’t) for different plants. Some seeds, like succulents, need even more perlite (up to 50%), while leafy greens tolerate a higher compost ratio. Tailor your recipe to your plants’ needs!
Frequently asked questions
What’s the difference between seed starting dirt and regular potting soil?
Seed starting dirt is lighter, fluffier, and more sterile than regular potting soil. It’s designed to promote quick germination and root growth, while potting soil is heavier and better suited for established plants. Regular potting soil often contains larger particles and nutrients that can overwhelm delicate seedlings.
Can I reuse seed starting dirt from last year?
Reusing old seed starting dirt is risky unless you sterilize it first. Over time, it can accumulate pathogens, weed seeds, and depleted nutrients. To reuse it, bake it at 180°F for 30 minutes or microwave it for 2 minutes per cup to kill harmful microbes. For best results, mix in 10% fresh perlite or compost to revive it.
How do I know if my seed starting mix is too dense?
A dense mix feels heavy and compact when squeezed. It should resemble a fluffy cake batter, not wet sand. If it holds its shape when pressed, add 10-20% perlite or vermiculite to lighten it. Test it by planting a seed—if it struggles to push through, your mix is too tight.
What’s the best way to store unused seed starting dirt?
Store it in a cool, dry place (like a sealed container in your garage) to prevent mold. Avoid refrigeration—it can introduce moisture and bacteria. If storing long-term, add 1 tablespoon of cinnamon per gallon to inhibit fungal growth naturally.
Can I make seed starting dirt without peat moss?
Replace peat moss with coconut coir (a sustainable alternative) or a mix of composted bark and worm castings. For a peat-free blend, try 50% coconut coir, 30% perlite, and 20% compost. This works just as well for most seedlings.