
Propagation
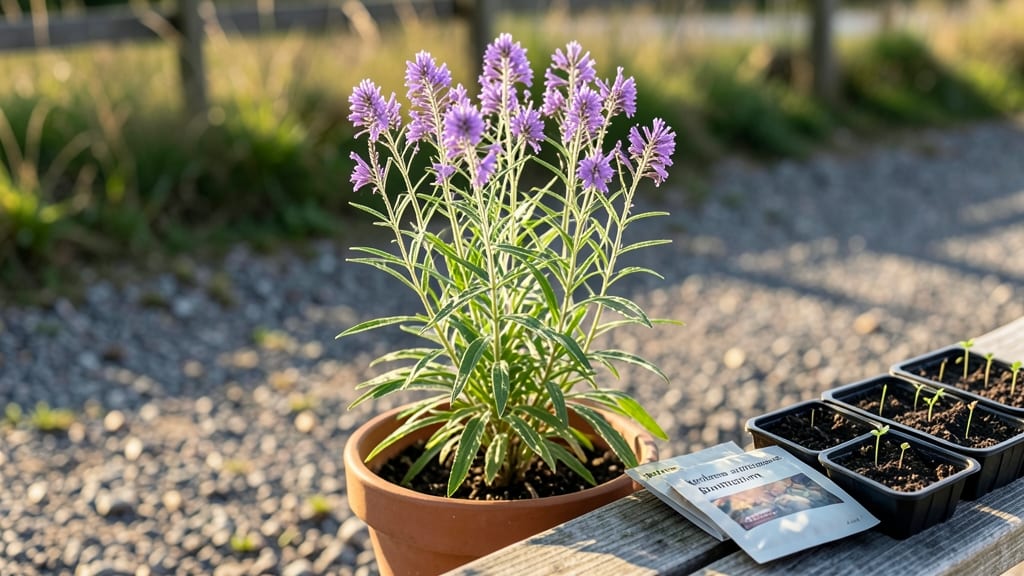
Growing Verbena Bampton seeds starts with a simple secret: patience pays off in just 10-14 days for those first green shoots. I’ve watched this variety transform from tiny seeds to towering, fragrant spires in my own garden—each one reaching 4-5 feet with delicate purple blooms that hummingbirds adore.
The key isn’t just the seeds themselves, but the right timing and soil prep that unlocks their fast germination.
You’ll need well-draining soil, a sunny spot (at least 6 hours of light daily), and a warmth-loving approach—these seeds thrive when soil temps hit 70°F or above.
Start indoors 8-10 weeks before last frost in small pots or a seed tray, then transplant once seedlings hit 3-4 inches tall. The leggy look? That’s normal—just give them more light to bulk up before moving outdoors.
What you’ll end up with is a drought-tolerant perennial that blooms from mid-summer to frost, attracting pollinators and adding vertical drama to any garden. The fragrance alone—light, sweet, and slightly floral—makes it worth the wait. Once established, these plants spread gently, filling gaps without taking over.
Between you and me, the biggest mistake is overwatering those first weeks—keep soil moist but not soggy, and you’ll avoid the dreaded damping-off. Here’s how to get them off to the right start without the guesswork.
📚 In This Guide
- What you need
- Instructions
- Tips and common mistakes
- Wrapping up and next steps
What you need
- ● Verbena Bampton seeds – 1 packet (approx. 50-100 seeds) (ensure they’re fresh for best germination).
- ● Seed-starting mix – 1 bag (1-2 cubic feet) (lightweight, sterile, and well-draining).
- ● Seed trays or containers – 4-6 small pots (2-3" deep) or a seed tray with cells (ensure drainage holes are present).
- ● Grow lights or sunny windowsill – 12-16 hours of light daily (south-facing window or LED grow lights work best).
- ● Spray bottle – For gentle watering without disturbing seeds.
- ○ Misting sprayer (optional but helpful) – Keeps humidity high for germination.
- ● Plastic wrap or humidity dome – To retain moisture until sprouts appear.
- ● Fertilizer (balanced, water-soluble) – 1 small bottle (e.g., 5-5-5 or 10-10-10) (dilute to half-strength for seedlings).
- ○ Gloves (optional) – Protects hands from soil and seeds.
- ● Small hand shovel or spoon – For transplanting seedlings.
- ○ pH tester (optional) – Ensures soil pH is 6.0-7.0 (Verbena thrives in slightly acidic to neutral soil).
- ● Label markers & tags – To track planting dates and varieties.
- ● Patience & a green thumb! 🌿 – Verbena Bampton germinates in 7-21 days—stay consistent with care.
Step-by-step instructions for growing Verbena Bampton seeds
Here's how to get these fragrant perennials blooming quickly with minimal fuss.
Prepare the Seed Starting Mix and Containers
Fill your containers with a lightweight seed-starting mix—never garden soil, as it compacts too easily and can harbor disease. I like to mix the sterile potting mix with 20% perlite to improve drainage and prevent damping-off, which is especially critical for Verbena Bampton seeds that germinate near the surface. Moisten the mix until it feels like a damp sponge, not soggy.
Press the soil down gently to remove air pockets, but don't compact it. The goal is a fine, crumbly texture that allows tender roots to establish without resistance. Tap the container lightly on the table to settle the soil evenly. This step ensures your seeds have the perfect environment to sprout quickly.
Sow Seeds at the Right Depth and Spacing
Verbena Bampton seeds are tiny, so I use a toothpick or fine tweezers to place just one seed per cell or 2-3 seeds per 2-inch pot. Sow them just below the surface, no deeper than ⅛ inch, since they need light to trigger germination. Cover them with a thin layer of fine vermiculite—this keeps them in place while still allowing light penetration.
Label each container immediately with the variety and date, because these seedlings grow fast and look identical at first. Mist the surface lightly with water to settle the vermiculite, but avoid soaking the mix. Overwatering at this stage can wash seeds deeper than intended or create a crust that blocks light.
Provide Warmth and Humidity for Fast Germination
These seeds germinate best at 70-75°F, so place the containers on a seedling heat mat or in a warm spot like on top of the fridge. Cover them with a clear plastic dome or plastic wrap to retain moisture and warmth—this creates a mini greenhouse effect that speeds up germination to just 7-10 days. Check daily for condensation on the dome; if it's dripping, remove it briefly to let excess moisture escape.
Keep the soil consistently moist but never waterlogged. The moment you see tiny green sprouts, remove the dome immediately to prevent fungal issues. At this stage, I like to place the trays under a grow light for 12-14 hours daily to ensure strong, stocky growth from the start.
Thin Seedlings and Harden Off for Transplanting
Once seedlings develop 2-3 true leaves (about 3-4 weeks after sowing), thin them to the strongest plant per container. Use scissors to snip weaker seedlings at soil level—this prevents disturbing the roots of the ones you're keeping. Verbena Bampton seedlings are delicate, so handle them by the leaves, not the stems.
Start hardening off 2 weeks before your last frost date by moving seedlings outdoors for 1-2 hours daily in a sheltered spot. Gradually increase their time outside over 10-14 days, protecting them from direct sun initially. You'll know they're ready for the garden when they can handle a full day outside without wilting.
Plant Out and Maintain for Continuous Blooms
Transplant seedlings to their final location in well-draining soil with full sun exposure (6+ hours daily). Space them 12-18 inches apart to allow airflow, which reduces disease risk. Water deeply at planting to settle the roots, then maintain 1 inch of moisture in the soil at all times—Verbena Bampton thrives with consistent hydration but hates soggy conditions.
Deadhead spent blooms regularly to encourage nonstop flowering throughout the season. I also fertilize lightly every 4-6 weeks with a balanced, water-soluble fertilizer to support their fragrant, prolific blooms. With proper care, your Verbena Bampton will reward you with years of low-maintenance color and scent.
Tips & tricks for perfect Verbena Bampton seed germination
These essential insights will help you achieve rapid, healthy germination for your Verbena Bampton seeds—because we're talking about that coveted 7-10 day window that makes all the difference.
Seed Starting Mix Consistency: The lightweight seed-starting mix with 20% perlite isn't just about drainage—it's about creating the perfect air-to-moisture ratio. After mixing, run your finger through it: it should hold together when lightly squeezed but crumble easily when poked. If it feels like wet sand, add more perlite; if it clumps, add a touch more water. This texture prevents both over-saturation and compaction, both of which can drown your delicate Verbena Bampton seeds before they even sprout.
Precision Sowing Technique: When placing those tiny seeds just below the surface (no deeper than ⅛ inch), use the fine tweezers method I mentioned—but here's the pro move: gently press the seed into place with the tweezers after positioning. This ensures consistent depth without burying them too deeply. For extra precision, I like to draw a faint pencil line in the soil where each seed should go, then place the seed directly on that mark. This visual guide prevents accidental double-seeding or uneven spacing that can lead to overcrowding later.
Warmth Optimization: While the 70-75°F range is ideal, don't assume your kitchen maintains perfect conditions. Place your seedling heat mat on top of the fridge (not inside) for consistent warmth without temperature swings. For those without heat mats, try placing containers on a sunny windowsill during the day and moving them to a warm spot at night. I've seen germination times extend to 14-16 days when seeds sit in cooler conditions—so monitor your environment closely. The moment you see condensation dripping from the plastic dome, remove it immediately to prevent fungal growth that can kill seedlings before they emerge.
Light Management: Those crucial 12-14 hours of grow light aren't just about duration—they're about distance. Position your grow lights 6-8 inches above the seedlings and adjust as they grow. Too close and you'll get leggy, etiolated seedlings; too far and they'll stretch toward the light. I like to keep a small ruler on my grow light stand to track height and adjust accordingly. Remember, Verbena Bampton seedlings need strong, stocky growth from day one to handle transplanting stress later.
Pro Tips for Verbena Bampton Seeds
- These essential insights will help you achieve rapid, healthy germination for your Verbena Bampton seeds—because we're talking about that coveted 7-10 day window that makes all the difference.
- Seed Starting Mix Consistency: The lightweight seed-starting mix with 20% perlite isn't just about drainage—it's about creating the perfect air-to-moisture ratio.
- This ensures consistent depth without burying them too deeply.
Frequently asked questions
Got questions about growing Verbena Bampton from seeds? You’re not alone! Here are some of the most common concerns—plus quick, practical answers to help you succeed.
How long does it take for Verbena Bampton seeds to germinate?
With the right conditions, these seeds typically sprout in 7–21 days. Keep them in warm soil (around 70°F) and maintain consistent moisture. A humidity dome or plastic wrap can speed up germination. Patience is key—some seeds may take longer, especially in cooler environments.
Can I plant Verbena Bampton seeds directly outdoors, or should I start them indoors first?
For best results, start seeds indoors 8–10 weeks before your last frost date. This gives them a head start in warmer conditions. If you prefer direct sowing, wait until soil temps reach at least 60°F and plant after the frost risk has passed. Just be ready to protect seedlings from pests or cold snaps!
What’s the best soil mix for Verbena Bampton seeds?
Use a well-draining, slightly acidic to neutral pH (6.0–7.0) mix. A blend of peat moss, perlite, and compost works well. Avoid heavy clay soil—it can cause rot. If repurposing garden soil, sterilize it first to prevent fungal issues. A light top layer of vermiculite can also help retain moisture during germination.
Why aren’t my Verbena Bampton seeds germinating? Troubleshooting tips.
Check these common culprits:
- Cold soil: Seeds need warmth (70°F+) to activate. Use a heat mat if needed.
- Too much moisture: Overwatering can drown seeds. Keep soil damp, not soggy.
- Old seeds: Store seeds in a cool, dry place—they lose viability over time.
- Poor light: Place trays near a bright window or under grow lights.
Are there any low-maintenance alternatives to Verbena Bampton?
If you love fragrant perennials but want easier care, try:
- Lavender: Drought-tolerant and long-blooming.
- Russian Sage: Low-maintenance with striking purple spikes.
- Catmint (Nepeta): Resistant to deer and thrives in poor soil.
- Salvia nemorosa: Heat-loving and pollinator-friendly.
Wrapping up and next steps
Growing Verbena Bampton seeds is a rewarding journey that brings fragrant, vibrant blooms to your garden with minimal fuss—thanks to their fast germination and hardy nature!
Whether you're a seasoned gardener or just starting, these perennials offer beauty and resilience, making them a perfect addition to borders, containers, or pollinator-friendly spaces. 🌸
Ready to dive in? Start by gathering your supplies—soil, containers, and seeds—and follow the steps above. Before you know it, you’ll be enjoying lush, fragrant blooms that attract butterflies and bees. Happy planting! 🌱