
Propagation
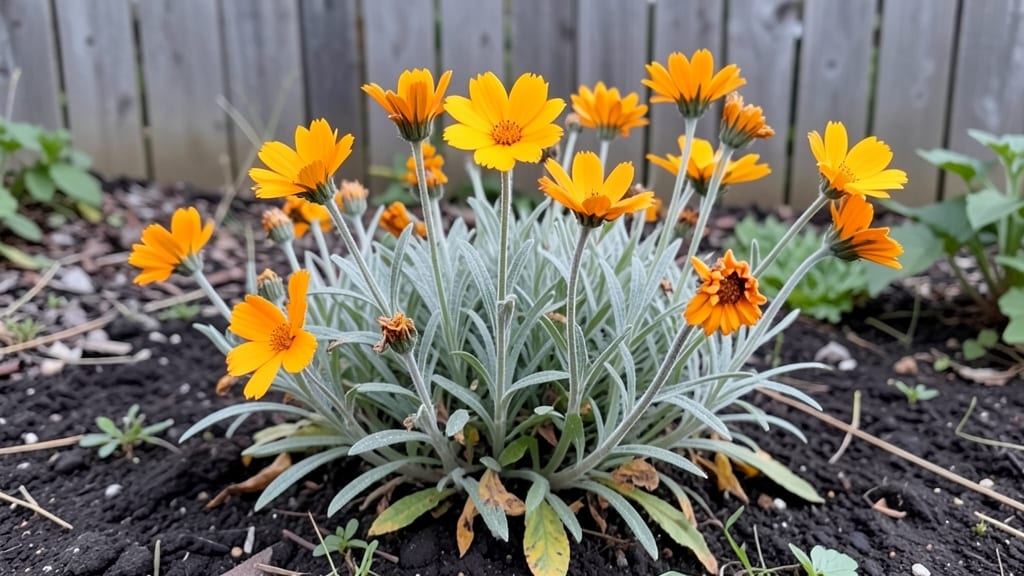
Growing western wallflower seeds might sound tricky, but these hardy blooms practically beg to be planted—especially if you’ve got rocky soil or forget to water often. 🌱 I’ve watched mine push through cracks in concrete sidewalks and still put on a show, proving they’re nature’s low-maintenance showstoppers.
These seeds love full sun and don’t care if your soil’s more gravel than dirt. Start them indoors 8-10 weeks before frost for a head start, or scatter them directly into beds once temperatures stay above 50°F. The key? Keep them barely moist until sprouts appear—no soggy soil needed.
By early summer, you’ll be rewarded with clusters of bright yellow or orange blooms that hummingbirds adore. They’re tough enough to handle deer nibbles and rarely attract pests, making them the perfect “plant and forget” annual for sunny, dry spots.
Once established, they self-seed like crazy, so you’ll have free plants for years. Just deadhead spent blooms if you want to control where they pop up next. Ready to add some effortless color to your garden?
📚 In This Guide
- What you need
- Instructions
- Tips and common mistakes
- Wrapping up and next steps
What you need
- ● Western Wallflower Seeds: 1 packet (100–500 seeds, depending on your planting scale). Look for Erysimum menziesii or Erysimum asperum varieties.
- ● Well-draining potting mix: 1–2 bags (sterile, cactus/succulent mix works well). Avoid heavy garden soil.
- ○ Containers: Seed trays or small pots (3–4 inches deep) with drainage holes. Optional: Biodegradable peat pots for transplanting.
- ○ Grow lights or sunny windowsill: A seedling heat mat (optional) helps speed up germination.
- ● Watering can or spray bottle: With a fine mist nozzle for gentle hydration.
- ● Fertilizer: A balanced, water-soluble fertilizer (5-10-5 ratio) for post-germination growth.
- ● Gloves: To protect hands from soil and seeds.
- ● Trowel or small shovel: For transplanting seedlings.
- ○ Mulch (optional): Gravel or coarse sand to improve drainage in outdoor beds.
- ● Plant labels: To track varieties and planting dates.
Step-by-step instructions for planting western wallflower seeds
Here's how to grow these resilient blooms with minimal fuss—ideal for rocky slopes or dry gardens.
🌱 Step 1: Prepare the Soil and Planting Site
Western wallflowers love well-draining soil—even poor, rocky ground won’t stop them. Clear debris from your chosen area and loosen the top 4-6 inches of soil with a garden fork. These seeds despise soggy roots, so if your soil holds water, mix in sand or grit to improve drainage.
Choose a spot with full sun to partial shade—they’ll bloom best with at least 4-6 hours of sunlight daily. I often plant mine along slopes or borders where other plants struggle. Scatter seeds thinly (they self-seed easily) or sow in shallow rows ¼ inch deep. A light covering of soil or a sprinkle of mulch keeps them in place without smothering.
💧 Step 2: Water Sparingly and Wait for Germination
Water lightly right after planting to settle the soil, but don’t overdo it. Western wallflowers are drought-tolerant once established, so water only when the top inch of soil feels dry. Too much moisture can rot seeds before they sprout. I use a gentle spray bottle to avoid disturbing the tiny seeds.
Germination takes 2-4 weeks, depending on soil warmth. You’ll know they’re up when delicate green shoots appear—don’t be fooled by the first tiny leaves (cotyledons). True leaves look like miniature versions of the adult plant. If no sprouts appear after 6 weeks, try sowing fresh seeds; they may need better light or warmer soil.
☀️ Step 3: Provide Low-Maintenance Care for Fast Growth
Once seedlings emerge, reduce watering to once every 1-2 weeks, unless your area experiences extreme heat or drought. These plants store water in their roots, so they bounce back quickly after dry spells. You’ll see rapid growth in 4-6 weeks, with stems reaching 12-18 inches tall.
Fertilizer isn’t necessary—western wallflowers thrive in lean soil. If you notice pale leaves, a light application of low-nitrogen fertilizer (like 5-10-10) once in early spring can help, but most growers skip this step entirely. Watch for blooms to appear in 8-10 weeks after planting, starting with clusters of tiny, fragrant flowers.
✂️ Step 4: Deadhead and Enjoy Long-Lasting Blooms
To encourage more flowers, pinch off spent blooms as they fade. This redirects the plant’s energy to producing new buds rather than seed pods. I deadhead mine weekly during peak bloom season (late spring to early summer). The more you remove, the longer your plants will flower.
Western wallflowers are self-sufficient and often reseed themselves, creating naturalized drifts over time. If you want to control spread, trim back foliage by one-third in early fall. They’ll return stronger the following year, proving they’re one of the toughest perennials for dry gardens.
Tips & tricks for perfect western wallflower planting
Here's what I've learned after growing these tough little blooms in my own rocky garden—tricks that'll help you avoid common pitfalls and get the best results.
Soil Prep Secret: Don't just loosen the top 4-6 inches—break up any hardpan or compacted layers you find. Western wallflowers have shallow roots and need easy access to moisture. I use a garden fork to gently pry apart stubborn clumps, creating little pockets for those tiny seeds. If your soil is truly rocky, you can even plant directly on the surface—just press seeds lightly into the crevices.
Timing Tip for Germination: Those 2-4 weeks for germination can feel like forever, but patience pays off. To speed things up slightly, place a clear plastic dome or even a sheet of glass over the planting area for the first week after sowing. This creates a mini greenhouse effect that warms the soil faster. Just remember to remove it once you see sprouts to prevent rot.
Watering Wisdom: The "wait until top inch is dry" rule is perfect, but here's how I make it foolproof: I stick a wooden chopstick into the soil at planting time. When it comes out with dry soil clinging to it, that's my signal to water. This visual cue works better than guessing, especially for beginners. And always water in the morning—it gives plants time to dry out before evening.
Deadheading Strategy: When you're deadheading those spent blooms in Step 4, don't just snip them off. Pinch or twist them off just above a set of leaves. This encourages bushier growth and more flowers. I also like to do this on a cloudy day—the plants are less stressed without the full sun beating down on them while they recover.
Pro Tips for Western Wallflower Seeds
- Here's what I've learned after growing these tough little blooms in my own rocky garden—tricks that'll help you avoid common pitfalls and get the best results.
- Soil Prep Secret: Don't just loosen the top 4-6 inches—break up any hardpan or compacted layers you find.
- Timing Tip for Germination: Those 2-4 weeks for germination can feel like forever, but patience pays off.
Frequently asked questions
Got questions about growing western wallflower seeds? You’re in the right place! Whether you’re a first-time gardener or a seasoned pro, these answers will help you nurture resilient blooms with ease.
When is the best time to plant western wallflower seeds?
Plant seeds in early spring (after the last frost) or late summer (6-8 weeks before your first frost). These hardy annuals thrive in cooler weather—avoid planting in scorching summer heat, as germination may struggle. For container gardening, start indoors 4-6 weeks before your last frost date for a head start!
What if my western wallflower seeds aren’t germinating?
Don’t worry—these seeds can be slow! Ensure they’re planted no deeper than ¼ inch in well-draining soil and kept consistently moist (not soggy). Light exposure helps too; try covering the tray with plastic wrap until sprouts appear (usually 10-20 days). If soil is too dry, soak it gently before replanting.
How often should I water western wallflowers?
Once established, western wallflowers are drought-tolerant—water deeply but infrequently (every 1-2 weeks, depending on your climate). Overwatering can rot roots, so let the soil dry out between waterings. Young seedlings need slightly more moisture (keep soil lightly damp) until they’re 3-4 inches tall.
Can I grow western wallflowers in containers or hanging baskets?
These compact plants thrive in containers as long as the pot has drainage holes and you use a fast-draining mix (like cactus/succulent soil). Hang baskets work great for trailing varieties. Just ensure the container is at least 6 inches deep—shallow pots may stunt root growth. Fertilize lightly with a balanced formula every 4-6 weeks.
Are western wallflowers deer- or rabbit-resistant?
Yes! While no plant is 100% pest-proof, western wallflowers are unappealing to deer and rabbits due to their bitter taste. Their tough stems and fuzzy foliage also deter nibbling. For extra protection, plant near strongly scented herbs (like lavender or rosemary) or use organic repellents if needed.
How do I encourage more blooms on my western wallflowers?
Deadhead spent flowers regularly to prompt continuous blooming through the season. Prune leggy stems back by ⅓ in early spring to encourage bushier growth. Avoid heavy fertilization—these plants prefer lean soil and may produce fewer blooms if overfed. A light layer of mulch (like gravel) can also improve flower production by retaining heat.
Wrapping up and next steps
Growing western wallflower seeds is a rewarding way to add vibrant, drought-resistant beauty to your garden with minimal effort! These hardy blooms prove that stunning flowers don’t require rich soil or constant watering—just a little patience and the right conditions.
Whether you're a seasoned gardener or just starting out, their resilience makes them the perfect choice for low-maintenance landscapes.
Ready to transform your outdoor space? Start by gathering your seeds and supplies, then follow the simple steps to sow and nurture them. Before you know it, your garden will be bursting with cheerful, fragrant wallflowers—and you’ll be the proud gardener who made it happen! 🌸✨