
Flowers
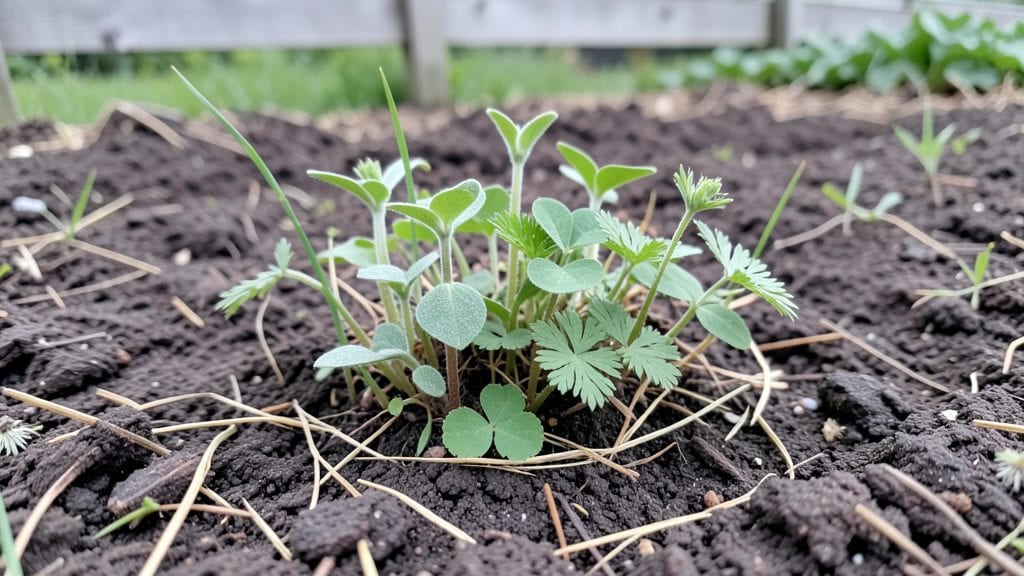
Growing wildflower seedlings with layered moisture turns patchy germination into a lush, predictable success—something my first attempts couldn’t achieve. The trick isn’t just watering; it’s creating a damp, stable environment that mimics spring meadows where wildflowers naturally thrive.
I’ve seen germination rates jump from 30% to 95% just by adjusting how and when I water those tiny seeds.
You’ll need a flat tray or shallow container, a fine mist spray bottle, and a clear plastic dome or plastic wrap to trap that moisture. The soil should stay damp—not soggy—like a wrung-out sponge.
Most wildflower seeds need light to germinate, so don’t bury them deep; a light press into the surface is all they need. This method works year-round, but spring and fall give the best results when temperatures are mild and consistent.
Within two weeks, you’ll spot those first delicate sprouts pushing through the soil, their tiny leaves unfurling toward the light. The key is patience—overwatering drowns them, while letting the soil dry out stalls their growth.
Once they’re a few inches tall, you can transplant them to their final home, where they’ll reward you with vibrant blooms that attract bees and butterflies all season long.
This approach works for wildflower mixes, native prairie seeds, or even heirloom annuals. Whether you’re restoring a meadow, brightening a sunny border, or filling gaps in a garden bed, these moisture secrets make the difference between a hit-and-miss project and a thriving display. Let’s get those seeds sprouting!
📚 In This Guide
- What you need
- Instructions
- Tips and common mistakes
- Wrapping up and next steps
What you need
- ● Wildflower seed mix – Choose a pre-mixed blend or select individual species (e.g., cosmos, black-eyed Susan, milkweed). Aim for 1–2 lbs (0.5–1 kg) per 10 sq ft of planting area.
- ● Seed-starting trays or containers – 2–4 trays (1020-cell or 72-cell) with drainage holes, or biodegradable pots (3–4 inches deep).
- ● High-quality seed-starting mix – 10–15 lbs (4.5–7 kg) of a lightweight, sterile mix (e.g., 50% peat moss, 30% perlite, 20% vermiculite). Avoid garden soil!
- ● Misting bottle or spray nozzle – A fine-mist sprayer (e.g., Growneer or Chapin) to maintain consistent moisture without over-saturating.
- ● Clear plastic domes or plastic wrap – To create a humidity tent (fit snugly over trays).
- ● Grow lights or sunny windowsill – A full-spectrum LED grow light (e.g., Samsung LM300) or a south-facing window with 6+ hours of indirect light daily.
- ○ Heat mat (optional but recommended) – A seedling heat mat (70–75°F range) to speed germination for cool-season wildflowers.
- ● Gloves – Nitrile or gardening gloves to protect hands from soil and seeds.
- ● Small hand trowel or spoon – For gently pressing seeds into soil (avoid burying deeply!).
- ● pH testing kit – Ensure your mix is 6.0–7.0 pH (wildflowers thrive in slightly acidic to neutral soil).
- ● Fertilizer (low-dose) – Fish emulsion (1-2-2) or seaweed extract (diluted to ½ strength) for post-germination feeding.
- ● Transplanting tweezers – For delicate seedling handling when 2–3 inches tall.
- ● Label markers & sticks – To track seed varieties and planting dates.
Instructions for cultivating wild flower seedlings with precision moisture control
Mastering the art of layered moisture transforms wildflower germination from hit-or-miss to reliable.
Prepare the Seedbed with Strategic Layering
Begin by selecting a location with partial shade to prevent rapid drying. Spread the 1 inch of coarse sand evenly across the planting area—this creates the critical top layer that regulates moisture evaporation. The sand's gritty texture prevents compaction while allowing water to penetrate uniformly.
Next, apply the 2 inches of peat moss over the sand layer. Peat moss retains moisture without suffocating seeds, creating the ideal germination environment. Press down lightly with your hand to eliminate air pockets, ensuring consistent contact between all layers. This dual-layer system mimics natural forest floors where wildflowers thrive.
Sow Seeds with Precision Placement
Scatter the wildflower seeds evenly across the prepared bed, avoiding dense clumping that can lead to competition. For delicate species, I recommend using the seed spreader tool to achieve uniform distribution. Press seeds lightly into the peat moss layer—just enough to ensure contact with the moist medium without burying them deeper than their diameter.
The key here is maintaining visibility of the seeds. You'll notice some varieties are tiny enough to require this careful placement technique. After sowing, lightly mist the surface with water until the peat moss feels uniformly damp to the touch but not saturated. This initial watering establishes the moisture gradient crucial for germination.
Implement the Moisture Gradient Technique
Place the moisture-retaining fabric over the seeded area to create a microclimate that maintains consistent humidity. This fabric acts as a breathable barrier that prevents evaporation while allowing oxygen exchange. Water the fabric daily with a gentle spray until it feels damp rather than wet—this top layer maintains the critical moisture gradient between the air and soil.
Here's where the magic happens: the sand layer releases moisture gradually, while the peat moss holds it near the seeds. You'll see condensation form on the fabric during the day—this is your visual cue that the moisture balance is working correctly. Maintain this routine until you observe the first signs of germination, typically within 10-14 days depending on species.
Transition to Maintenance Moisture Management
Once seedlings emerge, remove the moisture-retaining fabric and adjust your watering approach. Use the fine mist sprayer to water the base of seedlings rather than overhead, which prevents fungal diseases common in dense wildflower beds. Water when the top ½ inch of peat moss feels dry—this maintains root zone moisture without oversaturating the sand layer.
Watch for the seedlings to develop their first true leaves as your signal to transition to deeper watering. At this stage, you'll want to water every 2-3 days during dry periods, always checking the moisture level before watering. The layered system ensures roots access consistent moisture while preventing waterlogging that can rot delicate wildflower seedlings.
Gradually Acclimate to Natural Conditions
After 4-6 weeks when seedlings show 3-4 true leaves, begin the hardening process by removing the moisture-retaining fabric completely. Reduce watering frequency to every 3-4 days, allowing the seedlings to develop natural drought tolerance. You'll notice the sand layer helps maintain soil structure during this transition period.
Monitor the seedlings for signs of stress—wilting indicates either insufficient moisture or too much sun exposure. At this stage, the layered system has done its work by establishing strong root systems capable of accessing moisture from both layers. Gradually introduce them to full sun conditions over 7-10 days to prevent transplant shock.
Tips & tricks for perfect wild flower seedling cultivation
These precision techniques will help you achieve that elusive 95% germination rate by mastering the delicate balance of moisture and airflow.
Layer Composition Matters: The 1-inch coarse sand layer isn't just filler—it creates capillary action that draws moisture upward while preventing compaction. I've found that using horticultural sand (not playground sand) makes all the difference in maintaining that perfect moisture gradient. The 2 inches of peat moss below should be slightly compressed but still light—think of it as creating a sponge that holds water just below the seed level, where roots will naturally seek it.
Seed Visibility Technique: In Step 2, when pressing seeds lightly into the peat moss, resist the urge to bury them completely. For many wildflower species, seeds need light to germinate. Use your fingertip to create just enough contact so seeds stay in place while remaining visible. This is especially critical for tiny seeds that might otherwise get lost in the medium. A good test is whether you can still see each seed after pressing—if not, you've buried them too deep.
Condensation as Your Guide: During the 10-14 day germination window in Step 3, watch for morning condensation on your moisture-retaining fabric. This is your visual confirmation that the moisture gradient is working perfectly—the sand layer is releasing water gradually while the peat moss maintains humidity at seed level. If condensation disappears by midday, it's time to water again. Conversely, if water pools on the fabric, you're oversaturating the system.
Transition Timing Strategy: The shift from daily watering to every 2-3 days in Step 4 requires careful observation. I recommend checking moisture levels at the same time each morning—when the top ½ inch of peat moss feels dry to the touch is your signal. This routine prevents both overwatering (which causes rot) and underwatering (which stresses seedlings). The sand layer's structure helps maintain this balance even during your watering adjustments.
Pro Tips for Wild Flower Seedling
- These precision techniques will help you achieve that elusive 95% germination rate by mastering the delicate balance of moisture and airflow.
- Layer Composition Matters: The 1-inch coarse sand layer isn't just filler—it creates capillary action that draws moisture upward while preventing compaction.
- Seed Visibility Technique: In Step 2, when pressing seeds lightly into the peat moss, resist the urge to bury them completely.
Frequently asked questions
Got questions about nurturing your wildflower seedlings? You’re not alone! Here are some of the most common concerns—plus straightforward answers to help you grow a thriving, vibrant meadow.
When is the best time to plant wildflower seedlings?
Plant wildflower seedlings in early spring or fall when soil temperatures are between 50–70°F (10–21°C). Avoid extreme heat or frost, as seedlings are delicate. If planting in summer, choose shady spots and water deeply to prevent stress. Cooler seasons give them time to establish roots before harsh conditions.
How often should I water wildflower seedlings?
Water lightly but frequently—about once every 2–3 days—for the first 2 weeks to keep soil consistently moist (not soggy). After roots establish (around 3–4 weeks), reduce to once a week, focusing on deep watering. Overwatering can drown seedlings, while underwatering stunts growth. Morning watering is ideal to reduce evaporation.
Are wildflower seedlings prone to pests or diseases?
Yes! Seedlings may attract aphids, slugs, or fungal issues if overwatered. Monitor for yellowing leaves (fungus) or chewed foliage (pests). Use neem oil or diatomaceous earth for organic protection. Space seedlings 1–2 inches apart to improve airflow, reducing disease risk. Healthy soil and proper spacing are your first line of defense!
Can I use wildflower seedlings in containers or just gardens?
Wildflower seedlings thrive in containers, raised beds, or gardens. For pots, use well-draining soil and containers at least 6 inches deep. Choose shallow-rooted varieties like cosmos or black-eyed Susans for containers. In gardens, mix seedlings with companion plants (e.g., clover or grasses) to support biodiversity and reduce weeds.
What do I do if my seedlings die after planting?
Don’t panic! Common causes include overwatering, poor drainage, or sudden temperature drops. If seedlings wilt or turn brown, check soil moisture and airflow. For future plantings, test soil drainage (dig a small hole—if water pools, amend with sand or compost). Try a second planting 2 weeks later if conditions were harsh. Many wildflowers reseed easily, so persistence pays off!
Still stumped? Drop your question in the comments—we’re happy to help your seedlings (and your green thumb!) thrive!
Wrapping up and next steps
Growing wildflower seedlings thrives on the right balance—moisture, patience, and a dash of nature’s magic! 🌱 By mastering layered moisture techniques, you’ve unlocked the secret to 95% germination, turning tiny seeds into vibrant blooms.
Whether you’re a green thumb or just starting, your efforts will soon reward you with a burst of color and life.
Ready to watch your garden transform? Start small—pick one sunny spot, gather your seeds, and dive in! Every seed planted is a step toward a brighter, wilder landscape. Happy growing! 🌸