
Propagation
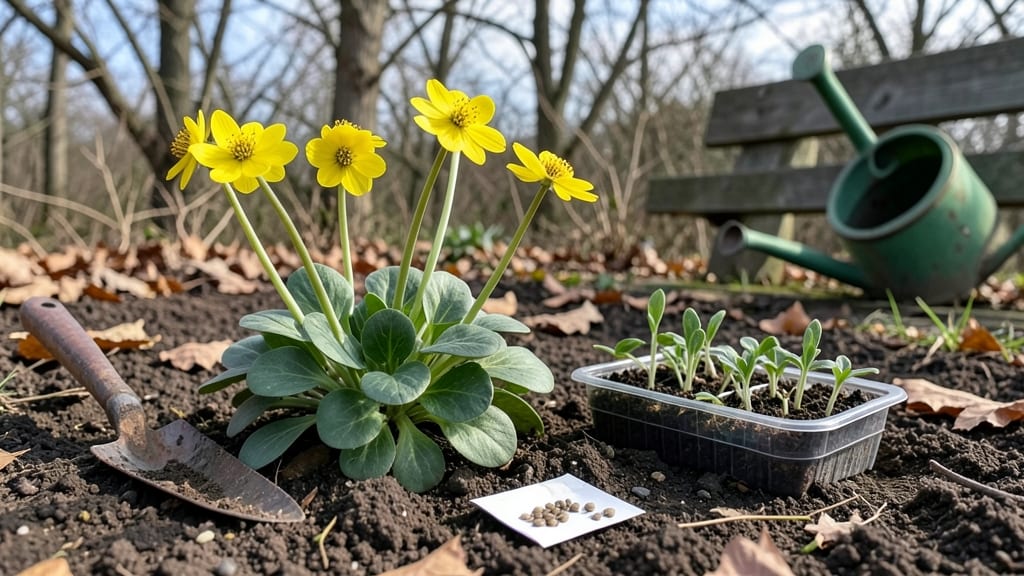
Growing winter aconite from seeds is all about patience and a little cold-moist magic—those bright yellow blooms emerge when you let nature handle the timing. 🌱 I’ve planted these delicate seeds for years, and the secret lies in mimicking their natural cycle: scatter them in fall, let winter’s chill work its magic, then watch them pop in spring.
The trick starts with soil that stays damp but not soggy—think of it as a cozy blanket for tiny seeds. You’ll need a spot with partial shade (they hate hot afternoon sun), well-draining soil, and a light layer of mulch to keep moisture steady.
Most people rush the process, but winter aconite seeds need that cold stratification to break dormancy.
By early spring, you’ll see those first pale green leaves pushing through, followed by cheerful cups of yellow blooms that brighten shady corners. The key is consistency: keep the soil moist but never waterlogged, and avoid disturbing the seedlings once they sprout.
Perfect for woodland gardens, rockeries, or any spot where spring color arrives early. Here’s how to set it up right the first time—no guesswork, just reliable blooms.
📚 In This Guide
- What you need
- Instructions
- Tips and common mistakes
- Wrapping up and next steps
What you need
- ● Winter aconite seeds: 10–20 seeds (fresh or stored properly in a cool, dry place). Pro tip: 💡 Use seeds from a trusted supplier for best germination rates!
- ● Seed-starting mix: 1–2 cups of well-draining, sterile potting soil (or a mix of 50% peat moss and 50% perlite/sand).
- ● Small containers: 2–3 shallow trays, pots, or even a seed-starting mat with individual cells (3–4 inches deep).
- ● Clear plastic wrap or humidity dome: To create a mini greenhouse effect.
- ● Spray bottle: For gentle watering (avoid soaking the soil!).
- ● Grow lights or sunny windowsill: A south-facing window or LED grow lights (12–14 hours/day) for optimal light.
- ○ Fine-mesh sieve: For sifting soil (optional but helpful for even seed placement).
- ○ Heat mat (optional): Set to 60–65°F (15–18°C) to speed up germination.
- ● Labeling tags: To track planting dates (especially useful if sowing in stages!).
- ● Fertilizer (balanced, water-soluble): Diluted to half-strength for seedlings (apply after 4–6 weeks).
- ● Transplanting tools: Small trowel or spoon for moving delicate seedlings later.
Step-by-Step instructions for growing winter aconite from seeds
This cold-moist method guarantees vibrant spring blooms with minimal fuss—just follow these simple steps.
🌱 Step 1: Prepare Seeds and Sow in Moist Medium
Winter aconite seeds need a cold, moist start to break dormancy. Place the seeds in a small container with 1 inch of damp sphagnum moss or a mix of 50% peat moss and 50% perlite. The medium should feel like a damp sponge—squeeze it gently to test moisture. If water drips out, it's too wet; if it crumbles, add a bit more water.
Scatter the seeds on the surface of the medium, spacing them about ½ inch apart. Don’t press them in—just let them rest on top. Cover the container loosely with plastic wrap or a clear lid to retain moisture, but leave a tiny gap for airflow. This creates a humid microclimate without trapping excess heat.
❄️ Step 2: Cold Stratify for 4-6 Weeks
Place the container in a refrigerator or cold frame where temperatures stay between 35-45°F. This cold treatment mimics winter conditions and signals the seeds to germinate. Check the moisture every 7-10 days—the medium should never dry out completely, but don’t soak it. A light mist with a spray bottle keeps things balanced.
You’ll see tiny green sprouts in 4-6 weeks, but don’t rush to move them. Wait until the seedlings have 2-3 true leaves—these look like miniature versions of the adult plant, not the first fuzzy cotyledons. Patience here ensures strong roots for spring planting.
☀️ Step 3: Transition to Bright, Cool Light
Once sprouts appear, move the container to a bright, indirect light spot—like a north-facing window or under a grow light set to 12-14 hours of light daily. Avoid direct sun at first; winter aconite seedlings are delicate and can scorch easily. If you use a grow light, position it 6 inches above the seedlings and adjust as they grow.
Water gently from the bottom by placing the container in ½ inch of water for 10 minutes, then let it drain completely. This prevents overwatering, which can rot tender roots. You’ll know moisture is right when the top layer feels barely damp to the touch.
🪴 Step 4: Pot Up and Harden Off for Outdoor Planting
When seedlings reach 2-3 inches tall, transplant them into 3-inch pots filled with a mix of 50% potting soil and 50% perlite. Gently loosen the roots if they’re tangled, then bury them to the same depth they were growing before. Press the soil lightly around the stems to secure them without compacting.
Start hardening off by placing pots outside in a sheltered spot for 1-2 hours daily, gradually increasing time over 10-14 days. Choose a location with dappled shade—too much sun now will stress the young plants. Once they tolerate full outdoor conditions, they’re ready for their permanent spot in partial shade.
⏰ Step 5: Plant Out and Prepare for Spring Blooms
Transplant winter aconite outdoors in early spring, after the last frost but before new growth begins. Space plants 6-8 inches apart in well-draining soil with partial shade. Mulch lightly with 1 inch of shredded bark to retain moisture and regulate soil temperature. Avoid fertilizing—these plants thrive in lean conditions.
Water deeply after planting, then only when the top 1 inch of soil feels dry. You’ll see bright yellow blooms in 8-12 weeks, proving your cold-moist patience paid off. Deadhead spent flowers to encourage more blooms, but leave the foliage until it yellows naturally—this feeds next year’s growth.
Tips & tricks for perfect winter aconite growth
A few key tricks will help you avoid common pitfalls and maximize your chances of vibrant winter aconite blooms.
The Moisture Factor: In Step 1, maintaining that perfect damp sponge consistency is crucial. I learned this the hard way—overwatering causes rot, while too little moisture prevents germination. Use a spray bottle to mist the moss or medium lightly every 3-4 days during stratification. The goal is to keep it consistently moist but never soggy. A clear container helps you monitor moisture levels without disturbing the seeds.
Cold Stratification Secrets: The 4-6 week cold treatment in Step 2 is non-negotiable for breaking dormancy. I recommend placing your container in the crisper drawer of your fridge where temperatures stay most consistently between 35-45°F. If you don't have a cold frame, a north-facing windowsill with indirect light works too. Pro tip: Place a thermometer in the container to monitor temps—fluctuations above 45°F can delay germination.
Light Transition Strategy: When moving to bright, indirect light in Step 3, I suggest starting with 8-10 hours of light daily before gradually increasing to 12-14 hours. This gradual adjustment prevents shock to delicate seedlings. For grow lights, I've found LED bulbs work better than fluorescent—they emit less heat while providing full-spectrum light. Position the light 6 inches above and adjust as seedlings grow to maintain consistent light exposure.
Harden Off Gradually: The 1-2 hour daily outdoor exposure in Step 4 is where many gardeners rush the process. I recommend increasing time by 30 minutes every 2-3 days rather than jumping to full sun exposure. Watch for wilting—this is your signal to slow down. Also, choose sheltered spots like under patio furniture or near building walls to protect from wind, which can stress tender seedlings even more than direct sun.
Pro Tips for Winter Aconite Seeds
- A few key tricks will help you avoid common pitfalls and maximize your chances of vibrant winter aconite blooms.
- The Moisture Factor: In Step 1, maintaining that perfect damp sponge consistency is crucial.
- Cold Stratification Secrets: The 4-6 week cold treatment in Step 2 is non-negotiable for breaking dormancy.
Frequently asked questions
Got questions about growing winter aconite seeds? You're not alone!
Here are answers to the most common queries to help you succeed with this cheerful early bloomer.
When is the best time to plant winter aconite seeds?
Winter aconite seeds thrive in cold, moist conditions—sow them outdoors in late fall (October-November) for spring blooms. Avoid planting in summer or early autumn; they need a chilling period to germinate. If you must start indoors, stratify seeds for 4-6 weeks in the fridge before planting.
Can I grow winter aconite from seeds if I live in a warm climate?
Yes, but it requires extra effort! In warm zones, plant seeds in winter (Dec-Feb) when temps drop below 60°F (15°C). Use shade cloth to mimic cold conditions, or try growing them in a cold frame. Patience is key—germination may take 1-2 years!
Why aren’t my winter aconite seeds germinating?
Common culprits:
- Too warm: Seeds need cold stratification (40-50°F / 4-10°C). If your soil stays above 60°F (15°C), germination stalls.
- Dry soil: Keep seeds moist but not soggy—use a spray bottle or light misting.
- Poor light: Place in partial shade (they hate direct summer sun).
How long does it take for winter aconite to bloom from seed?
Patience is key! Most winter aconite seeds take 2-3 years to flower after sowing. The first year, focus on establishing roots; tiny leaves (cotyledons) may appear, but blooms won’t show up until the plant is well-established. Consistency in moisture speeds up the process!
Are there alternatives to winter aconite seeds for early spring color?
If winter aconite seems tricky, try these low-maintenance early bloomers:
- Crocus – Fast-growing, deer-resistant, and thrives in cold climates.
- Snowdrops (Galanthus) – Nearly indestructible; blooms in late winter.
- Hellebores (Lenten Rose) – Shade-tolerant with long-lasting flowers.
- Winter Jasmine (Jasminum nudiflorum) – Bright yellow blooms on bare stems.
Wrapping up and next steps
Growing winter aconite seeds is a rewarding way to bring early spring color to your garden—just follow the cold-moist trick! With patience and the right conditions, you’ll soon enjoy delicate yellow blooms that defy winter’s chill.
Whether you’re a seasoned gardener or a curious beginner, this method is simple and effective.
Ready to try? Start by gathering your seeds and supplies, then follow the steps above. Plant now—your future spring garden will thank you! 🌱✨