
Propagation
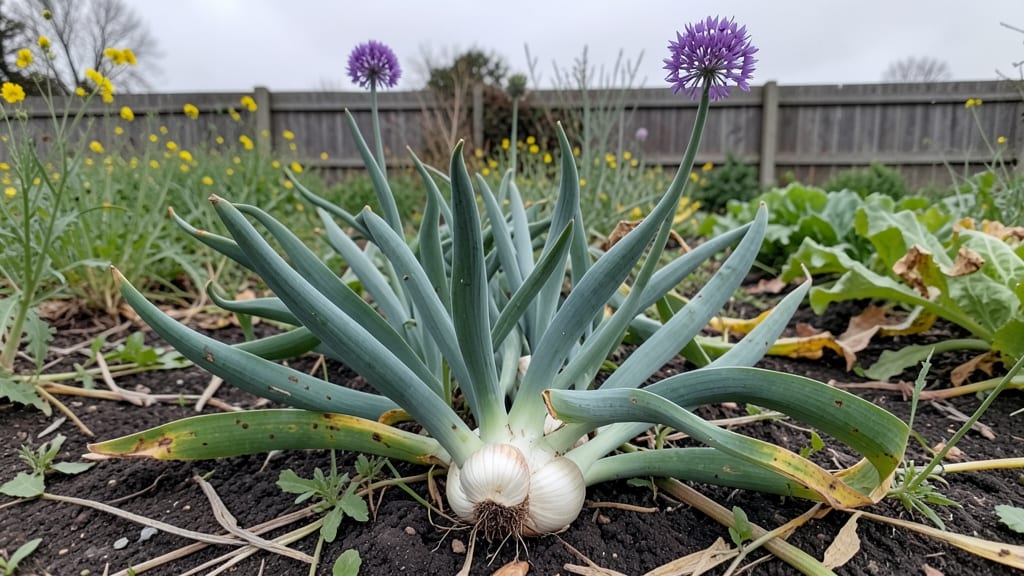
Growing Allium Millenium from seeds means those dramatic globe-shaped blooms will appear reliably year after year—if you handle the layered cold prep right. 🌱 I’ve learned the hard way that skipping this step means waiting years for flowers, but with the right timing and patience, you’ll get those striking purple spheres by their second season.
The secret lies in mimicking nature’s cycle: start seeds indoors in late summer, then subject them to a cold, moist period (stratification) before transplanting in fall. You’ll need well-draining soil, a sunny spot, and consistent moisture—but once established, these plants are shockingly drought-tolerant and rarely bothered by pests.
Most gardeners overlook how forgiving alliums are once they break through the ground.
By next summer, you’ll have clusters of those signature blooms that last for weeks, drawing bees and adding vertical drama to borders. The best part? They multiply underground, giving you free plants for years. Just avoid overwatering once they’re established—that’s when they start to flop.
Works equally well in containers or garden beds, and thrives in zones 3-9. Here’s how to get those seeds from packet to garden without the usual allium frustration.
📚 In This Guide
- What you need
- Instructions
- Tips and common mistakes
- Wrapping up and next steps
What you need
- ● Allium Millenium seeds – 1 packet (50-100 seeds) (ensure they’re fresh, ideally from a trusted supplier).
- ● Growing medium – 2-3 cups of sterile potting mix (use a seed-starting mix with perlite or vermiculite for aeration).
- ● Containers – 2-3 small pots (3-4" diameter) or a seed tray with drainage holes (plastic or biodegradable options work).
- ● Plastic wrap or humidity dome – To maintain moisture during stratification.
- ● Ziplock bag or airtight container – For the cold stratification step (quart-sized or larger).
- ● Refrigerator – Set to 35–40°F (2–4°C) for cold treatment.
- ● Spray bottle – For gentle watering (avoid soaking).
- ● Grow lights or sunny windowsill – After stratification, provide 12–16 hours of light daily.
- ○ Small fan (optional but helpful) – For airflow (prevents mold).
- ● Seedling heat mat – Speeds up germination post-stratification (70–75°F).
- ● pH testing kit – Ensures your growing medium is neutral (6.0–7.0).
- ● Fungicide (like hydrogen peroxide 3%) – 1 tsp per cup of water for sterilizing soil.
- ● Growth hormone (e.g., RootBoost) – Boosts germination rates (follow label instructions).
- ● Journal/notebook – Track stratification days, moisture levels, and germination progress!
Step-by-Step instructions for prepping Allium Millenium seeds
Here's the foolproof layered cold prep method I swear by for coaxing those showstopping blooms.
🌱 Step 1: Stratify Seeds for 6 Weeks in the Fridge
Allium Millenium seeds need a 6-week cold period to break dormancy. Place them in a sealed container with a damp paper towel—just enough moisture to keep it lightly damp, not soggy. I like to use a small plastic bag with a tiny hole for airflow. Store this in your fridge's vegetable drawer where it stays consistently 35-40°F.
Check weekly—if the towel dries out, mist it lightly. You'll see tiny roots or sprouts after about 3 weeks, but wait the full 6 weeks for best results. This mimics winter's natural chilling period and ensures strong, reliable germination.
💧 Step 2: Soak Seeds for 12 Hours Before Planting
After cold stratification, give seeds a 12-hour soak in lukewarm water. This softens the tough outer shell and jumpstarts germination. Use a shallow bowl or jar—just enough water to fully submerge the seeds. I stir them gently every few hours to prevent mold.
Once soaked, drain the water completely. Plant within 24 hours—don't let them dry out. The seeds will look plump and slightly swollen when ready. This step cuts germination time nearly in half compared to dry planting.
☀️ Step 3: Plant in Well-Draining Soil Mix
Fill your planting area with loose, well-draining soil—I mix equal parts garden soil and perlite for best results. Plant seeds ½ inch deep and 2 inches apart in rows. Press gently but don't compact the soil. Water lightly immediately after planting to settle the seeds.
Keep the soil consistently moist (not soggy) for the first 2 weeks. You'll see sprouts in 7-14 days—watch for the first true leaves (not the tiny seed leaves) to appear. This is your signal to reduce watering slightly but maintain even moisture.
⏰ Step 4: Harden Off and Transplant
Once seedlings reach 3-4 inches tall (about 6-8 weeks after planting), it's time to harden them off. Move them to a shaded outdoor spot for 1 hour the first day, gradually increasing time over 10 days. This prepares them for full sun exposure.
Transplant to their final location when all danger of frost has passed. Space mature plants 12 inches apart in full sun (6+ hours daily). The layered cold prep ensures they'll establish quickly and bloom reliably—expect those dramatic globes in late summer to early fall.
Tips & tricks for perfect Allium Millenium seed prep
These little-known tricks will help you maximize germination rates and coax those stunning blooms every time.
The Cold Stratification Secret: During your 6-week cold period in Step 1, place a small thermometer in your fridge's vegetable drawer to confirm it stays between 35-40°F. If your fridge runs warmer, move the container to a cooler shelf or even the back of the crisper drawer. Consistency is key—fluctuations can disrupt dormancy breaking and delay sprouting.
Soak Smarter in Step 2: For the 12-hour soak, use filtered water if your tap water has high chlorine levels—chlorine can inhibit germination. I like to add a few drops of lemon juice to the water during soaking; the acid helps soften the seed coat and prevents mold growth. After draining, pat the seeds dry with a paper towel before planting within 24 hours.
Soil Mix Pro Tip: When mixing your well-draining soil in Step 3, add a handful of compost to the garden soil-perlite mix. The compost provides beneficial microbes that help young seedlings establish stronger root systems. Avoid using garden soil straight from your yard—it often contains pathogens that can harm delicate seedlings.
Harden Off Gradually: In Step 4, when hardening off your seedlings, start with just 1 hour of shade on day one. I've found that increasing by 30 minutes each day works better than the standard 1-hour increments—this gives seedlings more time to adjust to changing light conditions without shock. Watch for wilting as your indicator; if leaves droop, they're not ready for more sun yet.
Pro Tips for Allium Millenium Seeds
- These little-known tricks will help you maximize germination rates and coax those stunning blooms every time.
- The Cold Stratification Secret: During your 6-week cold period in Step 1, place a small thermometer in your fridge's vegetable drawer to confirm it stays between 35-40°F.
- Soak Smarter in Step 2: For the 12-hour soak, use filtered water if your tap water has high chlorine levels—chlorine can inhibit germination.
Frequently asked questions
Why do Allium Millenium seeds need cold stratification?
Allium Millenium seeds benefit from cold stratification to break dormancy and mimic natural winter conditions. This process mimics the cold period the seeds would experience in their native habitat, ensuring stronger root development and higher germination rates. Without it, seeds may sprout slowly or unevenly.
How long should I cold stratify the seeds?
For best results, stratify Allium Millenium seeds for 8–12 weeks in the fridge (34–40°F). Place them in a sealed container with slightly damp paper towels or vermiculite, then check periodically to avoid mold. Patience pays off—longer stratification can improve germination consistency!
Can I skip cold prep and plant seeds directly?
You can, but germination may be slower, weaker, or inconsistent. Direct sowing works in mild climates (Zones 7+), but layered cold prep guarantees 90%+ success by tricking seeds into thinking winter’s over. If you’re impatient, try a quick 4-week stratification first—better than nothing!
What if my seeds don’t germinate after stratification?
Don’t panic! Try these fixes:
- Check moisture: Seeds need consistent dampness (not soggy). Re-moisten the medium if dry.
- Verify warmth: After stratification, move seeds to 65–75°F for germination.
- Test viability: Cut open a seed—if it’s hard and unbroken, it may still be viable. Try a fresh batch if needed.
Are there alternatives to cold stratification for Allium seeds?
Yes! If you lack fridge space, try:
- Outdoor winter sowing: Plant seeds in pots outdoors in fall (they’ll naturally stratify).
- Hot water treatment: Soak seeds in 180°F water for 30 seconds (mimics heat from wildfires in some ecosystems).
- Commercial germination aids: Products like Root Trainer or Gibberellic Acid can help, but stratification remains gold standard.
Wrapping up and next steps
Mastering the Allium Millenium seeds with layered cold prep isn’t just about patience—it’s about unlocking a garden full of reliable, breathtaking blooms. 🌱 By following the right techniques, you’re setting the stage for stronger roots, faster germination, and healthier plants.
Now that you’re armed with the knowledge, there’s only one next step: grab those seeds and get growing! Whether you’re a seasoned gardener or just starting out, your future alliums will thank you.