
Lawn
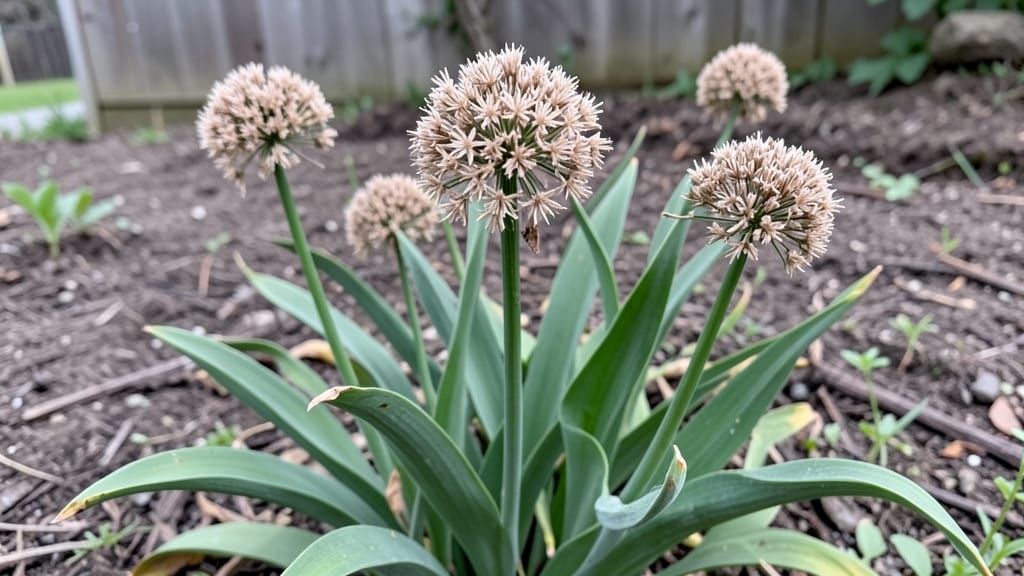
Allium seed heads are the unsung heroes of the garden—those papery globes that turn heads in dried arrangements and keep giving long after the flowers fade. 🌿 I used to toss them after blooming, but now I harvest them at their peak, dry them carefully, and store them for months, turning what would be waste into decor and next year’s plants.
The secret to great allium seed heads starts with patience. Let the blooms mature fully before harvesting—usually when about 60% of the flowers have turned brown and papery. A sharp knife or clean scissors work best, cutting stems just above a leaf node.
Bundle them in small groups and hang upside down in a dry, dark place for 2-3 weeks until completely crisp.
Once dried, these seed heads become stunning centerpieces, rustic garlands, or even natural confetti for weddings. The best part? Save a few heads to plant—alliums self-seed reliably, so you’ll have fresh blooms next spring with almost no effort.
Store extras in breathable fabric bags to keep them dry and ready for use.
This method works for all allium varieties—from towering globe alliums to delicate chives—and adapts to any garden size. Whether you’re a floral artist or just love filling your home with natural beauty, these seed heads are a game-changer. Let’s get started!
📚 In This Guide
- What you need
- Instructions
- Tips and common mistakes
- Wrapping up and next steps
What you need
- ● Mature allium plants (e.g., garlic, onions, chives, leeks, or ornamental alliums like Allium giganteum or Allium schubertii) with fully developed seed heads.
- ● Pruning shears or sharp garden scissors (sterilized to prevent disease spread).
- ● Brown paper bags or breathable mesh bags (1–2 per seed head, sized to fit snugly).
- ● Drying rack or screen (elevated, well-ventilated surface to air-dry seed heads).
- ● Small containers or envelopes (for storing dried seed heads or seeds—label with plant type and date!).
- ● Fine-mesh sieve or colander (to separate seeds from dried flower heads).
- ● Air-tight containers (glass jars, plastic bins with tight lids, or vacuum-sealed bags for long-term storage).
- ○ Optional: Desiccant packets (to absorb moisture and extend shelf life).
- ● Gloves (to protect hands from prickly seed heads or sap).
- ● Spray bottle with water (for lightly misting seed heads during drying if humidity is low).
- ● Labeling tags and permanent marker (to track varieties and harvest dates).
- ● Humidity monitor (ideal drying conditions: 40–50% humidity).
- ● Freezer-safe bags (for storing seeds in the freezer as a backup storage method).
How to harvest and store allium seed heads for year-long use
Preserve your allium harvest beyond the garden with these simple, foolproof methods.
🌱 Step 1: Identify and Select Mature Seed Heads
Wait until the seed heads turn a rich, papery brown and the flower stalks begin to dry completely—this usually happens 8-10 weeks after flowering. Gently shake a mature head over a brown paper bag to check for seeds; if they rattle inside, they're ready. Avoid heads that still have green stems or moist centers, as these won't store well.
I like to harvest on a dry morning after the dew has evaporated. This prevents moisture from lingering in the seed heads, which can encourage mold during storage. Cut the stalks with clean pruners, leaving about 2 inches of stem attached to each head. This extra stem helps the heads dry more evenly.
☀️ Step 2: Dry the Seed Heads Properly
Hang the allium seed heads upside down in a dry, well-ventilated area with indirect light—like a garage, shed, or even a kitchen cabinet. Avoid direct sunlight, which can cause the seed heads to overheat and dry too quickly, potentially damaging the seeds inside. You'll know they're fully dry when the seed pods turn brittle and the seeds rattle inside when shaken.
This drying process typically takes 2-3 weeks, depending on your climate. If your home is particularly humid, you might need to spread the heads out on a wire rack for faster drying. Once completely dry, the seed heads will crumble easily when rubbed between your fingers—a sure sign they're ready for storage.
🪴 Step 3: Separate and Store Seeds Correctly
Once dry, gently rub the seed heads between your palms or use a fork to scrape out the seeds. Place the seeds in a clean, dry container—like a glass jar or airtight bag. Label the container with the allium variety and the harvest date, as seeds can lose viability over time. Store the container in a cool, dark place, like a pantry or basement.
Allium seeds remain viable for 1-3 years when stored properly. To test viability, plant a few seeds in a small pot of moist potting mix. If they sprout within 2-3 weeks, the rest of the batch is likely still good. If you notice any signs of mold or musty smells during storage, discard those seeds immediately to avoid contaminating the rest.
✂️ Step 4: Preserve the Seed Heads for Decorative Use
For decorative purposes, leave some seed heads attached to their stems and dry them completely. Once fully dry, you can use them in dried floral arrangements or hang them in bundles for a rustic touch. To create bundles, tie 3-5 stems together with twine and hang them upside down in a dry, airy space for an additional 1-2 weeks to ensure they're completely dry.
Store decorative bundles in a cool, dry place away from direct sunlight. They'll keep their shape and color for 6-12 months, adding a beautiful, textured element to your home decor. If you notice any signs of moisture or mold during storage, remove the affected seed heads immediately to prevent the spread.
💧 Step 5: Extend Storage Life with Optional Methods
For an extra layer of protection, you can store allium seeds in the refrigerator. Place the sealed container of seeds in a plastic bag to prevent freezer burn, then store it in the crisper drawer. This method can extend seed viability for up to 5 years, though germination rates may decline slightly over time.
If you plan to use the seeds for planting in the near future, store them at room temperature. For long-term storage, consider vacuum-sealing the seeds to remove excess air and moisture, which can further extend their shelf life. Just be sure to label your vacuum-sealed containers clearly, as the seeds may look different after processing.
Tips & tricks for perfect allium seed head preservation
These simple but game-changing strategies will help you maximize your harvest and keep those seeds viable for years to come.
Harvest Timing Secret: The 8-10 week window after flowering is critical for seed maturity. I've learned the hard way that harvesting too early means immature seeds that won't store well, while waiting too long risks seed loss from birds or weather. Look for that rich papery brown color and the telltale rattle test—this is your green light to harvest. Harvesting on dry mornings prevents moisture that can lead to mold during storage. That 2-inch stem you leave attached isn't just decorative—it helps the heads dry more evenly, preventing uneven moisture distribution that could ruin your entire batch.
Drying Strategy: The 2-3 week drying period in Step 2 is where most people go wrong. If your climate is humid, don't just hang them—spread them out on a wire rack to speed up drying. I've seen seed heads take up to 5 weeks in damp conditions when simply hung. The brittle test (when they crumble easily between fingers) is your only reliable indicator, not the calendar. And remember: indirect light only! Direct sunlight can overheat the seeds and reduce viability. A garage with open windows works perfectly in most climates.
Storage Wisdom: That 1-3 year viability window is only achievable with proper storage conditions. I've had seeds last 5 years in the fridge, but they lost some germination power. The key is removing all moisture before sealing containers. I like to let seeds sit in their containers uncovered for 24 hours after separation to evaporate any residual dampness. For long-term storage, vacuum sealing removes air that could cause oxidation—just be sure to label everything clearly, as processed seeds can look different from fresh ones.
Decorative Bundle Hack: When creating those 3-5 stem bundles in Step 4, use natural twine instead of wire. The natural fibers breathe better, preventing moisture buildup that could lead to mold. For extra protection, wrap the twine around the stems twice—this creates a tighter bundle that holds its shape better during the additional 1-2 weeks of drying. Store bundles in a breathable cotton bag rather than plastic to prevent moisture accumulation. I've kept decorative bundles looking fresh for nearly 2 years using this method.
Pro Tips for Allium Seed Heads
- These simple but game-changing strategies will help you maximize your harvest and keep those seeds viable for years to come.
- Harvest Timing Secret: The 8-10 week window after flowering is critical for seed maturity.
- Drying Strategy: The 2-3 week drying period in Step 2 is where most people go wrong.
Frequently asked questions
Got questions about allium seed heads?
You’re not alone! Here are answers to the most common queries—from harvesting to storage—so you can make the most of these ornamental (and edible!) gems.
When is the best time to harvest allium seed heads?
Harvest seed heads after they’ve fully dried on the plant—usually 4–6 weeks after flowering. Wait until the seed pods turn brown and papery, then snip them off with clean shears. Pro tip: Harvest on a dry day to prevent mold.
How long do allium seed heads last once harvested?
Dried seed heads stay fresh for 6–12 months if stored properly in a cool, dark, and well-ventilated space (like a mesh bag or paper envelope). Avoid plastic—it traps moisture and causes rot. For longer storage, freeze them!
Can I use allium seed heads for more than just decor?
Beyond bouquets, they’re edible—young seed pods taste mild and onion-like, perfect for pickling or adding to salads. Warning: Overcooked pods can be bitter, so use them fresh or lightly sautéed.
Why are my allium seed heads attracting pests?
Seed heads may draw spider mites or aphids if left too long in humid conditions. Prevent pests by harvesting promptly and storing them in dry areas. For infested heads, isolate them and treat with neem oil or insecticidal soap.
What’s a good alternative if I can’t grow alliums?
Try dried hydrangeas, echinacea, or statice for similar texture and longevity in arrangements. For edible options, garlic chives or wheatgrass seed heads offer comparable ornamental (and culinary!) value.
Wrapping up and next steps
Allium seed heads aren’t just pretty—they’re a gardener’s year-round treasure! 🌱 From extending harvests to creative storage hacks, these versatile blooms prove that even "finished" flowers have hidden potential.
Whether you’re drying them for crafts, saving seeds for next year, or whipping up a rustic garnish, you’re now equipped with the know-how to make the most of every stage.
Ready to level up your garden game? Start small—try growing a few allium varieties this season and experiment with storage methods. Before you know it, you’ll be the go-to expert for harvesting, preserving, and repurposing allium seed heads like a pro. Happy gardening! 🌿✨