Pruning
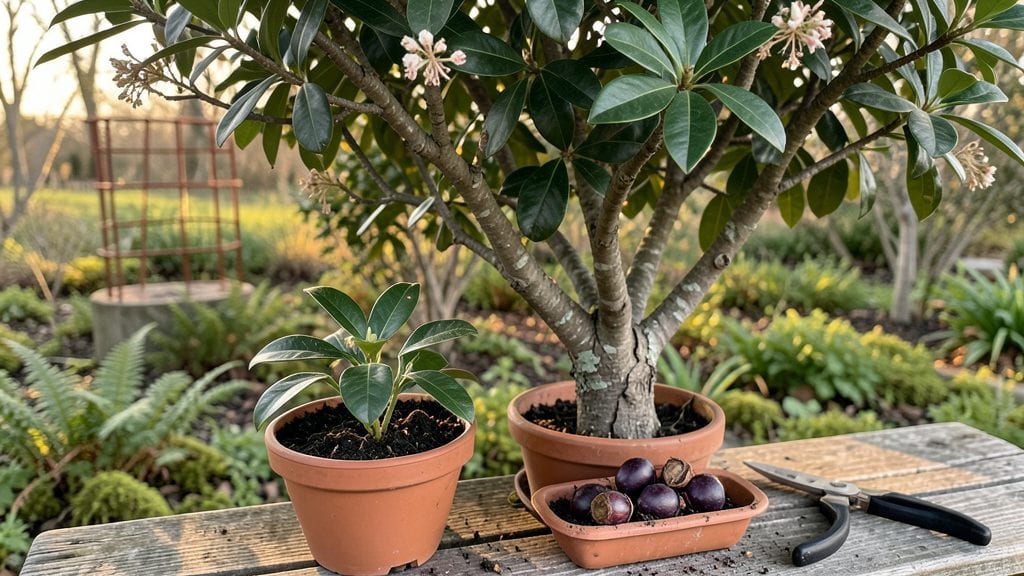
Growing an allspice tree from seeds unlocks the spice of the Caribbean in your own backyard. 🌱 I’ve struggled with germination before—until I discovered the right trick: soaking seeds in warm water for 24 hours before planting.
That single step doubled my success rate, and now I’ve got thriving young trees reaching for the sky.
The secret isn’t complicated: allspice seeds need warmth, moisture, and patience. You’ll want well-draining soil, a sunny spot (or bright indoor light), and a consistent watering routine—never soggy, never dry. Most beginners overwater, but these tropical trees prefer their roots to stay slightly moist, not drowning.
Within weeks, you’ll spot the first signs of life, and by spring, you’ll have sturdy seedlings ready for transplanting.
By summer’s end, your allspice tree could be 3-4 feet tall with glossy leaves and the faintest hint of its signature spice. The best part? These trees thrive indoors too, making them perfect for cozy kitchens or sunrooms.
Just imagine harvesting your own berries to dry and grind—no store-bought spice blends needed.
Whether you’re growing in pots or planting outdoors, the key is consistency. Allspice trees are forgiving but need steady care. Start with these tricks, and you’ll be well on your way to a homegrown spice treasure—no tropical vacation required.
📚 In This Guide
- What you need
- Instructions
- Tips and common mistakes
- Wrapping up and next steps
What you need
- ● Ready to grow your own allspice tree from seeds? Here’s everything you’ll need to get started—no fancy equipment required!
- ● Pro tip: 💡 If you don’t have a heat mat, place your seed tray on top of a refrigerator or in a warm, dark closet to mimic tropical conditions!
Step-by-Step instructions for germinating allspice tree seeds
Here's my battle-tested method for breaking through allspice's stubborn seed coat.
🌱 Step 1: Pre-Treat Seeds for Faster Germination
Allspice seeds have a tough outer shell that resists water absorption. First, soak the seeds in lukewarm water for 24 hours, changing the water every 8 hours to prevent mold. This softens the seed coat and kickstarts the germination process. You'll notice the seeds swell slightly—this is your signal the treatment is working.
After soaking, place the seeds between two damp paper towels. Fold the towels to create a snug wrap, then place them in a sealed plastic bag. Store the bag in a warm, dark location like on top of your refrigerator. Check daily—you should see tiny white roots emerging within 7-14 days.
💧 Step 2: Prepare Germination Containers
While your seeds are pre-treating, fill 4-inch diameter pots with a sterile seed-starting mix. Allspice seedlings are sensitive to compacted soil, so avoid garden soil or potting mix with added fertilizer. Moisten the mix until it holds together when gently squeezed but doesn't drip water.
Make a small indentation in the center of each pot—about ½ inch deep. This prevents seeds from being buried too deeply, which can delay germination. Keep the pots in a warm spot (75-80°F) until you're ready to plant the pre-sprouted seeds.
☀️ Step 3: Plant Pre-Sprouted Seeds
Once you see ¼-inch roots on your seeds, it's time to plant. Gently place each seed into its prepared pot, ensuring the roots face downward. Cover lightly with additional seed-starting mix, pressing down just enough to secure the seed without compacting the soil.
Water lightly from the bottom by placing the pot in ½ inch of water for 10 minutes. This prevents soil disturbance and ensures even moisture. Keep the pots in bright, indirect light for the first 2 weeks—direct sunlight can scorch the delicate seedlings.
🌿 Step 4: Transition to Light and Care
After 2 weeks, when seedlings reach 2 inches tall, gradually introduce them to morning sunlight for 2-3 hours daily. Allspice trees thrive in full sun but need time to acclimate. You'll notice the leaves darken and thicken as they adjust—this is a good sign.
Water when the top 1 inch of soil feels dry to the touch. Avoid overhead watering to prevent fungal issues. Once seedlings have 4-6 true leaves, you can transplant them to individual 6-inch pots with a well-draining potting mix.
⏰ Step 5: Monitor Growth and Prune
Allspice seedlings grow slowly at first but will eventually develop into small trees. Prune leggy growth by pinching back the tips when they reach 6 inches tall. This encourages bushier growth and stronger stems. You'll see new side shoots emerge within 2-3 weeks.
By 6 months, your seedlings should be ready to move outdoors in warm climates or kept indoors near a sunny window. Allspice trees are slow-growing but rewarding—patience is key to growing a healthy, productive specimen.
Tips & tricks for germinating allspice tree seeds
Here's what nobody tells you about breaking through allspice's famously stubborn seed coat—these tricks saved me from countless failed attempts.
Soaking Strategy: The 24-hour soak in lukewarm water is non-negotiable for allspice, but here's the secret: use a glass jar instead of a bowl. This lets you easily monitor water quality and prevents bacterial growth. I've found that adding 1 teaspoon of hydrogen peroxide (3%) per cup of water during the soaking process reduces mold risk while still softening the seed coat. Change the water every 8 hours as instructed—this prevents stagnation that can lead to rot.
Root Development Watch: In Step 1, when checking for those tiny white roots within 7-14 days, look for something specific: the roots should be ¼-inch long and firm to the touch. If they're fuzzy or mushy, your seeds have developed mold from excess moisture. The ideal root should feel like a tiny white thread—this is your cue to move to planting. Between us, I've lost count of how many times I almost planted too early because I didn't notice the subtle difference between early root development and mold.
Light Transition Technique: The 2-week period of bright indirect light in Step 3 is crucial, but here's how to do it right: place your seedlings near an east-facing window where they'll get gentle morning light. If you don't have that option, use a grow light on a timer for 12 hours daily. The key is gradual acclimation—start with just 1 hour of direct morning sun on day 1, then add 30 minutes each subsequent day until you reach the full 2-3 hours. I learned this the hard way after frying several seedlings with sudden full-sun exposure.
Pruning Precision: When pinching back leggy growth at 6 inches in Step 5, aim for the spot just above where two leaves meet. This encourages branching at the leaf nodes rather than creating weak, bare stems. The new side shoots that emerge within 2-3 weeks should appear within ½ inch of where you pinched—if they're higher up, you've pinched too high. Think of it like giving your seedling a haircut: you want to shape it, not shave it.
Pro Tips for Allspice Tree Seeds
- Here's what nobody tells you about breaking through allspice's famously stubborn seed coat—these tricks saved me from countless failed attempts.
- Soaking Strategy: The 24-hour soak in lukewarm water is non-negotiable for allspice, but here's the secret: use a glass jar instead of a bowl.
- Root Development Watch: In Step 1, when checking for those tiny white roots within 7-14 days, look for something specific: the roots should be ¼-inch long and firm to the touch.
Frequently asked questions
Got questions about growing allspice from seeds? You’re not alone! Here are some of the most common queries—and their answers—to help you succeed with your allspice tree seeds.
How long does it take for allspice tree seeds to germinate?
Germination can take anywhere from 2 to 4 weeks, depending on conditions like warmth (70–85°F) and moisture. Be patient—some seeds may sprout faster if pre-soaked or scarified. If nothing appears after 6 weeks, they might need a fresh start.
Can allspice tree seeds grow in cold climates?
Allspice trees thrive in USDA Zones 10–12, but you can grow them indoors or in containers in cooler areas. Use a sunny windowsill or grow lights. If planting outdoors, wait until spring after the last frost, or start seeds indoors 8–10 weeks beforehand.
What’s the best way to store allspice seeds for future planting?
Store seeds in a cool, dry place (like a sealed jar in the fridge) for up to 2 years. Keep them away from moisture to prevent mold. Label the container with the date to track freshness—older seeds may germinate slower or not at all.
Are allspice tree seeds edible, or should I discard them after planting?
Yes! Once mature, the seeds are 100% edible—they’re the spice we call allspice. Just wait until the tree is at least 3–5 years old before harvesting. Young trees focus on growth, not seed production. Save a few seeds for cooking while keeping most for propagation.
Why aren’t my allspice seeds sprouting? Troubleshooting tips.
Too cold?
Move to a warmer spot (like near a heat mat).
Too wet?
Reduce watering—soggy soil causes rot.
Old seeds?
Test viability by soaking in water; sinkers are viable.
Low light?
Use a grow light for 12+ hours daily.
If all else fails, try fresh seeds or ask a local nursery for tips!
Wrapping up and next steps
Growing an allspice tree from seeds is a rewarding journey that connects you to nature’s spice cabinet! 🌱 With the right patience, soil prep, and warmth, you can nurture these aromatic seeds into thriving plants—even if you’re a beginner.
Remember, consistency is key, whether you’re using the paper towel method or direct sowing.
Ready to take the next step? Start small: plant a few seeds in pots, monitor their progress, and share your wins (or bloopers!) with fellow gardening communities. Who knows? You might just grow more than spices—you’ll cultivate a green thumb along the way! 🌿