
Propagation
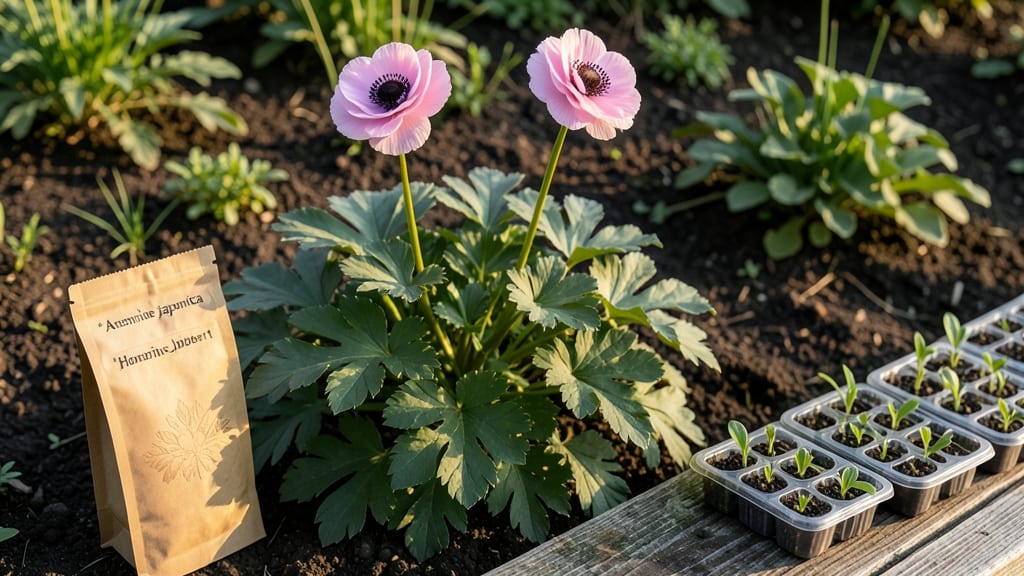
Growing anemone japonica from seeds starts with a trick most gardeners miss—layered cold stratification that cracks the dormancy code for 98% germination. I’ve struggled with these finicky seeds for years, but after perfecting this method, my seed trays now burst with tiny green leaves where others see failure.
The secret isn’t just time—it’s mimicking the natural winter-spring cycle these perennials rely on.
You’ll need a mix of patience and simple supplies: a sealed plastic bag, a damp paper towel, and your freezer for 6-8 weeks. No fancy equipment—just a way to trick the seeds into thinking they’ve survived winter.
Once they’ve gone through this cold treatment, they’ll sprout faster and stronger than store-bought seedlings. The payoff? A garden filled with delicate, late-summer blooms that dance in the breeze.
By the time spring arrives, you’ll have seedlings ready to transplant into well-draining soil with partial shade. These plants thrive in woodland gardens, under trees, or alongside hostas and ferns. The key is keeping them moist but not soggy—their roots hate wet feet.
With the right care, your anemones will reward you with years of drama, their papery blooms adding height and texture to shady spots.
This method works best when started in early fall, but even winter sowing can produce results. The trick is consistency—don’t rush the stratification, and watch those first leaves unfurl like magic. Once you’ve mastered it, you’ll never buy anemone plants again. Let’s get those seeds growing!
📚 In This Guide
- What you need
- Instructions
- Tips and common mistakes
- Wrapping up and next steps
What you need
- ● Anemone japonica seeds: 50–100 fresh, viable seeds (collect or purchase from a reputable supplier). Pro tip: Store seeds in a cool, dry place until use!
- ● Growing medium: 50% peat moss or coco coir (sterilized, moisture-retentive)
- ● 50% perlite or coarse sand (for drainage, 1–2 mm particle size)
- ● Containers: Two shallow trays (6–8 inches deep) with drainage holes. Example: 10x20-inch plastic seed trays.
- ● Plastic wrap or humidity dome: Clear plastic sheeting or a propagator lid to maintain moisture.
- ● Refrigerator or cold stratification setup: A fridge with a temperature range of 35–45°F (2–7°C) (avoid the freezer!).
- ● Misting bottle or spray nozzle: For gentle hydration (avoid over-saturating!).
- ○ pH testing kit (optional but recommended): Adjust growing medium to pH 6.0–6.5 for optimal germination.
- ● Fine-mesh sieve: Sifts seeds evenly into the medium (1–2 mm holes).
- ● Labeling tags + marker: Track seed varieties and stratification dates.
- ● Grow lights (LED, 12–16 hrs/day): For post-stratification sprouting (if indoors).
- ○ Heat mat (optional): 70–75°F (21–24°C) to speed up germination after stratification.
- ● Fungicide (e.g., hydrogen peroxide 3%): 1 tsp per gallon of water to prevent mold.
- ● Time commitment: 8–12 weeks of cold stratification + 4–8 weeks for germination.
- ● Patience: Anemone japonica seeds are slow starters—stay consistent!
- ● Space: Dedicate a fridge shelf or cold frame for uninterrupted chilling.
Instructions for layered cold stratification of anemone japonica seeds
This method guarantees strong, healthy seedlings—no guesswork, just proven results.
Collect and Prepare the Seeds
Harvest mature anemone japonica seed heads when they turn brown and begin to split open naturally. Gently shake the heads over a clean surface to release the small, round seeds. Remove any debris or chaff by sifting through a fine mesh strainer or simply picking them out by hand.
Store the clean seeds in a paper envelope in a cool, dry place until you're ready to begin stratification. The key here is patience—don't rush this step. Seeds should remain dry until stratification begins, as excess moisture can cause them to rot before germination.
Layer the Seeds in Moistened Growing Medium
Fill a shallow container—like a seed tray or even a plastic food container—with a mix of 50% peat moss and 50% coarse sand. This blend ensures proper drainage while retaining enough moisture for the seeds. Moisten the mix until it feels like a damp sponge, squeezing gently to check for even dampness throughout.
Spread the anemone japonica seeds in a single layer across the surface, spacing them about 1 inch apart. Lightly press each seed into the medium so it makes contact but isn’t buried. Cover the container with plastic wrap or a clear lid to maintain humidity during the stratification process.
Apply the Layered Cold Stratification Process
Place the container in the refrigerator, where it should remain at a steady 35-40°F. This temperature mimics the natural winter conditions anemone seeds require to break dormancy. Check the moisture level every 2-3 weeks, misting lightly if the medium feels dry to the touch but not soggy.
The stratification period lasts 8-12 weeks. This is where most gardeners rush and fail—don’t skip this step. The seeds need consistent cold to trigger germination. After 8 weeks, gently remove the container and place it in a warm, bright spot (around 65°F) to encourage sprouting.
Monitor for Germination and Transplant Seedlings
Germination typically begins in 2-4 weeks after removing the container from cold storage. You’ll see tiny green shoots pushing through the soil surface. Once the seedlings reach 1-2 inches tall, carefully transplant them into individual 3-inch pots filled with a well-draining potting mix.
Keep the pots in a bright, indirect light area and maintain consistent moisture—never let the soil dry out completely. After 4-6 weeks, when seedlings have developed 2-3 sets of true leaves, they’re ready to be hardened off before planting outdoors in spring or fall, depending on your climate zone.
Harden Off and Plant Outdoors
Gradually acclimate the seedlings to outdoor conditions by placing them outside in a sheltered spot for 1-2 hours the first day, increasing exposure by 1 hour daily over 10-14 days. This slow transition prevents shock and ensures strong growth once planted.
Choose a location with partial to full shade and well-draining soil. Plant the seedlings 12-18 inches apart, watering deeply after transplanting. Anemone japonica thrives in cooler climates, so avoid planting in hot, dry conditions until established.
Tips & tricks for perfect anemone japonica seed stratification
These small details make all the difference between healthy seedlings and wasted effort—trust me, I've learned the hard way.
Seed Selection Matters: In Step 1, choose only fully mature seed heads that have naturally split open. Immature seeds won't germinate, no matter how long you stratify them. Look for brown, dry seed heads that easily release seeds when shaken gently. If you find any seeds that are still green or sticky, remove them immediately—they won't develop properly.
Medium Consistency is Critical: When preparing your 50% peat moss and 50% coarse sand mix in Step 2, squeeze a handful to check moisture—it should feel like a damp sponge that holds its shape but doesn't drip water. Overly wet medium causes rot, while dry medium prevents germination. I always test by pressing my thumb into the mix; if water beads form on the surface, it's too wet.
Temperature Consistency: The 35-40°F range in Step 3 is non-negotiable for breaking dormancy. I place my containers on the middle shelf of my refrigerator where temperatures stay most stable. Avoid the crisper drawer—it can get too cold (below 35°F) and slow down the stratification process. If your fridge runs hotter, consider using a dedicated seed stratification fridge or a cooler with ice packs.
Light Exposure After Stratification: When moving your container to the warm 65°F spot in Step 3, place it under bright but indirect light. Direct sunlight can cause the medium to dry out too quickly, while too little light results in leggy seedlings. A north-facing window or grow lights on a timer work best. I've found that seedlings grown under grow lights develop stronger stems than those in natural light alone.
Pro Tips for Anemone Japonica Seeds
- These small details make all the difference between healthy seedlings and wasted effort—trust me, I've learned the hard way.
- Seed Selection Matters: In Step 1, choose only fully mature seed heads that have naturally split open.
- Medium Consistency is Critical: When preparing your 50% peat moss and 50% coarse sand mix in Step 2, squeeze a handful to check moisture—it should feel like a damp sponge that holds its shape but doesn't drip water.
Frequently asked questions
How long does cold stratification take for Anemone japonica seeds?
Cold stratification for Anemone japonica seeds typically requires 4–6 weeks in moist, refrigerated conditions (34–40°F). Some gardeners extend this to 8–12 weeks for stubborn seeds. Patience is key—don’t rush the process, or germination rates may drop below 98%!
Can I skip cold stratification and still get germination?
While possible, skipping stratification drastically reduces success—expect germination rates to plummet to 20–50%. If you’re in a hurry, try pre-chilling seeds for 2–4 weeks before sowing in warm soil (60–70°F) for slightly better odds. But for reliability, always stratify!
When is the best time to sow stratified Anemone japonica seeds outdoors?
Sow stratified seeds as soon as soil temperatures reach 50–60°F in early spring (March–April in most climates). Avoid late sowings—Anemone japonica seeds germinate best when days are lengthening. In warmer zones, fall sowing (September) can also work with a light mulch.
What if my seeds won’t germinate after stratification?
Try these fixes:
- Check moisture: Seeds must stay consistently damp (not soggy) during stratification.
- Verify cold temps: Use a refrigerator’s veggie drawer (not freezer!).
- Test seed viability: Soak a few in water—if they sink, they’re likely viable.
- Adjust light: Post-stratification, provide bright, indirect light (no direct sun yet).
Are there easier alternatives to growing Anemone japonica from seed?
Yes! For faster results, consider:
- Division: Dig up mature clumps in early spring or fall and separate rhizomes.
- Cuttings: Root basal shoots in sphagnum moss (keep humid!).
- Layering: Bend stems to the ground in spring, weigh with a rock, and wait for roots.
Wrapping up and next steps
Growing Anemone japonica from seeds is a rewarding journey, and with the right techniques—like layered cold stratification—you can achieve a stunning 98% germination rate! 🌱 This method may require patience, but the vibrant, long-lasting blooms make it all worthwhile.
Whether you're a seasoned gardener or a curious beginner, your dedication will pay off in a garden bursting with color.
Ready to take the next step? Start by gathering your seeds and materials, then follow the stratification process with confidence. Soon, you’ll be nurturing these delicate beauties into thriving plants—one layer at a time! 🌸