
Propagation
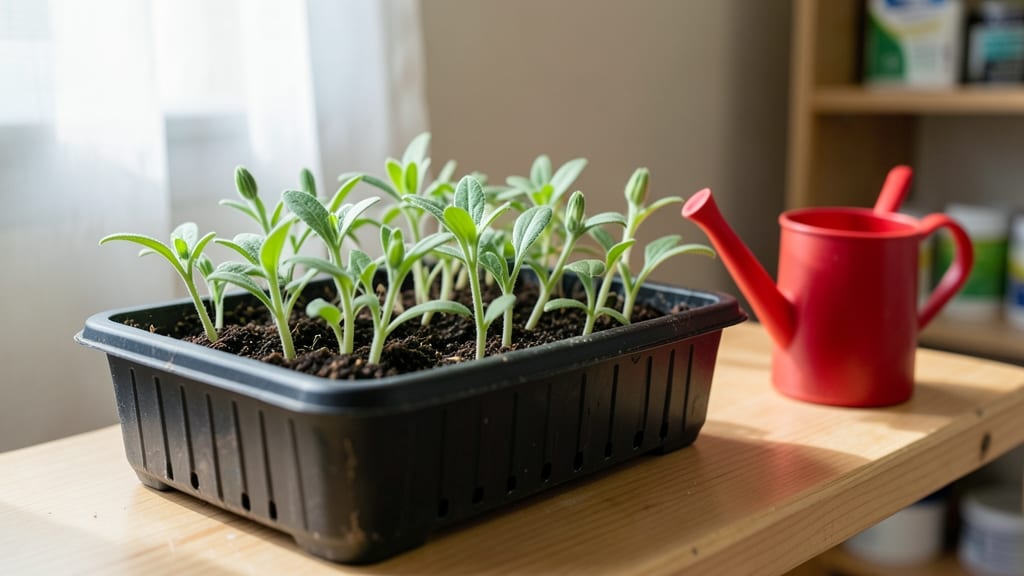
The germination of antirrhinum seeds demands steady moisture—too dry, and they’ll refuse to wake, too wet, and they’ll rot before sprouting. I’ve learned the hard way that snapdragons aren’t like lettuce; they demand patience and just the right dampness to wake up.
The key is mimicking their natural spring conditions where they’d normally germinate in woodland edges—cool, shaded, and evenly moist without soggy soil.
Start with a shallow tray filled with sterile seed-starting mix (not garden soil) and keep it lightly moist—like a wrung-out sponge. Plant the tiny seeds just 1/8-inch deep and space them 1/4-inch apart since they won’t transplant well later.
A humidity dome or plastic wrap helps maintain that critical moisture while preventing mold. Most seeds should sprout within 10-21 days if kept at 60-65°F—any colder and they’ll stall, any warmer and they’ll rot.
Once those first green shoots appear, you’ll know you’ve nailed the moisture balance—they’ll unfurl into tiny rosettes within days. Thin the seedlings to 3 inches apart when they have two sets of true leaves (not the first baby leaves), and move them to a sunny windowsill or grow light.
The transition from dome to open air should be gradual over 3-5 days to avoid shock, and you’ll soon have sturdy little plants ready for their first pinch.
Here’s where most gardeners trip up: snapdragons hate drying out or sitting in cold, wet soil. If germination stalls after two weeks, check your moisture—it’s likely either too dry or too cold.
A heat mat set to 70°F can speed things up if your home runs cool, but never let the soil dry out completely. With the right moisture control, you’ll go from seed to blooms in 8-10 weeks, and those vibrant spikes will make every bit of patience worth it.
📚 In This Guide
- What you need
- Instructions
- Tips and common mistakes
- Wrapping up and next steps
What you need
- ● Antirrhinum seeds – 10–20 seeds (depending on desired plant quantity; opt for fresh seeds for best results).
- ● Seed-starting trays or pots – 2–4 inch deep (with drainage holes) or biodegradable peat pots.
- ● Seed-starting mix – Lightweight, sterile potting mix (avoid garden soil—it’s too dense!).
- ● Spray bottle – For gentle, even moisture application (avoid over-saturating).
- ● Clear plastic dome or plastic wrap – To create a humidity tent (essential for moisture control!).
- ● Grow lights or sunny windowsill – 6–8 hours of indirect light daily (south-facing windows or LED grow lights work best).
- ○ Thermometer/hygrometer (optional but helpful) – Ideal germination temp: 65–75°F (18–24°C).
- ● Tweezers or pencil – For gently pressing seeds into soil (avoid burying too deep—just 1/8 inch max!).
- ○ Small fan (optional) – For light airflow to prevent mold (run for 10–15 mins daily).
- ● Plant labels & markers – To track seed varieties and planting dates.
- ● Fertilizer (after germination) – Diluted liquid fertilizer (5-5-5 NPK ratio) once seedlings sprout true leaves.
Step-by-Step instructions for germinating antirrhinum seeds
Here’s how to coax those tiny snapdragon seeds into sturdy seedlings with consistent moisture.
Prepare the Seed Starting Mix
Fill your seed trays with the sterile seed-starting mix—this prevents damping-off and gives young roots the airy environment they need. Moisten it lightly until it feels like a wrung-out sponge: damp but not dripping. I press the mix down gently with my fingers to create a firm, even surface. This prevents seeds from sinking too deep when you plant them, which can delay germination.
Antirrhinum seeds are tiny, so I use a shallow tray to keep them close to the surface. A fine mist from a spray bottle ensures even moisture without displacing the seeds. Overwatering now will suffocate them, so let any excess water drain away completely before moving to the next step.
Sow the Seeds Evenly
Sprinkle the seeds across the tray, spacing them about ¼ inch apart—they’re so small that a light dusting is enough. I use a toothpick to gently nudge them into the soil without pressing too hard. Cover them with an extra-thin layer of mix, just enough to obscure their color. This keeps them in darkness until they sprout, which they prefer.
Place the tray in a warm spot (around 70-75°F) to encourage germination. A seedling heat mat works wonders here, but even a sunny windowsill above a radiator can do the trick. Keep the tray covered with plastic wrap or a humidity dome to trap moisture—this mimics the damp conditions antirrhinum seeds need to break dormancy.
Maintain Consistent Moisture
Check the tray daily, but resist the urge to water until the top layer of soil feels dry to the touch. Antirrhinum seeds need steady moisture, not soggy conditions. I mist the tray lightly whenever the surface dries out, ensuring the seeds stay hydrated without becoming waterlogged. Too much water now can cause rot before the seeds even sprout.
Once you see the first green shoots (usually in 10-14 days), remove the plastic cover immediately. This prevents fungal growth, which thrives in the damp, enclosed environment. Place the tray under bright, indirect light—direct sun can scorch tiny seedlings. You’ll know they’re getting enough light when the leaves are a vibrant green, not pale or stretched.
Thin Seedlings for Strong Growth
When seedlings reach about 1 inch tall, use a small pair of scissors to snip the weaker ones at soil level. This might seem harsh, but crowded seedlings compete for nutrients and light, leading to leggy, weak plants. Leave the strongest seedlings 2 inches apart to give them room to grow. I always keep a few extra just in case—some snapdragons take longer to germinate than others.
After thinning, water the remaining seedlings at the base with a gentle stream to avoid disturbing their roots. Keep the soil evenly moist but never soggy—antirrhinum roots need oxygen to grow. If the leaves start to yellow, it’s a sign of overwatering. Adjust your watering schedule to match the drying rate of the soil.
Transition to Individual Pots
Once seedlings have 2-3 sets of true leaves (not just the first cotyledons), it’s time to transplant them into 2-inch pots. Fill each pot with fresh seed-starting mix and dig a small hole in the center. Gently remove a seedling by grasping its leaves (not the stem) and place it in the hole, covering the roots with soil. Press lightly to secure it.
Water the pots thoroughly after transplanting and place them under bright light for at least 6 hours a day. Antirrhinum seedlings need consistent light to prevent them from becoming leggy. If you notice stems stretching toward the light, move the pots closer or supplement with a grow light. Within a few weeks, you’ll see sturdy plants ready for their final home in the garden.
Tips & tricks for germinating antirrhinum seeds
These small but crucial details make all the difference when growing snapdragons from seed.
Temperature Matters: The 70-75°F range specified in Step 2 is ideal for breaking dormancy, but consistency is key. If your home runs cooler, place the tray on a seedling heat mat or near a warm spot like a radiator. I’ve seen germination rates drop significantly when temperatures dip below 68°F—those seeds just need that gentle warmth to wake up. A simple thermometer on the tray helps monitor this without guesswork.
Lighting Strategy: In Step 3, when you remove the plastic cover after 10-14 days, position your seedlings under bright, indirect light immediately. I’ve found that placing them on an east-facing windowsill gives them gentle morning light without the harsh afternoon sun that can scorch delicate leaves. If natural light is limited, supplement with a grow light for those required 6 hours daily—this prevents the leggy growth that happens when seedlings stretch toward any available light source.
Thinning Technique: When thinning in Step 4, I recommend using small scissors instead of pulling seedlings by hand to avoid disturbing the roots of nearby plants. The 2-inch spacing gives each seedling enough room to develop strong stems without competing for nutrients. If you’re worried about losing plants, thin gradually—remove just the weakest seedlings first, then space the remaining ones out over the next few days as they grow.
Transplanting Timing: The 2-3 sets of true leaves in Step 5 is your cue that roots have developed enough to handle individual pots. I’ve learned the hard way that transplanting too early can shock the seedlings, while waiting too long makes them root-bound. Gently squeeze the soil around the base—if you feel resistance, the roots are ready for their new home. Water thoroughly after transplanting to help them establish in their new pots.
Pro Tips for Antirrhinum Seeds Germination
- These small but crucial details make all the difference when growing snapdragons from seed.
- Temperature Matters: The 70-75°F range specified in Step 2 is ideal for breaking dormancy, but consistency is key.
- Lighting Strategy: In Step 3, when you remove the plastic cover after 10-14 days, position your seedlings under bright, indirect light immediately.
Frequently asked questions
Got questions about getting your Antirrhinum seeds to sprout like a pro? Here are answers to the most common queries—so you can skip the guesswork and start growing!
How long do Antirrhinum seeds take to germinate?
Most Antirrhinum seeds sprout in 10–21 days under ideal conditions (warmth, moisture, and light). If your soil stays consistently moist and temperatures hover around 65–75°F (18–24°C), you’ll likely see tiny shoots within 2 weeks. Patience is key—some varieties may take longer!
Can I germinate Antirrhinum seeds indoors in winter?
Use a seedling heat mat or place trays on a sunny windowsill to maintain warmth. Keep soil damp (not soggy) and use a clear plastic dome or plastic wrap to trap humidity. Once seedlings emerge, move them to a bright, south-facing window or under grow lights for 12–14 hours daily.
Why aren’t my Antirrhinum seeds germinating?
Check these common culprits:
- Cold soil: Seeds need warmth—try a heat mat or warmer spot.
- Too dry/wet: Keep soil evenly moist (like a wrung-out sponge).
- Old or poor-quality seeds: Test viability by soaking in water—if they float, they’re likely dead.
- Light sensitivity: Some varieties need light to germinate; others prefer darkness. Follow your seed packet!
Should I use a greenhouse or just start indoors?
For beginners, indoor trays work great with a humidity dome. A greenhouse speeds up germination and protects tender seedlings from pests/drafts, but it’s optional. If you live in a cool climate, a greenhouse extends the growing season—ideal for fall/winter starts!
Can I direct-sow Antirrhinum seeds outdoors?
Yes! Wait until after the last frost when soil is at least 50°F (10°C). Scatter seeds thinly (they’re tiny!) in well-draining soil, cover lightly with ¼ inch of compost, and water gently. Direct sowing avoids transplant shock, but be prepared for slower germination in cooler weather.
Pro Tip:
Label your trays or use biodegradable pots to avoid mix-ups—Antirrhinum varieties vary wildly in color and height! Thin seedlings to 3–4 inches apart once they have 2–3 true leaves to prevent overcrowding.
Wrapping up and next steps
Growing antirrhinum seeds successfully is all about patience and precision—especially when it comes to moisture control! With the right setup, you’ll soon enjoy vibrant snapdragons blooming in your garden. 🌱 Whether you’re a seasoned gardener or just starting, these steps make germination achievable and rewarding.
Now that you’re armed with the know-how, it’s time to roll up your sleeves and try it yourself! Start with a small batch of seeds, experiment with your setup, and soon you’ll be harvesting those stunning, fragrant blooms. Happy gardening! 🌸